Best Irish Cheese Toastie Recipe – Quick & Easy Comfort
An Irish Cheese Toastie is more than just a sandwich; it’s a warm hug on a plate, a nostalgic whisper of childhood kitchens, and a testament to the simple brilliance of good cheese and bread. We all have our comfort foods, those dishes that instantly transport us to a place of ease and happiness, and for many of us, the humble Irish Cheese Toastie holds that special spot. There’s something incredibly satisfying about the crisp, golden-brown exterior giving way to a molten, gooey interior, stretching with every bite. It’s the perfect antidote to a chilly evening, a quick and delicious lunch, or even a late-night craving. What makes this particular toastie so beloved? It’s the perfect balance of texture and flavour, often elevated by the unique, robust character of Irish cheese, creating an experience that’s both comforting and utterly delightful. Get ready to rediscover this classic; your taste buds will thank you.

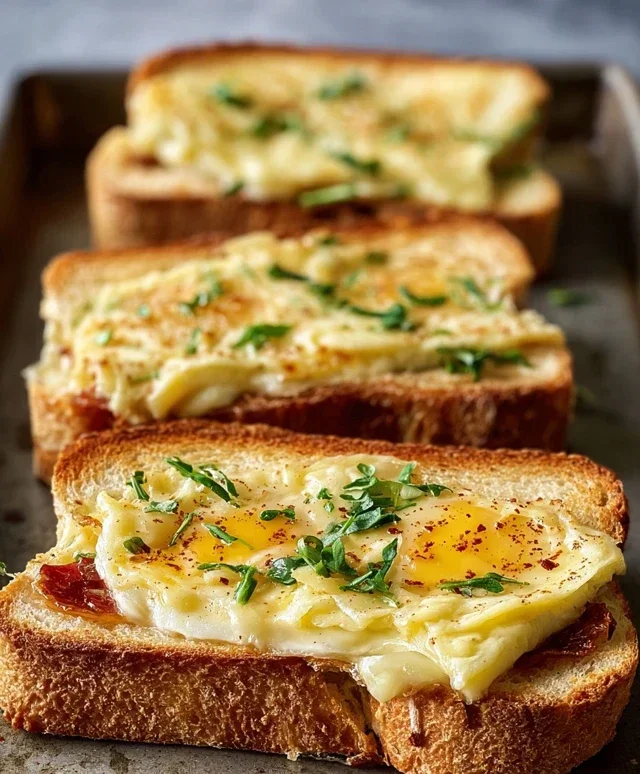
Irish Cheese Toastie
There’s something undeniably comforting about a perfectly grilled cheese sandwich. But when you elevate it with the rich, complex flavors of Irish cheddar and a touch of culinary magic, you transform a simple snack into something truly special. This Irish Cheese Toastie recipe takes the humble grilled cheese to a whole new level, making it perfect for a satisfying lunch, a cozy dinner, or even an impressive brunch offering. The secret lies in the quality of the cheese and the simple yet effective addition of Dijon mustard and Worcestershire sauce, which create a depth of flavor that will have you reaching for seconds.
This recipe is incredibly adaptable, too. While we’re focusing on the glorious taste of aged Irish cheddar, feel free to experiment with other robust, flavorful cheeses. The bread choice is also yours to make; whether you prefer the hearty texture of brown bread, the unique softness of potato bread, the classic appeal of white, or the wholesome goodness of multi-grain, each will lend its own character to the final toastie.
The beauty of this dish is its simplicity. It doesn’t require fancy equipment or complicated techniques. With just a few key ingredients and a little bit of care, you can create a truly memorable and delicious meal. So, gather your ingredients, preheat your pan, and let’s get ready to craft the ultimate Irish Cheese Toastie.
Ingredients:
Crafting the Custardy Base
The foundation of this elevated toastie is a rich, eggy custard that will soak into the bread, creating a wonderfully soft and flavorful interior. This is where the magic begin extracts to happen.
Grilling Perfection
Achieving that golden-brown, crispy exterior is key to a satisfying toastie experience. We’ll focus on getting the temperature just right to ensure the cheese melts beautifully without burning the bread.
1. Prepare the Custard Mixture: In a medium-sized bowl, whisk together the 3 large eggs until they are well combined and slightly frothy. This is the base of our flavorful soak. To this, add the 2 teaspoons of Dijon mustard and the 2 teaspoons of Worcestershire sauce. The Dijon mustard provides a subtle tang and peppery kick, while the Worcestershire sauce brings a complex umami depth that complements the cheese beautifully. Whisk these ingredients together vigorously until the mixture is smooth and homogenous. This blend is crucial for infusing the bread with incredible flavor.
2. Assemble the Toasties: Lay out your 6 slices of bread on a clean work surface. Evenly distribute the 7-8 ounces of shredded aged Irish cheddar (or your sharp cheddar of choice) across 3 of the bread slices, creating a generous layer of cheese. Don’t be shy with the cheese; this is the star of the show! Sprinkle the 1/2 teaspoon of cracked black pepper over the cheese. This adds a lovely warmth and bite that cuts through the richness. Then, lightly sprinkle the chopped fresh chives over the cheese. The chives add a fresh, oniony note that brightens the whole sandwich. Carefully place the remaining 3 bread slices on top of the cheese-covered slices, creating your sandwiches. Gently press down on each sandwich to help them hold together.
3. Soaking the Bread: Now comes the crucial step for creating that irresistible texture. Take one sandwich at a time and carefully dip each side into the prepared egg and mustard mixture. Ensure that both sides of the bread are thoroughly coated. You want the bread to absorb some of the custard, becoming beautifully saturated but not falling apart. A gentle soak for about 10-15 seconds per side should be sufficient. As you soak each sandwich, you’ll notice the bread plumping up slightly, ready to absorb the heat and melt the cheese. Place the soaked sandwiches onto a plate or a clean surface as you work.
4. Butter and Sear: Heat a large, non-stick skillet or griddle over medium heat. Once the pan is warm, add about 1 tablespoon of the softened butter, spreading it evenly across the surface. Once the butter is melted and shimmering, carefully place 2-3 of the soaked sandwiches into the skillet. Be sure not to overcrowd the pan; you want the toasties to have enough space to cook evenly. Cook for 3-5 minutes on the first side, or until the bread is a deep golden brown and looks beautifully crisp. You should be able to see the edges starting to crisp up.
5. Flip and Finish: Using a spatula, carefully flip each toastie to the other side. Add the remaining 1 tablespoon of butter to the skillet, allowing it to melt and spread. Cook for another 3-5 minutes on this second side, or until it is also a deep golden brown and the cheese inside is completely melted and gooey. You might see some of the cheese oozing out the sides – this is a good sign of a perfectly melted interior! If the bread is browning too quickly before the cheese has melted, you can reduce the heat slightly and cover the pan for a minute or two to help the cheese melt thoroughly. Once both sides are golden brown and the cheese is melted, carefully remove the toasties from the skillet.
Serve your Irish Cheese Toasties immediately, while they are hot and the cheese is at its most glorious, oozy state. A simple side salad or a cup of hearty soup makes for a perfect accompaniment. Enjoy this taste of Ireland, elevated!
Conclusion:
There you have it – the simple yet utterly satisfying Irish Cheese Toastie! This recipe is a testament to the magic that can happen with just a few quality ingredients. It’s incredibly quick to assemble, making it the perfect answer for a speedy lunch, a comforting supper, or even a decadent late-night snack. The beauty of this dish lies in its delicious simplicity and the way it elevates humble bread and cheese into something truly special. Don’t be afraid to experiment and make it your own!
Serving this classic toastie alongside a steaming bowl of tomato soup is an absolute must for many, or try it with a side of crispy fries for a more substantial meal. For a twist, consider adding a thin slice of beef ham or a sprinkle of finely chopped chives before grilling. You might also enjoy a touch of mustard spread on the inside of the bread for an extra kick. I truly encourage you to give this Irish Cheese Toastie a try; you won’t regret this delightful culinary experience.
Frequently Asked Questions:
What kind of cheese is best for an Irish Cheese Toastie?
While a good mature Irish cheddar is traditional and truly shines, feel free to experiment! A mix of cheddar and a little Gruyere or even a creamy Monterey Jack can add wonderful depth and meltability to your toastie.
Can I make this toastie ahead of time?
For the best results, it’s best to assemble and grill your toastie just before serving to ensure that lovely crisp exterior and gooey, melted cheese. However, you can prepare the filling ingredients ahead of time to speed up the assembly process.
What’s the secret to a perfectly golden-brown crust?
The key is medium heat! Too high, and the bread will burn before the cheese melts. A generous amount of butter on the outside of the bread, along with patience, will result in that sought-after golden-brown perfection.
Irish Cheese Toastie
A hearty and flavorful grilled cheese sandwich featuring aged Irish cheddar, perfect for a simple yet satisfying meal.
Ingredients
-
6 slices bread (brown, potato, white, or multi-grain)
-
2 tablespoons butter, softened
-
3 large eggs
-
2 teaspoons Dijon mustard
-
2 teaspoons Worcestershire sauce
-
7-8 ounces aged Irish cheddar, shredded
-
1/2 teaspoon cracked black pepper
-
1 tablespoon fresh chives, chopped
Instructions
-
Step 1
In a shallow bowl, whisk together the eggs, Dijon mustard, Worcestershire sauce, and cracked black pepper until well combined. -
Step 2
Spread softened butter evenly on one side of each slice of bread. -
Step 3
Place half of the shredded Irish cheddar on the unbuttered side of three bread slices. Top with the remaining bread slices, buttered side up. -
Step 4
Heat a non-stick skillet or griddle over medium heat. Dip each sandwich into the egg mixture, ensuring both sides are coated. -
Step 5
Carefully place the coated sandwiches onto the hot skillet and cook for about 3-5 minutes per side, or until golden brown and the cheese is melted and gooey. -
Step 6
Remove from skillet, sprinkle with fresh chives, and slice in half before serving.
Important Information
Nutrition Facts (Per Serving)
It is important to consider this information as approximate and not to use it as definitive health advice.
Allergy Information
Please check ingredients for potential allergens and consult a health professional if in doubt.