Mini Grilled Cheese Hawaiian Rolls-Ultimate Recipe
Mini Grilled Cheese Hawaiian Rolls: An Incredible Ultimate Recipe – Get ready to experience pure bliss! We’re diving headfirst into a recipe that’s guaranteed to become a household favorite: the Mini Grilled Cheese Hawaiian Rolls. Why do we adore them so much? It’s the perfect marriage of sweet, fluffy Hawaiian rolls and the gloriously gooey, savory embrace of melted cheese. These aren’t just any mini grilled cheese; they’re a flavor explosion waiting to happen. The subtle sweetness of the rolls provides an unexpected yet delightful counterpoint to the rich, buttery cheese, creating a textural and taste sensation that’s simply irresistible. Whether you’re looking for the ultimate party appetizer, a fun lunchbox surprise, or just a comforting treat to brighten your day, these Mini Grilled Cheese Hawaiian Rolls deliver. Prepare to wow your taste buds and your guests!

Mini Grilled Cheese Hawaiian Rolls: An Incredible Ultimate Recipe
Get ready for a flavor explosion that’s both nostalgic and delightfully new! These Mini Grilled Cheese Hawaiian Rolls are destined to become your go-to appetizer, snack, or even a fun-sized lunch. The inherent sweetness of the Hawaiian rolls, combined with the gooey, melty cheese and a hint of savory goodness, creates an irresistible combination that will have everyone beggin extractg for seconds. Forget the fuss of traditional grilled cheese sandwiches; these little bites are perfectly portioned, incredibly easy to make, and guaranteed to impress. We’ve perfected this recipe to ensure maximum flavor and minimal effort, making them ideal for parties, game nights, or just a cozy evening in.
Ingredients:
Crafting Your Cheesy Masterpieces
This recipe is all about transforming simple ingredients into something truly special. The key to these mini grilled cheeses lies in the quality of the rolls and the cheese, and of course, the technique. We’re going to leverage the soft, slightly sweet nature of Hawaiian rolls to create a contrast with the savory, melted cheese. Don’t be afraid to customize the cheese blend to your liking – a sharp cheddar can add a punch, while a mild mozzarella offers that classic stringy pull. The butter is crucial for achieving that perfect golden-brown crisp on the outside, while the optional garlic powder and herbs elevate the flavor profile from good to absolutely sensational. Let’s get started!
Step-by-Step Instructions:
1. Prepare the Rolls: Start by taking your 12 Hawaiian rolls and carefully slicing them in half horizontally. It’s important to do this as evenly as possible so that each mini sandwich has a good cheese-to-bread ratio. You can use a serrated knife for a cleaner cut. Lay the bottom halves of the rolls out on a baking sheet or a clean work surface. This is where all the cheesy goodness will begin extract to build.
2. Mix the Cheesy Filling: In a medium bowl, combine the shredded cheddar cheese and shredded mozzarella cheese. If you’re using the optional garlic powder and dried herbs, now is the time to add them to the cheese mixture. Toss everything together thoroughly until the cheeses are well distributed. This ensures that each bite will have a balanced flavor. For an even more luxurious experience, you can add a pinch of salt and pepper at this stage, though the cheeses themselves are often salty enough.
3. Butter Up for Crispy Perfection: In a separate small bowl, combine the softened butter with the optional garlic powder and dried herbs if you haven’t already added them to the cheese. If you are using them in the cheese mixture, you can simply use plain softened butter here. Spread a generous layer of the softened butter onto the cut sides of the top halves of the Hawaiian rolls. You want to ensure an even coating. This butter will be the key to achieving that irresistible golden-brown, crispy exterior that we all know and love in a grilled cheese. Don’t be shy with the butter – it’s what makes them truly delicious!
4. Assemble the Mini Sandwiches: Evenly distribute the cheese mixture over the bottom halves of the Hawaiian rolls. Pile it on! You want a good amount of cheese to melt and ooze out slightly. Once the cheese is distributed, place the buttered top halves of the rolls over the cheese, completing each mini sandwich. Gently press down on each sandwich to help the ingredients meld together. This is also a good time to give them a little nudge to make sure they’re sitting snugly.
5. Grill to Golden-Brown Bliss: Now comes the fun part: grilling! You have a couple of excellent options here.
6. Serve and Enjoy: Once your mini grilled cheese Hawaiian rolls are perfectly grilled, remove them from the oven or skillet. Let them cool for just a minute or two before serving – the cheese will be molten hot! They are best enjoyed fresh and warm, where the cheese is at its most melty and the rolls are at their most tender and slightly crisp. These are fantastic on their own, but you can also serve them with a side of marinara sauce for dipping, or alongside a simple soup. Prepare for compliments, because these little bites are truly something special!
Conclusion:
There you have it – the ultimate recipe for Mini Grilled Cheese Hawaiian Rolls! This recipe truly is incredible, offering a delightful twist on a classic comfort food. The subtle sweetness of the Hawaiian rolls perfectly complements the rich, melted cheese, creating a bite-sized sensation that’s both satisfying and incredibly easy to make. These mini marvels are perfect for parties, snacks, or even a quick and easy lunch that will bring a smile to anyone’s face. They are sure to be a crowd-pleaser, no matter the occasion.
For serving, these Mini Grilled Cheese Hawaiian Rolls are fantastic on their own, but they also pair wonderfully with a side of tomato soup for that classic grilled cheese experience, or a simple green salad for a lighter option. Feel free to get creative with variations! You could add a thin slice of beef ham, some crispy beef bacon bits, or even a sprinkle of red pepper flakes for a little kick. Experiment with different cheeses like sharp cheddar, Monterey Jack, or a blend of your favorites.
I truly encourage you to give this recipe a try. It’s simple, delicious, and offers so much room for personalization. You’ll be amazed at how quickly these disappear! Enjoy creating and devouring your own batch of these fantastic mini grilled cheese sandwiches.
Frequently Asked Questions:
Can I make these ahead of time?
While they are best enjoyed fresh off the grill for optimal cheese meltiness, you can assemble them ahead of time and grill them just before serving. Store the assembled, ungrilled sandwiches in an airtight container in the refrigerator for up to a few hours.
What kind of cheese works best?
A good melting cheese is key! Cheddar, Colby Jack, Monterey Jack, and even Provolone work beautifully. A combination of cheeses can also add depth of flavor. Avoid pre-shredded cheese if possible, as it often contains anti-caking agents that can affect meltability.
Are there any dairy-free alternatives?
Absolutely! You can use dairy-free cheese slices and a vegan butter alternative for grilling. The Hawaiian rolls themselves are often accidentally vegan, so be sure to check the ingredients if that’s a concern.
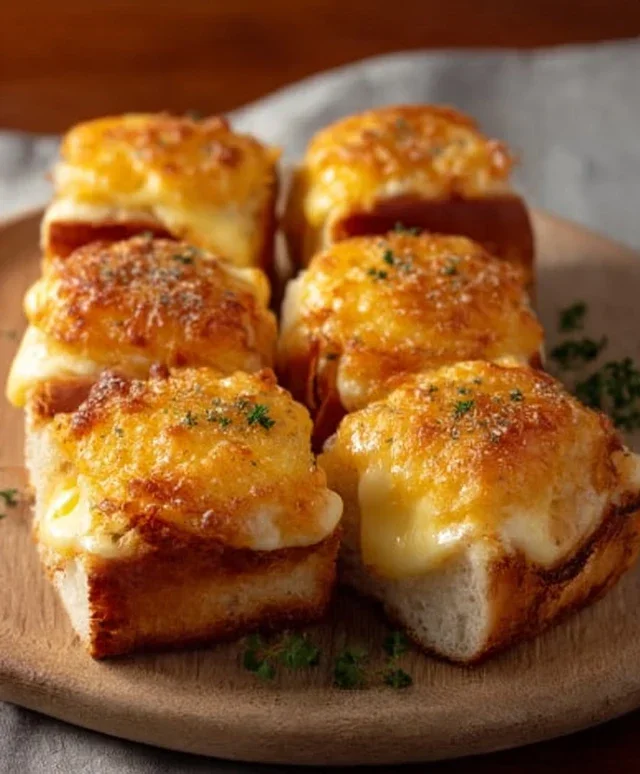
Mini Grilled Cheese Hawaiian Rolls: An Incredible Ultimate Recipe
These bite-sized grilled cheese sandwiches made with sweet Hawaiian rolls are an ultimate crowd-pleaser, perfect for parties or a fun snack. Crispy on the outside and gooey on the inside, they’re a delightful twist on a classic.
Ingredients
-
12 Hawaiian rolls
-
1 cup shredded cheddar cheese
-
1 cup shredded mozzarella cheese
-
1/2 cup butter, softened
-
1 teaspoon garlic powder (optional)
-
1 teaspoon dried herbs (oregano or basil, optional)
Instructions
-
Step 1
Slice each Hawaiian roll in half horizontally. -
Step 2
In a small bowl, mix together the softened butter, garlic powder (if using), and dried herbs (if using). -
Step 3
Spread the seasoned butter mixture evenly on the cut sides of the Hawaiian rolls. -
Step 4
On the bottom halves of the rolls, sprinkle a generous amount of shredded cheddar and mozzarella cheese. Place the top halves of the rolls on top. -
Step 5
Heat a non-stick skillet or griddle over medium heat. Grill the mini sandwiches for 3-5 minutes per side, or until golden brown and the cheese is melted and gooey. -
Step 6
Serve immediately and enjoy!
Important Information
Nutrition Facts (Per Serving)
It is important to consider this information as approximate and not to use it as definitive health advice.
Allergy Information
Please check ingredients for potential allergens and consult a health professional if in doubt.