Red Velvet Crinkle Cookies-Easy Holiday Treat
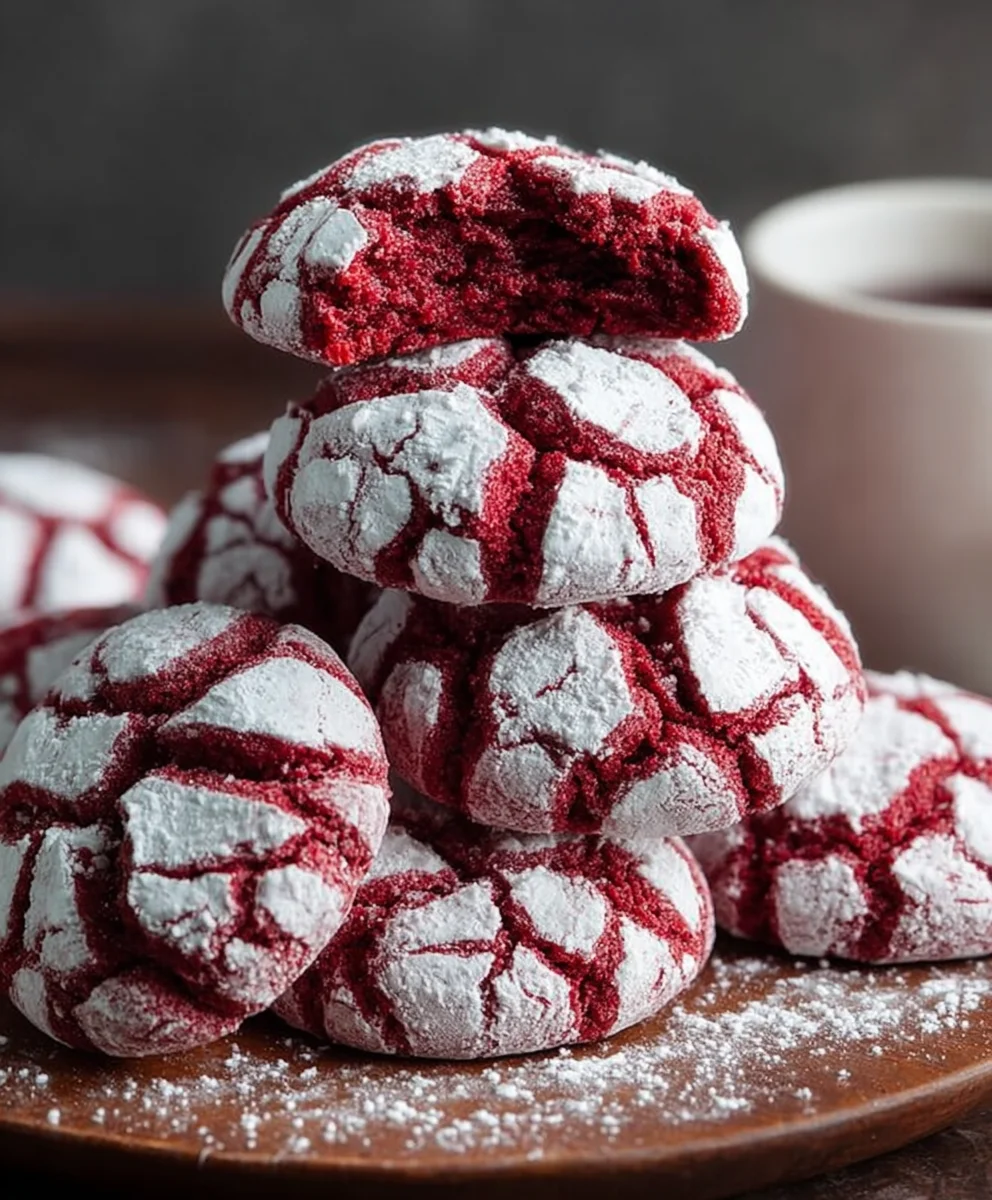
Red Velvet Crinkle Cookies are more than just a confection; they’re a vibrant explosion of festive color and decadent flavor that instantly sparks joy. These cookies possess a magical duality: on the outside, they wear a dusty, powdered sugar cloak, hinting at their delicate nature. But bite into one, and you’re met with a surprisingly soft, chewy interior, bursting with that unmistakable, subtly tangy red velvet essence. It’s this captivating contrast in texture and the iconic crimson hue that makes Red Velvet Crinkle Cookies a perennial favorite, especially during holidays and celebrations. They’re deceptively simple to make, yet they deliver an impressive visual and gustatory impact that always leaves a lasting impression. Whether you’re a seasoned baker or just starting, mastering these delightful treats will undoubtedly add a touch of elegance and undeniable deliciousness to your baking repertoire.
Why We Absolutely Adore Red Velvet Crinkle Cookies
The allure of Red Velvet Crinkle Cookies is multifaceted. Firstly, there’s the sheer visual spectacle. That deep, rich red peeking through the white powdered sugar coating is simply mesmerizing, making them a showstopper on any cookie platter. Beyond aesthetics, the flavor profile is uniquely satisfying. It’s not just about the sweetness; there’s a subtle hint of cocoa and a touch of tang from the buttermilk (or vinegar/lemon juice alternative) that elevates the experience beyond a standard chocolate cookie. The texture is another crucial element. The crinkled surface, achieved through the generous dusting of powdered sugar before baking, creates a beautiful, snow-dusted landscape, while the inside remains wonderfully soft and chewy. This perfect harmony of sight, taste, and texture is what truly makes these Red Velvet Crinkle Cookies unforgettable and a cherished part of any special occasion.
What Makes Them So Incredibly Special
What truly sets our Red Velvet Crinkle Cookies apart is the perfect balance of intense flavor and delightful texture, wrapped in a visually stunning package. The magic begin extracts with the vibrant red hue, a signature of red velvet, which immediately signals a special treat. As the cookies bake and then are rolled in a cloud of powdered sugar, they develop that characteristic crinkled surface. This isn’t just for looks; it contributes to the wonderful contrast between the slightly crisp exterior and the impossibly soft, fudgy center. The subtle notes of cocoa, combined with a toucgin extractf tanginess, create a complex flavor profile that’s both comforting and sophisticated. Each bite is a symphony of sensations, making these cookies an absolute showstopper and a guaranteed crowd-pleaser that brings smiles with every nibble. They’re the epitome of a feel-good bake.
Ingredients:
- 1 1/2 cups all-purpose flour
- 1/2 cup unsweetened cocoa powder
- 1 teaspoon baking powder
- 1/4 teaspoon salt
- 1/2 cup unsalted butter, softened
- 1 cup granulated sugar
- 2 large eggs
- 1 teaspoon vanilla extract
- 1 tablespoon red food coloring
- 1/2 cup powdered sugar, for rolling
Preparing the Dough
The journey to creating these delightful Red Velvet Crinkle Cookies begin extracts with meticulously preparing the dough. This phase is crucial for ensuring the cookies have the perfect texture and vibrant color. First, in a medium-sized bowl, I whisk together the dry ingredients: the all-purpose flour, unsweetened cocoa powder, baking powder, and salt. Whisking them thoroughly ensures that the leavening agent (baking powder) and salt are evenly distributed throughout the flour and cocoa mixture. This prevents pockets of saltiness or uneven rising in the final cookies. Once combined, I set this bowl aside.
In a separate, larger mixing bowl, I cream together the softened unsalted butter and the granulated sugar. Using softened butter is key here; it should be pliable but not melted. This allows it to incorporate air properly with the sugar, creating a light and fluffy base. I beat these together with an electric mixer on medium speed until the mixture is pnon-alcoholic ale and fluffy, which usually takes about 2 to 3 minutes. This step is important for achieving a tender cookie crum extractb. Next, I add the two large eggs, one at a time, beating well after each addition to ensure they are fully incorporated. Then, I stir in the vanilla extract, which adds its signature warmth and aroma to the dough.
This is where the magic happens for our Red Velvet Crinkle Cookies. I gradually add the liquid red food coloring to the butter and sugar mixture. I use a full tablespoon, ensuring that the color is evenly distributed. It’s important to mix this thoroughly until the batter transforms into a beautiful, uniform red hue. Seeing that vibrant color develop is always a satisfying part of the process. Once the color is perfectly distributed, I gradually add the dry ingredient mixture to the wet ingredients, mixing on low speed until just combined. Overmixing the dough at this stage can lead to tough cookies, so I stop as soon as I no longer see streaks of flour. The resulting dough will be thick and rich.
Chilling and Shaping the Dough
After the dough is ready, it needs a bit of time to chill. This is a vital step for crinkle cookies because it firms up the dough, making it easier to handle and preventing the cookies from spreading too much during baking. I cover the bowl tightly with plastic wrap, ensuring no air can get in. Then, I place it in the refrigerator for at least 1 hour. You can even prepare this dough the day before and chill it overnight, which can sometimes deepen the flavors.
Once the dough has chilled sufficiently and is firm enough to scoop, it’s time to prepare for rolling. I pour the 1/2 cup of powdered sugar into a shallow bowl. This is what gives the cookies their characteristic crinkled, snowy appearance. I take the chilled dough out of the refrigerator. Using a small cookie scoop (about 1 tablespoon in size) or two spoons, I portion out the dough into uniform balls. Rolling the dough into smooth balls before coating them in powdered sugar helps ensure an even baking process and a more attractive final cookie.
Baking the Red Velvet Crinkle Cookies
Now, it’s time to get these beauties into the oven. I preheat my oven to 350°F (175°C) and line two baking sheets with parchment paper. Parchment paper not only prevents sticking but also makes for easier cleanup. I take each chilled dough ball and roll it thoroughly in the powdered sugar, making sure it’s completely coated. I press the sugar gently into the dough to help it adhere. Then, I place the sugar-coated dough balls onto the prepared baking sheets, leaving about 2 inches of space between each cookie. This is crucial because the cookies will spread slightly as they bake.
Baking time is typically between 10 to 12 minutes. You’ll know they are ready when the edges look set and the centers appear slightly soft. They will continue to set up as they cool. It’s important not to overbake them, as this can result in dry cookies. As soon as they come out of the oven, I let them cool on the baking sheets for about 5 minutes. This allows them to firm up enough to be moved without falling apart. After this initial cooling period on the baking sheet, I carefully transfer the cookies to a wire rack to cool completely. This allows air to circulate around them, preventing a soggy bottom and ensuring they achieve that perfect crinkle.
Conclusion:
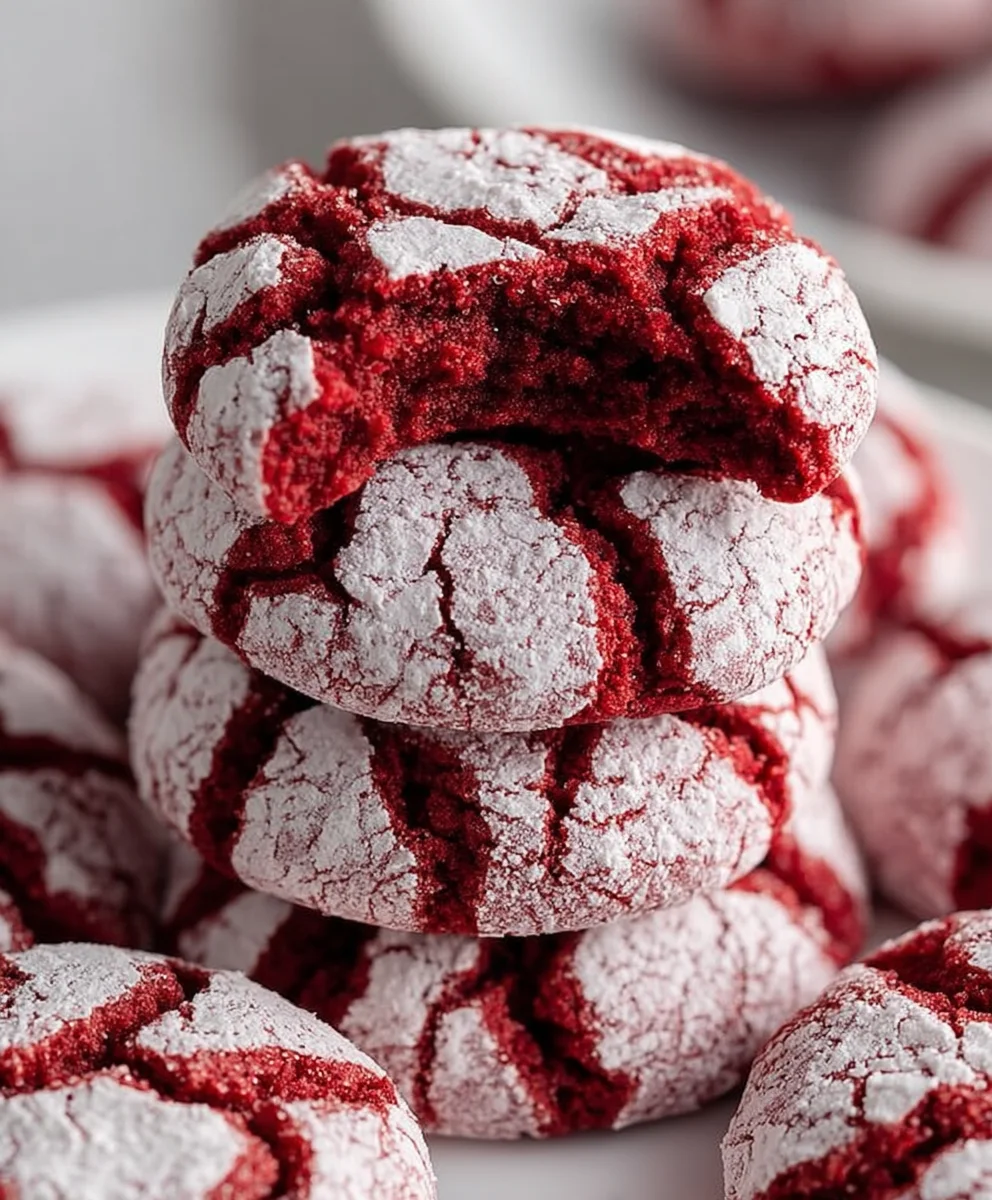
We’ve reached the end of our delightful journey into creating the perfect Red Velvet Crinkle Cookies! These cookies are a true showstopper, boasting a vibrant crimson hue and a wonderfully chewy center encased in a sweet, powdery snowdrift of confectioners’ sugar. The rich cocoa flavor beautifully balances the sweetness, making each bite an irresistible treat. Whether you’re baking for a special occasion, a holiday gathering, or just because, these Red Velvet Crinkle Cookies are sure to impress and bring smiles all around. Don’t hesitate to get creative with your toppings or accompaniments!
For serving suggestions, these cookies are fantastic on their own, perhaps with a tall glass of cold milk. They also pair exceptionally well with a cup of coffee or tea. Consider arrangin extractg them on a festive platter alongside other holiday treats for a stunning dessert table. For variations, you can add a touch of espresso powder to the dough for a mocha twist, or even sprinkle some finely chopped white chocolate chips into the batter before chilling. A drizzle of cream cheese frosting over the cooled cookies adds another layer of indulgence that complements the red velvet flavor perfectly.
Baking should be a joyful experience, and we hope this recipe brings you plenty of that. So, gather your ingredients, put on your favorite apron, and dive into the wonderful world of Red Velvet Crinkle Cookies. We encourage you to experiment, have fun, and most importantly, enjoy every delicious moment and every cookie!
Frequently Asked Questions:
Why are my Red Velvet Crinkle Cookies not cracking enough?
Insufficient cracking can be due to a few reasons. Ensure your dough is chilled thoroughly; this helps the cookies spread and then crinkle as they bake. Overmixing the dough can also develop too much gluten, leading to a less crinkly texture. Lastly, rolling the dough balls generously in confectioners’ sugar before baking is crucial for that signature crinkled appearance.
Can I make the dough for Red Velvet Crinkle Cookies ahead of time?
Absolutely! The dough for Red Velvet Crinkle Cookies can be made up to 2-3 days in advance and stored in an airtight container in the refrigerator. You can even freeze the dough balls for up to 3 months. When ready to bake from frozen, bake them directly from frozen, adding a few extra minutes to the baking time.
What is the best way to store Red Velvet Crinkle Cookies?
For the freshest Red Velvet Crinkle Cookies, store them in an airtight container at room temperature for up to 3-4 days. They maintain their chewy texture quite well. If you notice they’re starting to dry out, you can add a slice of bread to the container to help reintroduce moisture.
Red Velvet Crinkle Cookies
Easy and vibrant Red Velvet Crinkle Cookies perfect for any holiday celebration. These cookies feature a rich red velvet flavor with a delightful crinkled exterior.
Ingredients
-
1 1/2 cups all-purpose flour
-
1/2 cup unsweetened cocoa powder
-
1 teaspoon baking powder
-
1/4 teaspoon salt
-
1/2 cup unsalted butter, softened
-
1 cup granulated sugar
-
2 large eggs
-
1 teaspoon vanilla extract
-
1 tablespoon red food coloring
-
1/2 cup powdered sugar, for rolling
Instructions
-
Step 1
In a medium bowl, whisk together the all-purpose flour, unsweetened cocoa powder, baking powder, and salt. Set aside. -
Step 2
In a large bowl, cream together the softened unsalted butter and granulated sugar with an electric mixer until light and fluffy. Beat in the eggs one at a time, followed by the vanilla extract. -
Step 3
Gradually add the red food coloring to the butter mixture until a uniform red hue is achieved. Then, gradually add the dry ingredients to the wet ingredients, mixing on low speed until just combined. Do not overmix. -
Step 4
Cover the dough tightly with plastic wrap and chill in the refrigerator for at least 1 hour, or until firm enough to scoop. -
Step 5
Preheat oven to 350°F (175°C). Line baking sheets with parchment paper. Pour powdered sugar into a shallow bowl. -
Step 6
Scoop the chilled dough into uniform balls (about 1 tablespoon each). Roll each ball thoroughly in powdered sugar, ensuring it is completely coated. Place the sugar-coated dough balls on the prepared baking sheets, leaving about 2 inches between cookies. -
Step 7
Bake for 10 to 12 minutes, or until the edges are set and the centers appear slightly soft. Let cool on the baking sheets for 5 minutes before transferring to a wire rack to cool completely.
Important Information
Nutrition Facts (Per Serving)
It is important to consider this information as approximate and not to use it as definitive health advice.
Allergy Information
Please check ingredients for potential allergens and consult a health professional if in doubt.