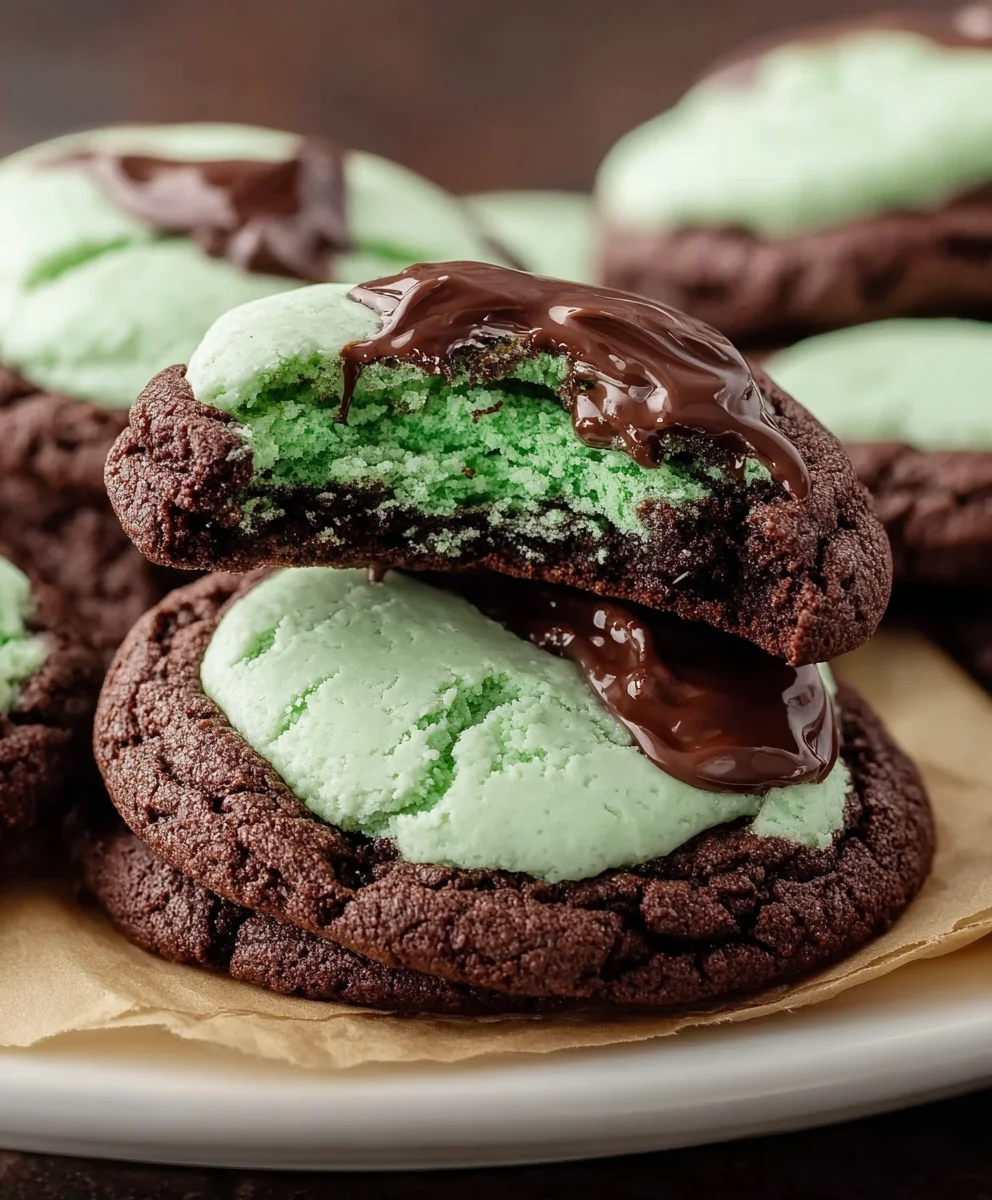
Easy Grasshopper Cake Mix Cookies-Quick Dessert
Easy Grasshopper Cake Mix Cookies are about to become your new best friend in the kitchen! If you’re searching for a dessert that’s both incredibly simple to whip up and delightfully delicious, look no further. These cookies capture the essence of those beloved minty, chocolatey Grasshopper cookies, but with a fraction of the effort. Why do we love them so much? Because they’re the perfect answer to a sudden sweet craving, a potluck contribution that will disappear in minutes, or a fun weekend baking project with the kids. What truly makes these Easy Grasshopper Cake Mix Cookies special is their magical transformation from a humble cake mix into a perfectly chewy, intensely flavorful treat. The secret lies in a few clever additions that elevate the standard cake mix cookie to something truly extraordinary, without requiring any complicated techniques or fancy ingredients. Get ready for a flavor explosion that will have everyone asking for the recipe!
Ingredients:
- 1 box (15.25 oz) chocolate cake mix
- ½ cup canola oil
- 2 large eggs
- ½ cup unsalted butter, room temperature
- 2 cups powdered sugar
- 1 teaspoon mint extract
- ¼ teaspoon salt
- Green food coloring
- 2-4 tablespoons heavy cream
- 1 cup semi-sweet chocolate chips
- ⅓ cup heavy cream
Making the Grasshopper Cookie Dough
Get ready to whip up some incredibly easy and delicious cookies that are perfect for any occasion. This recipe starts with a convenient chocolate cake mix, making the whole process a breeze. The key to these delightful treats is the combination of rich chocolate, refreshing mint, and a hint of creamy sweetness. We’re essentially transforming a simple cake mix into a chewy, flavorful cookie base that’s a real crowd-pleaser. Let’s dive into the steps to create these Easy Grasshopper Cake Mix Cookies.
Step 1: Preparing the Cookie Base
The first step in creating our fantastic cookies is to combine the core ingredients for the dough. In a large mixing bowl, add the entire box of chocolate cake mix. This provides the chocolatey foundation for our cookies. Next, pour in the ½ cup of canola oil. Canola oil is a great choice here because it’s neutral in flavor and helps create a moist and tender cookie. Then, crack in your 2 large eggs. Eggs act as a binder and add richness to the dough. Using a sturdy spoon or a hand mixer on low speed, begin extract to mix these ingredients together. You want to combine them until they are just incorporated. Don’t overmix at this stage; we’re just getting things started.
Step 2: Incorporating the Butter and Flavorings
Now, let’s add the elements that will give our cookies their signature creamy texture and minty flavor. In a separate bowl, ensure your ½ cup of unsalted butter is at room temperature. This is crucial because softened butter creams much more easily and evenly with other ingredients, preventing lumps and ensuring a smooth dough. Add the softened butter to the cake mix mixture. Next, we’ll add the flavorings. For that delightful minty kick, measure out 1 teaspoon of mint extract and add it to the bowl. The ¼ teaspoon of salt is also essential; it doesn’t just add saltiness, but it actually enhances all the other flavors present, making them more vibrant. If you want a true grasshopper experience, now is the time to add a few drops of green food coloring. Start with a few drops and add more until you achieve your desired shade of green. Mix everything thoroughly. A hand mixer on medium speed is ideal here. You want to beat the mixture until it becomes light, fluffy, and well combined. It should look like a thick, vibrant green batter.
Step 3: Chilling the Dough for Perfect Texture
This step is often overlooked but is critical for achieving the best cookie texture, especially with cake mix cookies. Once your dough is thoroughly mixed and beautifully green, it’s time to chill it. Transfer the dough to a bowl, cover it tightly with plastic wrap, and place it in the refrigerator for at least 30 minutes. Chilling the dough firms up the fats (butter and oil) and allows the flour to hydrate properly. This prevents the cookies from spreading too much during baking, ensuring they hold their shape and develop a wonderful chewy texture rather than becoming flat and crispy. While the dough is chilling, you can prepare your baking sheets.
Step 4: Baking the Cookies
Preheat your oven to 350°F (175°C). Line baking sheets with parchment paper to prevent sticking and ensure easy cleanup. Once the dough has chilled sufficiently, it’s time to form the cookies. You can use a cookie scoop or two spoons to drop rounded balls of dough onto the prepared baking sheets, leaving about 2 inches between each cookie to allow for spreading. Gently flatten the tops of the dough balls with the bottom of a glass or your fingers; this helps them bake more evenly and creates a nice surface. Bake for 10-12 minutes, or until the edges are set and lightly golden, but the centers still look slightly soft. Do not overbake! The cookies will continue to cook slightly on the hot baking sheet after you remove them from the oven. Allow the cookies to cool on the baking sheet for a few minutes before carefully transferring them to a wire rack to cool completely. This allows them to firm up properly.
Step 5: Crafting the Minty Chocolate Drizzle
While your cookies are cooling, let’s prepare the delightful minty chocolate drizzle that truly makes these cookies sing. In a small microwave-safe bowl, combine the 1 cup of semi-sweet chocolate chips with the ⅓ cup of heavy cream. Microwave the mixture in 30-second intervals, stirring well after each interval, until the chocolate is melted and smooth. Alternatively, you can melt this mixture gently in a double boiler. Once melted and smooth, stir in 1-2 tablespoons of heavy cream, adding more only if needed to reach a drizzling consistency. If you want an extra minty flavor in your drizzle, you can add a tiny splash of mint extract, but be careful not to overdo it, as it can become overpowering. Once the cookies are completely cooled, yogin extractan begin drizzling the chocolate mixture over them using a spoon or a piping bag with a fine tip. Let the drizzle set completely before storing or serving.
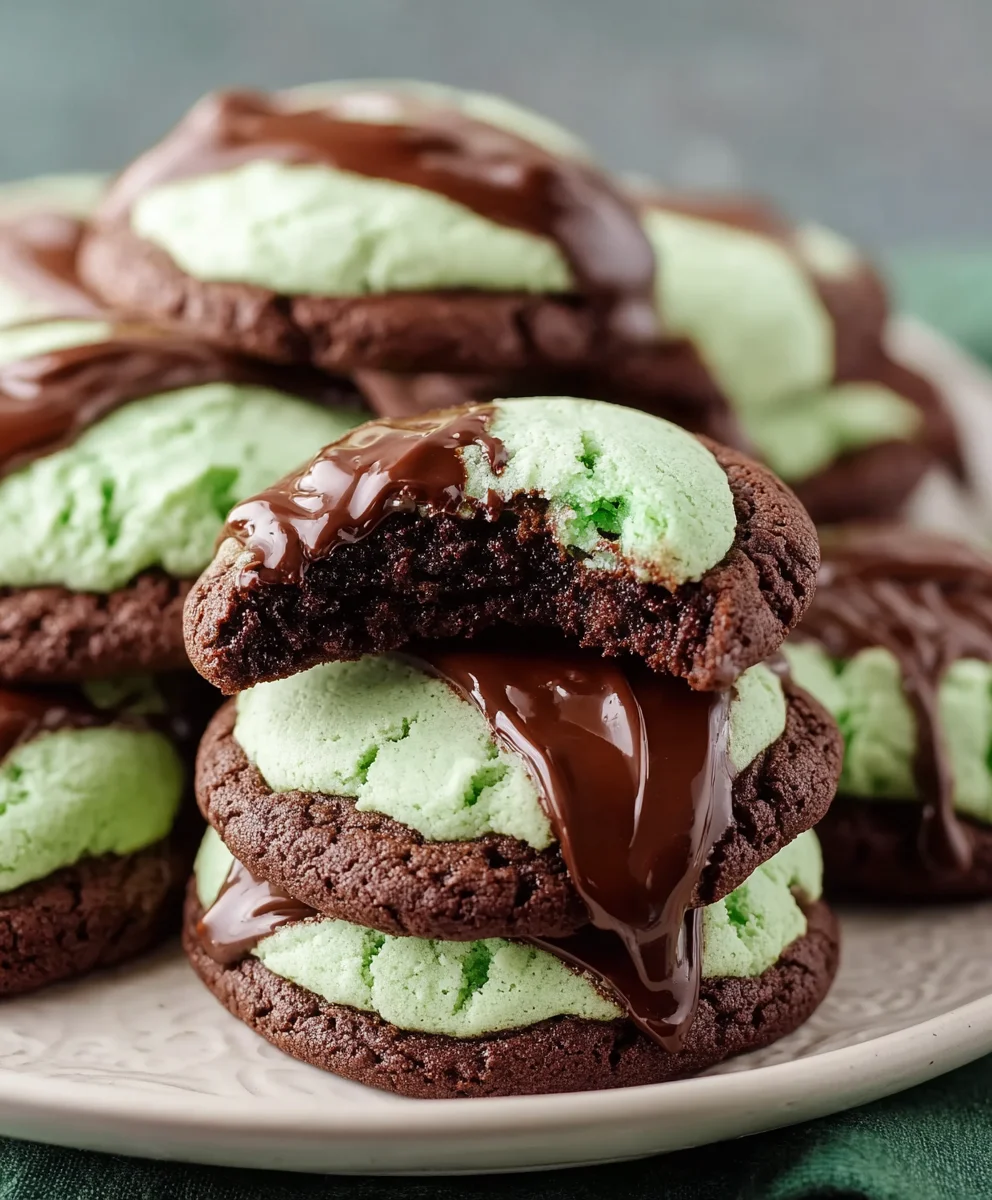
Conclusion:
And there you have it – a delightful batch of Easy Grasshopper Cake Mix Cookies ready to impress! We’ve walked through each simple step, from combining the essential ingredients to achieving that perfect chewy texture with a hint of minty goodness. These cookies are incredibly versatile and are sure to become a go-to for any occasion, whether it’s a casual get-together, a holiday treat, or just a sweet craving. I hope you feel inspired and empowered to whip up these delicious cookies in your own kitchen. Don’t be afraid to experiment and make them your own!
For serving suggestions, these cookies are fantastic on their own, perhaps with a glass of cold milk. They also pair wonderfully with coffee or tea. Consider crum extractbling them over a scoop of vanilla ice cream for an instant grasshopper sundae! For variations, feel free to add mini chocolate chips or a swirl of green food coloring to enhance the “grasshopper” theme. You could also try a drizzle of white chocolate or dark chocolate once they’ve cooled.
Frequently Asked Questions about Easy Grasshopper Cake Mix Cookies:
Q1: Can I use a different flavor of cake mix for these Easy Grasshopper Cake Mix Cookies?
While a white or yellow cake mix is recommended for the classic grasshopper flavor, you could certainly experiment with other flavors. A chocolate cake mix might create a richer cookie, or a mint chocolate chip cake mix would amplify the mint flavor. Keep in mind that different cake mixes have varying moisture and fat content, which could slightly alter the final texture.
Q2: My cookies spread too much. How can I prevent this next time I make Easy Grasshopper Cake Mix Cookies?
If your cookies are spreading excessively, a couple of things might be at play. Ensure your butter and eggs are not too warm when you mix them. Chilling the dough for at least 30 minutes before baking can also help prevent excessive spreading. You can also try baking on parchment paper, which can sometimes provide a bit more insulation.
Easy Grasshopper Cake Mix Cookies
Quick and easy grasshopper cookies made from a chocolate cake mix, featuring a refreshing mint flavor and a chocolate drizzle.
Ingredients
-
1 box (15.25 oz) chocolate cake mix
-
½ cup canola oil
-
2 large eggs
-
½ cup unsalted butter, room temperature
-
2 cups powdered sugar
-
1 teaspoon mint extract
-
¼ teaspoon salt
-
Green food coloring
-
2-4 tablespoons heavy cream (for dough)
-
1 cup semi-sweet chocolate chips
-
⅓ cup heavy cream (for drizzle)
Instructions
-
Step 1
In a large mixing bowl, combine the chocolate cake mix, canola oil, and eggs. Mix with a spoon or hand mixer on low speed until just incorporated. -
Step 2
Add the softened unsalted butter, mint extract, salt, and green food coloring to the mixture. Beat with a hand mixer on medium speed until light, fluffy, and well combined. The dough should be a thick, vibrant green. -
Step 3
Transfer the dough to a bowl, cover tightly with plastic wrap, and refrigerate for at least 30 minutes to firm up. -
Step 4
Preheat oven to 350°F (175°C). Line baking sheets with parchment paper. Drop rounded balls of chilled dough onto the prepared sheets, leaving 2 inches between cookies. Gently flatten the tops. -
Step 5
Bake for 10-12 minutes, or until edges are set and lightly golden, but centers are still soft. Cool on the baking sheet for a few minutes before transferring to a wire rack to cool completely. -
Step 6
While cookies cool, melt semi-sweet chocolate chips and ⅓ cup heavy cream in a microwave-safe bowl in 30-second intervals, stirring until smooth. Stir in 1-2 tablespoons additional heavy cream until drizzling consistency is reached. -
Step 7
Once cookies are completely cool, drizzle the chocolate mixture over them using a spoon or piping bag. Let the drizzle set before serving or storing.
Important Information
Nutrition Facts (Per Serving)
It is important to consider this information as approximate and not to use it as definitive health advice.
Allergy Information
Please check ingredients for potential allergens and consult a health professional if in doubt.