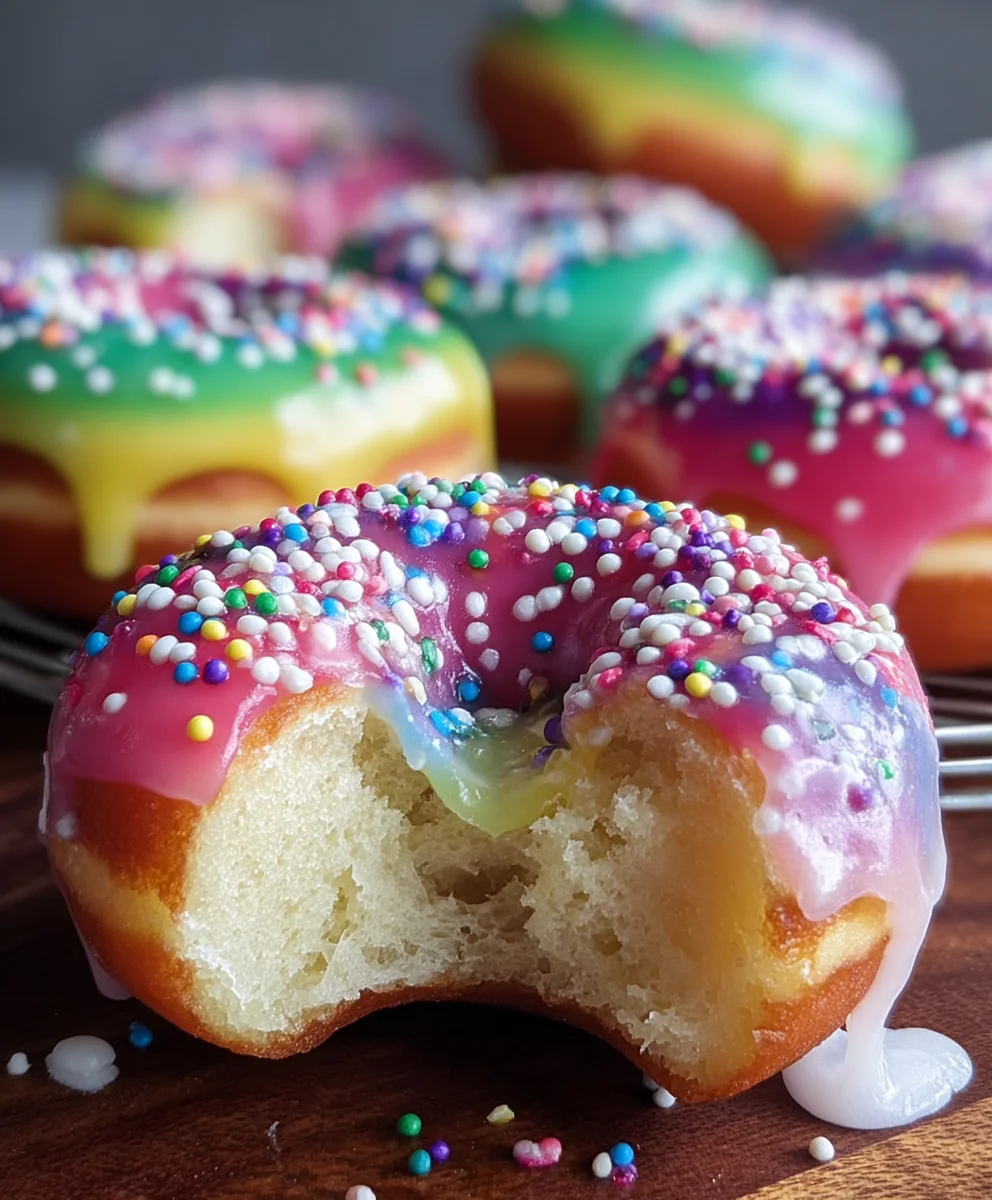
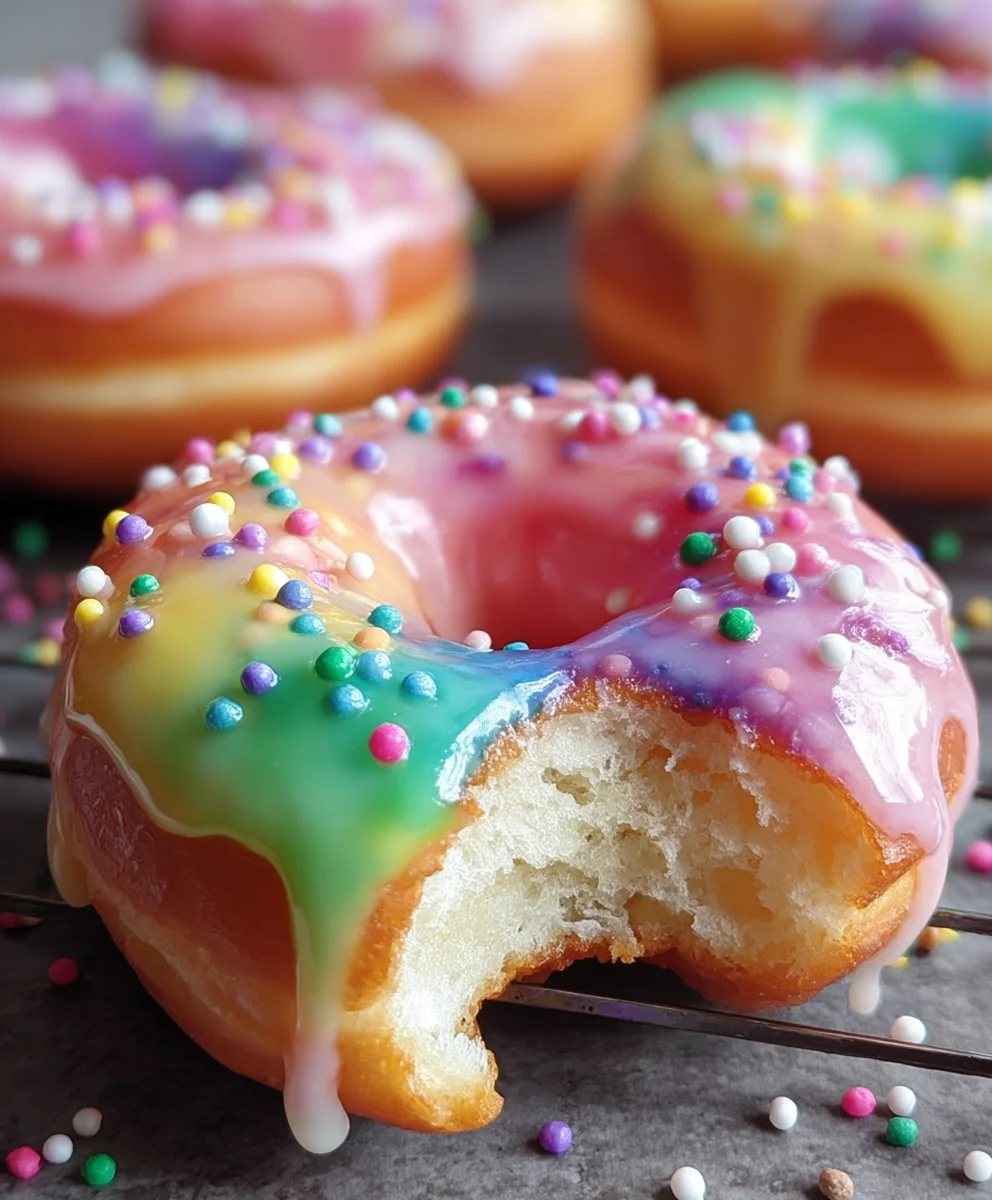
Rainbow Doughnuts-Bursting With Flavor
Rainbow-Filled Doughnuts are a vibrant explosion of color and flavor that are guaranteed to bring a smile to anyone’s face. There’s something inherently joyful about these delightful treats, and it’s no wonder they’ve become a perennial favorite for parties, celebrations, or simply as a special weekend indulgence. What truly sets Rainbow-Filled Doughnuts apart is their whimsical appearance; the colorful swirls baked into the dough or the brightly colored pastry cream filling create a visual spectacle that’s as delightful to behold as it is to eat. Imagin extracte biting into a fluffy, tender doughnut to discover a surprise of bright, fruity flavors peeking through – it’s a magical experience that appeals to both kids and adults alike. We’re going to dive into a recipe that will help you master these cheerful creations, ensuring your next batch is a showstopper.
Ingredients:
- 2 tablespoons active dry yeast
- ½ cup warm water (105-110°F)
- 1 teaspoon granulated sugar (for yeast activation)
- 2½ cups all-purpose flour, plus more for dusting
- ¼ cup granulated sugar (for the dough)
- 2 large eggs, at room temperature
- 2 tablespoons unsalted butter, softened to room temperature
- 2 teaspoons salt
- Canola oil, for frying (you’ll need a generous amount, at least 3-4 inches deep in your pot)
- 1½ cups confectioners’ sugar (for the glaze)
- ½ cup whipping cream (for the glaze)
- Rainbow sprinkles, for decoration
- 2½ cups vanilla pudding (store-bought or homemade, for filling)
- Rainbow food coloring (red, orange, yellow, green, blue, purple)
Preparing the Dough
The journey to these delightful Rainbow-Filled Doughnuts begin extracts with a beautiful, fluffy yeast dough. First, let’s get our yeast active and ready to work its magic. In a small bowl or the bowl of your stand mixer, combine the warm water, the 1 teaspoon of granulated sugar, and the active dry yeast. Give it a gentle stir to combine everything. It’s important to use warm water within the specified temperature range; too hot and you’ll kill the yeast, too cold and it won’t activate. Let this mixture sit undisturbed for about 5-10 minutes. You should see a foamy, bubbly layer form on top, which is a sure sign your yeast is alive and ready to create that wonderful airy texture in our doughnuts. If you don’t see any foam, your yeast might be old or the water temperature was off, and you’ll need to start again with fresh yeast.
Once your yeast mixture is nice and foamy, pour it into the bowl of your stand mixer fitted with a dough hook attachment, or into a large mixing bowl if you’re kneading by hand. Add the 2½ cups of all-purpose flour, the ¼ cup of granulated sugar, the 2 large eggs, the softened unsalted butter, and the 2 teaspoons of salt. If using a stand mgin extractr, begin mixing on low speed until the ingredients start to come together into a shaggy dough. Gradually increase the speed to medium-low and continue to knead for about 8-10 minutes. The dough should become smooth, elastic, and pull away from the sides of the bowl. If you’re kneading by hand, turn the dough out onto a lightly floured surface and knead for about 10-12 minutes, pushing, stretching, and folding until it achieves that smooth, elastic consistency. This kneading process is crucial for developing the gluten structure that gives doughnuts their signature chegrape juicess.
First Rise and Shaping
Now it’s time for the dough to relax and rise. Lightly grease a clean large bowl with a little oil or cooking spray. Place the kneaded dough into the greased bowl, turning it once to coat the entire surface. Cover the bowl tightly with plastic wrap or a clean kitchen towel. Find a warm, draft-free spot in your kitchen for the dough to rise. This could be in a slightly warm (but turned off!) oven, or just on your counter if your kitchen is typically warm. Let the dough rise for about 1 to 1½ hours, or until it has doubled in size. The exact time will depend on the ambient temperature of your kitchen. Once doubled, gently punch down the dough to release the air.
Turn the risen dough out onto a lightly floured surface. Gently roll or pat the dough out to about ½-inch thickness. Now, it’s time to cut out our doughnuts! You can use a doughnut cutter for classic shapes, or simply use two different-sized round cutters. A larger cutter, about 3 inches in diameter, for the outer shape, and a smaller one, about 1 inch in diameter, for the hole. Don’t worry if you don’t have a doughnut cutter; two round cookie cutters will work perfectly. As you cut out the doughnuts, place them on baking sheets lined with parchment paper. You can re-roll the scraps gently, but try not to overwork the dough. Once all your doughnuts are cut, cover them loosely with plastic wrap or a clean kitchen towel and let them rest for another 20-30 minutes while you prepare your frying station and filling.
Frying and Filling
This is where the magic really happens and gin extract doughnuts begin to take their delicious final form. Heat a generous amount of canola oil in a heavy-bottomed pot or Dutch oven over medium heat. You’ll want the oil to reach a temperature of about 350-375°F. A kitchen thermometer is your best friend here; maintaining the correct oil temperature is key to perfectly fried doughnuts that are golden brown on the outside and cooked through on the inside without being greasy. If the oil is too hot, the doughnuts will burn before they cook through. If it’s too cool, they’ll absorb too much oil and become greasy.
Carefully lower a few doughnuts at a time into the hot oil, being careful not to overcrowd the pot. Overcrowding will lower the oil temperature, leading to less-than-ideal results. Fry the doughnuts for about 1-2 minutes per side, or until they are deeply golden brown and puffed up. Use a slotted spoon or spider strainer to carefully remove the doughnuts from the oil and place them on a wire rack set over a baking sheet to drain any excess oil. Allow them to cool slightly before proceeding. While the doughnuts are still warm but not hot, we’re going to add that delightful rainbow filling! You’ll need to prepare your vanilla pudding and divide it into separate bowls, one for each color of food coloring. Add a few drops of red food coloring to one bowl of pudding, orange to another, yellow to a third, and so on, until you have all six rainbow colors. Mix each bowl thoroughly until you achieve vibrant, even colors. Using a piping bag fitted with a small, round tip, or even a sturdy zip-top bag with a corner snipped off, carefully inject a small amount of each colored pudding into the center of each doughnut. Aim for a swirl or layers of color as you fill. Don’t overfill, or the pudding will start to escape!
Glazing and Decorating
Now for the finishing touch that truly makes these Rainbow-Filled Doughnuts a showstopper: the glaze and sprinkles! In a medium bowl, whisk together the 1½ cups of confectioners’ sugar and the ½ cup of whipping cream. Continue whisking until you have a smooth, pourable glaze. If the glaze is too thick, add a tiny bit more whipping cream, a teaspoon at a time, until you reach the desired consistency. If it’s too thin, add a little more confectioners’ sugar. Dip the tops of the slightly cooled, filled doughnuts into the glaze, letting any excess drip back into the bowl. Alternatively, you can spoon the glaze over the tops. As soon as the glaze is applied, generously shower the tops with rainbow sprinkles. The sprinkles will adhere best to the wet glaze, creating that signature festive look. Arrange the decorated doughnuts on a clean wire rack to allow the glaze to set fully. These are best enjoyed fresh, but can be stored in an airtight container at room temperature for a day or two.
Conclusion:
You’ve done it! You’ve successfully created a batch of vibrant and delicious Rainbow-Filled Doughnuts. We hope you enjoyed the process and are now savoring the delightful taste and stunning visual appeal of these homemade treats. These doughnuts are perfect for brightening any occasion, from a casual breakfast to a festive birthday party. Don’t hesitate to experiment with different fillings and toppings to make them uniquely yours. The joy of baking lies in both the creation and the sharing, so gather your loved ones and share the rainbow! We encourage you to try this recipe again and again, perhaps even inspiring your own rainbow-themed baking adventures. Happy baking!
Frequently Asked Questions about Rainbow-Filled Doughnuts:
Q1: Can I make the rainbow filling ahead of time?
Yes, absolutely! The rainbow filling can be prepared up to 2 days in advance and stored in an airtight container in the refrigerator. This can significantly cut down on prep time when you’re ready to assemble your Rainbow-Filled Doughnuts. Just give it a good stir before using to ensure it’s smooth.
Q2: What other types of fillings work well for Rainbow-Filled Doughnuts?
The possibilities are endless! Beyond the classic custard or cream cheese filling, consider fruit-based options like berry compote or lemon curd. Chocolate ganache is always a crowd-pleaser, and even a simple whipped cream infused with vanilla or almond extract can be a delightful surprise. For a healthier twist, a thick Greek yogurt mixed with honey and fruit puree can also be delicious.
Rainbow Doughnuts-Bursting With Flavor
Delightful, fluffy yeast doughnuts filled with vibrant rainbow-colored vanilla pudding and finished with a sweet glaze and festive sprinkles.
Ingredients
-
2 tablespoons active dry yeast
-
½ cup warm water (105-110°F)
-
1 teaspoon granulated sugar
-
2½ cups all-purpose flour, plus more for dusting
-
¼ cup granulated sugar
-
2 large eggs, at room temperature
-
2 tablespoons unsalted butter, softened to room temperature
-
2 teaspoons salt
-
Canola oil, for frying
-
1½ cups confectioners’ sugar
-
½ cup whipping cream
-
Rainbow sprinkles, for decoration
-
2½ cups vanilla pudding
-
Rainbow food coloring (red, orange, yellow, green, blue, purple)
Instructions
-
Step 1
Activate yeast: In a small bowl, combine warm water, 1 tsp granulated sugar, and active dry yeast. Let sit for 5-10 minutes until foamy. -
Step 2
Make dough: In a stand mixer or large bowl, combine activated yeast mixture, 2½ cups all-purpose flour, ¼ cup granulated sugar, eggs, softened butter, and salt. Knead until smooth and elastic (8-10 minutes for mixer, 10-12 minutes by hand). -
Step 3
First rise: Place dough in a greased bowl, cover, and let rise in a warm place for 1 to 1.5 hours, or until doubled. Punch down gently. -
Step 4
Shape doughnuts: Turn dough onto a floured surface, roll to ½-inch thickness. Cut out doughnuts using a doughnut cutter or two round cutters. Place on parchment-lined baking sheets and let rest for 20-30 minutes. -
Step 5
Fry doughnuts: Heat canola oil to 350-375°F in a deep pot. Fry doughnuts 1-2 minutes per side until golden brown. Drain on a wire rack. -
Step 6
Prepare and fill: Divide vanilla pudding into separate bowls, tinting each with a different food coloring. Using a piping bag, inject each doughnut with a variety of colored pudding. -
Step 7
Glaze and decorate: Whisk confectioners’ sugar and whipping cream to make a glaze. Dip the tops of the filled doughnuts into the glaze and immediately cover with rainbow sprinkles. Let glaze set.
Important Information
Nutrition Facts (Per Serving)
It is important to consider this information as approximate and not to use it as definitive health advice.
Allergy Information
Please check ingredients for potential allergens and consult a health professional if in doubt.