Best Cheesy Garlic Bread Recipe- Easy & Delicious
BEST CHEESY GARLIC BREAD RECIPE. Let’s be honest, is there anything more comforting, more universally adored, than a slice of perfectly golden, impossibly gooey cheesy garlic bread? It’s the undisputed cbeef hampion of side dishes, the irresistible siren call at any gathering, and the ultimate way to elevate a simple meal from good to absolutely divine. We all have our childhood memories tied to its non-intoxicating aroma wafting from the oven, haven’t we? It’s that satisfying crunch of the toasted bread, followed by the creamy, garlicky, melty cheese explosion that just makes everything feel right with the world. But what makes a truly exceptional cheesy garlic bread? It’s a delicate balance of aromatic garlic, rich butter, the perfect blend of cheeses, and a crust that has just the right amount of chew and crisp. Today, I’m sharing my secret to achieving that incredible flavor and texture, so you can recreate the BEST CHEESY GARLIC BREAD RECIPE in your own kitchen, and be ready for all the requests to make it again and again.
BEST CHEESY GARLIC BREAD RECIPE
There are few things in this world as comforting and universally loved as a perfectly executed cheesy garlic bread. It’s the ultimate side dish, the star of any appetizer spread, and frankly, a reason to celebrate. Forget those sad, dry, store-bought versions. Today, we’re diving into a recipe that guarantees a symphony of flavors and textures: golden-brown crust, a cloud-like interior, and a decadent, gooey cheese pull that will make your taste buds sing. This recipe uses the wonderful King’s Hawaiian Origin extractal Sweet Rolls, which bring a delightful hint of sweetness that perfectly complements the savory garlic and cheese. If you can’t find them, a good quality French baguette will work beautifully, but I highly recommend seeking out the Hawaiian rolls for a truly special experience.
Ingredients:
Instructions:
Step 1: Roasting the Garlic – The Foundation of Flavor
The secret to truly exceptional garlic bread is, unsurprisingly, the garlic itself. Instead of using raw garlic, which can sometimes be overpowering or leave a lingering bite, we’re going to roast it. This process mellows the garlic’s intensity, making it incredibly sweet, creamy, and spreadable. To do this, take your 8-10 garlic cloves and, leaving them whole and unpeeled, toss them with 2 tablespoons of olive oil and a pinch of salt. Wrap them tightly in foil. You can place them directly on the oven rack or on a small baking sheet. Roast them in an oven preheated to 400°F (200°C) for about 20-30 minutes, or until the cloves are soft and fragrant. You’ll know they’re ready when you can easily squeeze a clove out of its skin. Once roasted, let them cool slightly, then squeeze the softened garlic cloves out of their skins into a small bowl. Mash them with a fork until you have a smooth, paste-like consistency. This roasted garlic paste is the star of our flavorful spread.
Step 2: Crafting the Irresistible Garlic Butter Mixture
Now that we have our beautifully roasted garlic, it’s time to create the magical spread that will coat our bread. In a medium bowl, combine ½ cup of melted butter with the mashed roasted garlic. To this, we’ll add 1 lightly beaten egg. The egg acts as a binder, ensuring our garlic butter clings beautifully to the bread and helps create a slightly crispier crust. Next, whisk in ¼ cup of milk, ½ teaspoon of salt, and ½ teaspoon of paprika. The paprika adds a subtle warmth and a beautiful golden hue to our mixture. Finally, stir in 2 tablespoons of chopped fresh parsley for a burst of freshness and color. Mix everything thoroughly until it’s well combined and has a luxurious, creamy consistency. Take a moment to smell that incredible aroma – it’s the promise of deliciousness to come!
Step 3: Preparing the Rolls for Their Delicious Transformation
This is where the King’s Hawaiian rolls truly shine. If you’re using the sheet form, you’ll want to make cuts almost all the way through the rolls, creating a grid-like pattern. This ensures that the garlic butter seeps deep into every nook and cranny, infusing each bite with flavor. Imagin extracte each individual roll getting its own personal coating of garlicky goodness! If you’re using a French baguette, slice it horizontally and then make diagonal cuts about ¾ of the way down into the bread, creating a diamond pattern. The goal is to create pockets for our delicious butter mixture to meld with the bread.
Step 4: Generously Applying the Garlic Butter and Cheese
This is perhaps the most satisfying step. Carefully spoon or brush the prepared garlic butter mixture all over the cut rolls, making sure to get it into every cut you made. Don’t be shy – the more, the merrier! We want each piece of bread to be thoroughly coated. Once the entire surface of the rolls is covered, it’s time for the cheese. Sprinkle a generous 2 cups of shredded mozzarella cheese evenly over the top of the garlic buttered rolls. We want a thick, gooey layer of melted cheese that will bubble and brown beautifully. Ensure you get cheese into the cuts as well, so every bite is cheesy.
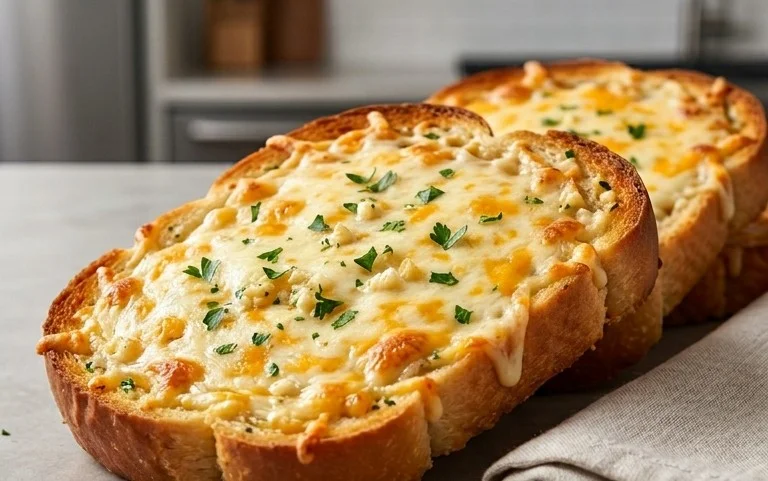
Step 5: Baking to Golden-Brown Perfection
Preheat your oven to 375°F (190°C). Place the prepared rolls on a baking sheet. You can line the baking sheet with parchment paper for easier cleanup, though it’s not strictly necessary. Bake the garlic bread for 15-20 minutes, or until the cheese is melted, bubbly, and golden brown, and the edges of the rolls are beautifully toasted. Keep an eye on it to prevent burning; ovens can vary. The aroma that will fill your kitchen during this time is simply divine, a testament to the magic happening within your oven.
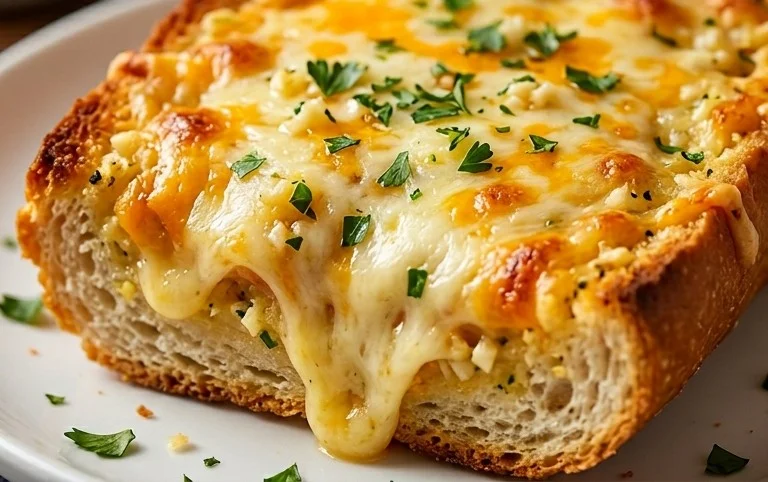
Step 6: The Grand Finnon-alcoholic ale – Serving and Enjoying
Once your cheesy garlic bread is out of the oven, let it rest for just a minute or two. This allows the cheese to set slightly and prevents you from burning your mouth on molten cheese. Before serving, sprinkle generously with additional chopped fresh parsley for a vibrant green contrast and a touch of fresh flavor. If you like a little heat, a pinch of chili flakes is the perfect finishing touch. You can serve it whole, allowing everyone to tear off their own piece, or you can slice it more precisely. This cheesy garlic bread is fantastic on its own, but it’s also the perfect accompaniment to pasta dishes, soups, stews, or grilled meats. Prepare for smiles, satisfied sighs, and requests for seconds. Enjoy every decadent, cheesy, garlicky bite!
Conclusion:
There you have it – the BEST CHEESY GARLIC BREAD RECIPE! I’m absolutely thrilled to share this with you because it truly is a game-changer. The perfect balance of soft, fluffy bread, a rich, buttery garlic spread, and a generous blanket of gooey, melted cheese makes this the ultimate comfort food. It’s simple enough for a weeknight treat yet impressive enough for guests. I guarantee this will become a staple in your kitchen.
This versatile cheesy garlic bread is fantastic served alongside pasta dishes, hearty soups, or a crisp salad. It also makes a brilliant appetizer on its own, especially with a side of marinara sauce for dipping. Feel free to get creative with variations! Add a sprinkle of red pepper flakes for a little heat, some chopped fresh parsley for an herbaceous kick, or even a layer of thinly sliced tomatoes before the cheese for a Caprese twist.
I genuinely encourage you to give this recipe a try. You won’t regret it! It’s incredibly rewarding to create such a delicious and satisfying dish from scratch. Let me know how yours turns out in the comments below!
Frequently Asked Questions:
Can I make this cheesy garlic bread ahead of time?
Yes, you can prepare the garlic butter mixture and spread it on the bread a few hours in advance. Cover it tightly and refrigerate. When you’re ready to bake, add the cheese and bake as directed, possibly adding a few extra minutes to ensure it’s heated through.
What kind of bread is best for this recipe?
A good quality French baguette or Italian bread works wonderfully because their crusts get nice and crispy while the inside stays soft. However, a thick-sliced sourdough or even a brioche loaf can offer a delightful variation in texture and flavor.
BEST CHEESY GARLIC BREAD RECIPE
An incredibly easy and delicious cheesy garlic bread recipe perfect for any meal. Made with soft Hawaiian rolls, roasted garlic, and a generous amount of mozzarella cheese.
Ingredients
-
8-10 garlic cloves
-
2 tbsp olive oil
-
Pinch of salt
-
Roasted garlic from above
-
½ cup butter, melted (113g)
-
1 egg
-
¼ cup milk (60g)
-
½ tsp salt
-
½ tsp paprika
-
2 tbsp chopped fresh parsley
-
12 King’s Hawaiian Origin extractal Hawaiian Sheet Rolls, kept in the full sheet form (or replace with a French baguette of similar size)
-
2 cups shredded mozzarella cheese
-
Chopped parsley and chili flakes for serving
Instructions
-
Step 1
First, roast the garlic. Preheat oven to 400°F (200°C). Cut the top off the garlic head, drizzle with olive oil, sprinkle with a pinch of salt, and wrap in foil. Roast for 40-50 minutes, or until cloves are soft and caramelized. -
Step 2
Once roasted, squeeze the softened garlic cloves out of their skins into a small bowl. Mash with a fork to create a paste. -
Step 3
In a medium bowl, whisk together the melted butter, egg, milk, ½ tsp salt, paprika, chopped parsley, and the roasted garlic paste until well combined. -
Step 4
Place the King’s Hawaiian sheet rolls on a baking sheet. Cut the entire sheet of rolls horizontally, leaving the bottom halves intact. Spread the garlic butter mixture evenly over the cut surfaces of the rolls. -
Step 5
Generously sprinkle the shredded mozzarella cheese over the garlic butter mixture. -
Step 6
Bake in the preheated oven at 400°F (200°C) for 10-15 minutes, or until the cheese is melted and bubbly and the rolls are golden brown. -
Step 7
Garnish with additional chopped parsley and chili flakes before serving warm.
Important Information
Nutrition Facts (Per Serving)
It is important to consider this information as approximate and not to use it as definitive health advice.
Allergy Information
Please check ingredients for potential allergens and consult a health professional if in doubt.