Quick Pickled Red Onions- Easy & Delicious
Pickled red onions are one of those culinary magic tricks that elevate everyday meals into something truly spectacular. I’m utterly obsessed with their vibrant color and their ability to transform a simple dish with just a few slivers. What’s not to love about these tangy, slightly sweet, and wonderfully crisp gems? They bring an instant burst of flavor and a beautiful visual pop to everything from tacos and avocado toast to salads and sandwiches. The secret to why everyone adores pickled red onions lies in their incredible versatility and the delightful contrast they provide. That perfect balance of acidity and subtle sweetness cuts through richness, brightens up savory dishes, and adds a delightful crunch that’s simply irresistible. They’re surprisingly easy to make at home, requiring just a handful of pantry staples and a little bit of patience, yielding a condiment that feels far more gourmet than its simple preparation suggests.
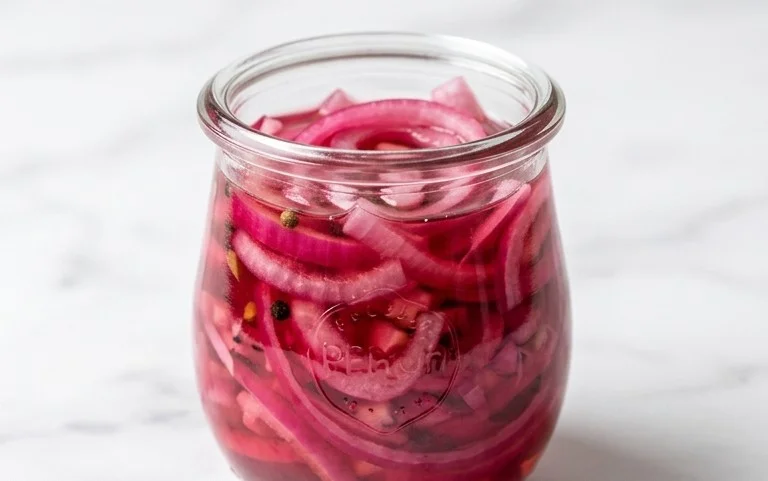
Pickled Red Onions: A Burst of Flavor in Every Bite
There are few condiments that can elevate a dish as dramatically as a vibrant jar of pickled red onions. Their sweet, tangy, and slightly spicy bite cuts through richness, adds a pop of color, and transforms everything from tacos and sandwiches to salads and grilled meats. Forget those store-bought versions that are often too sweet or too vinegary; making your own is incredibly simple and allows you to customize the flavor to your liking. In less than 30 minutes, you can have a delicious batch ready to grace your table. Let’s dive into how easy it is to create this culinary marvel.
Ingredients:
Preparing the Onions: The Foundation of Flavor
The first step in this delightful process is to prepare our star ingredient: the red onions. You want to slice them as thinly as possible. This is crucial for several reasons. Thinner slices will pickle more quickly and evenly, ensuring that every strand gets a chance to absorb that beautiful brine. Plus, thin slices are more pleasant to eat, melting into your dishes rather than overpowering them.
To achieve this, I like to use a sharp chef’s knife. Start by trimming off the top and bottom ends of each onion. Then, cut the onion in half vertically, from root to stem. Peel away the papery outer skin. Place each half flat-side down on your cutting board. Now, carefully slice them thinly, following the natural curve of the onion. Aim for slices that are almost translucent. If you have a mandoline slicer, this is the perfect tool for achieving uniform, paper-thin slices, but a sharp knife will do the job beautifully with a little patience. Don’t worry if they’re not perfectly uniform; a little variation adds character!
Crafting the Perfect Brine: The Soul of the Pickles
While you’re slicing your onions, you can get started on the brine. This is where the magic happens, transforming simple vinegar and water into a tangy, flavorful liquid that will infuse the onions. In a medium saucepan, combine the water, white vinegar, sugar, and sea salt. White vinegar is a classic choice for pickling because of its neutral flavor profile, allowing the other ingredients to shine. You can experiment with other vinegars like apple cider vinegar for a slightly fruitier note, but white vinegar is a fantastic starting point.
Heating and Dissolving: Melding the Flavors
Place the saucepan over medium heat. Stir the mixture gently until the sugar and salt have completely dissolved. This is important; you don’t want any gritty residue at the bottom of your jar. You’ll see the liquid become clear as the sugar and salt disappear. Once dissolved, bring the mixture to a gentle simmer. Let it simmer for just a minute or two. This brief simmering helps to further meld the flavors and ensures everything is well incorporated.
Adding the Heat (Optional): A Touch of Spice
Now is the time to add the red pepper flakes if you’re using them. This is where you can customize the heat level. For a mild kick, stick to 1/4 teaspoon. If you love a bit of warmth, go for the 1/2 teaspoon or even a touch more. Stir them into the simmering brine. The heat from the brine will begin extract to awaken the flavor of the pepper flakes, infusing the liquid with a subtle warmth. Be sure to taste the brine at this stage (carefully, it’s hot!) and adjust sweetness or saltiness if you desire.
Assembling the Pickles: The Final Transformation
Once your brine is ready and your onions are sliced, it’s time to bring it all together. You’ll need a clean jar or container with a lid. Sterilizing your jar is a good practice to ensure longer shelf life, though for immediate consumption, a thoroughly washed jar is usually sufficient. Place your thinly sliced red onions into the clean jar. Don’t pack them in too tightly; give them a little room to move around.
Carefully pour the hot brine over the sliced onions. Make sure the onions are completely submerged in the liquid. This is essential for them to pickle evenly. You might need to gently press down on the onions with a spoon or spatula to ensure they are fully covered.
Cooling and Infusing: Patience is a Virtue
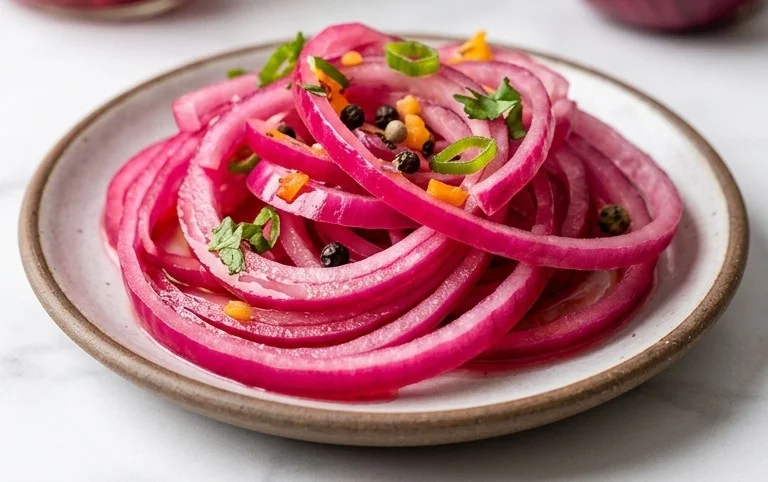
Once the jar is filled and the onions are submerged, let it sit at room temperature for about 20 to 30 minutes. During this time, the onions will begin extract to soften and change color, turning a beautiful fuchsia. The heat from the brine will start the pickling process. After this initial cooling period, secure the lid tightly and transfer the jar to the refrigerator.
The Waiting Game: Reaping the Rewards
The most challengin extractg part of making pickled red onions is waiting for them to reach their peak flavor. While they are technically edible after the 20-30 minute room temperature sit, I find that they are best after at least an hour in the refrigerator. For the most intense flavor, I like to let them pickle for a few hours, or even overnight. The longer they sit, the more the vinegar and sugar will penetrate the onion, resulting in a more nuanced and delicious pickle.
These vibrant pickled red onions will last for several weeks in the refrigerator, making them a fantastic pantry staple. Use them on avocado toast, alongside grilled salmon, mixed into a potato salad, or piled high on your favorite burger. Enjoy the burst of flavor they bring to every dish!
Conclusion:
And there you have it – the simple yet spectacular way to transform humble red onions into a vibrant, zesty condiment! This pickled red onion recipe is an absolute game-changer for any kitchen. It’s incredibly easy to make, requiring just a few common ingredients and minimal active time, yet the flavor payoff is immense. The beautiful pink hue they develop is as appealing to the eye as their tangy, slightly sweet crunch is to the palate. These aren’t just pickled onions; they’re a flavor enhancer, a vibrant garnish, and a testament to the power of a simple brine. They add a delightful punch to everything from tacos and burgers to salads and sandwiches.
Don’t be afraid to experiment with this versatile base! Feel free to add a pinch of chili flakes for a spicy kick, a bay leaf for an extra layer of aroma, or even a touch of honey for a sweeter profile. The possibilities are truly endless. So, I highly encourage you to give this recipe a try. You’ll be amazed at how often you reach for this jar of goodness. Get ready to elevate your everyday meals with these incredibly delicious pickled red onions!
Frequently Asked Questions:
Q: How long do these pickled red onions last?
A: Properly stored in an airtight container in the refrigerator, these pickled red onions can last for up to 2 to 3 weeks. The longer they sit, the more the flavors meld and deepen.
Q: Can I use a different type of vinegar?
A: Absolutely! While apple cider vinegar is a fantastic choice for its balanced flavor, you can also experiment with white grape juice vinegar for a cleaner tang or red grape juice vinegar for a richer, more robust taste that complements the red onions beautifully.
Q: What if I don’t have pickling salt?
A: If you don’t have pickling salt, regular kosher salt or sea salt without any anti-caking agents will work just fine. Avoid iodized table salt, as it can sometimes impart a metallic flavor.
Quick Pickled Red Onions
A simple and fast recipe for tangy, vibrant pickled red onions that add a delicious crunch to sandwiches, tacos, salads, and more. Easily customizable with spice.
Ingredients
-
2 medium red onions (or 3 small ones), thinly sliced
-
1 1/4 cup water
-
1 1/4 cup white vinegar
-
3 tbsp sugar
-
1 tbsp sea salt
-
1/4 tsp red pepper flakes (optional)
Instructions
-
Step 1
Slice the red onions thinly. A mandoline works best for even slices, but a sharp knife is fine. -
Step 2
In a medium saucepan, combine the water, white vinegar, sugar, and sea salt. If using, add the red pepper flakes. -
Step 3
Heat the mixture over medium heat, stirring until the sugar and salt are completely dissolved. Do not boil. -
Step 4
Place the sliced red onions into a heat-safe jar or bowl. -
Step 5
Pour the hot brine over the sliced onions, ensuring they are fully submerged. -
Step 6
Let the mixture cool to room temperature, then cover and refrigerate for at least 30 minutes before serving. The longer they sit, the more flavorful they become.
Important Information
Nutrition Facts (Per Serving)
It is important to consider this information as approximate and not to use it as definitive health advice.
Allergy Information
Please check ingredients for potential allergens and consult a health professional if in doubt.