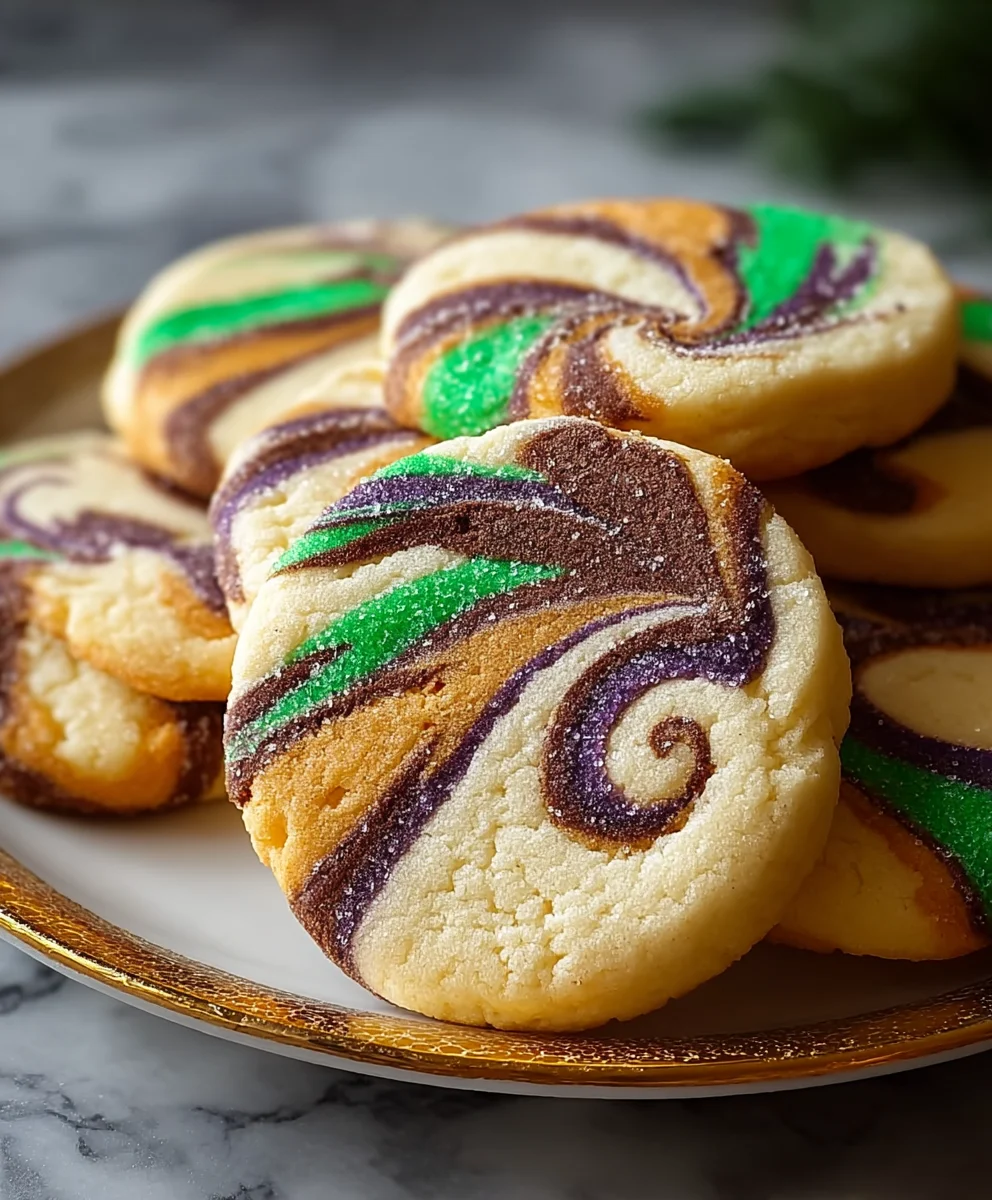
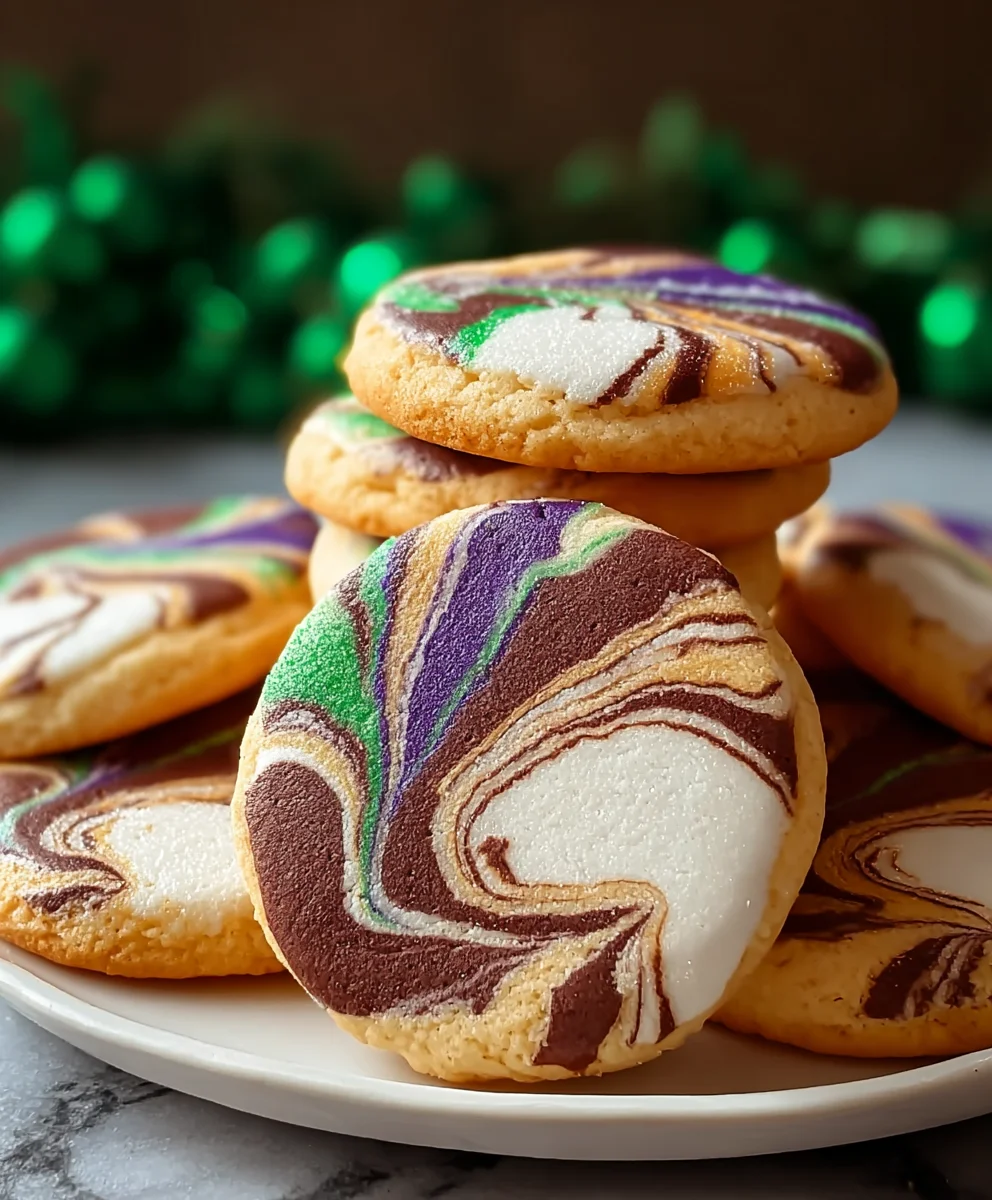
Marbled Sugar Cookies- Easy & Beautiful Dessert Recipe
Marbled Sugar Cookies are more than just a sweet treat; they’re a little piece of edible art that brings smiles to faces of all ages. If you’ve ever found yourself mesmerized by the beautiful swirls of color on these delightful cookies, you’re not alone! There’s an inherent joy in creating something so visually stunning that also happens to taste incredibly delicious. What truly makes these Marbled Sugar Cookies special is the perfect balance of a crisp, buttery base and a tender, melt-in-your-mouth texture. The magic happens when you artfully swirl two or more dough colors together, creating unique patterns in every single cookie. This isn’t just baking; it’s a creative endeavor that results in a show-stopping dessert perfect for holidays, celebrations, or just a delightful afternoon pick-me-up. Get ready to impress your friends and family with these stunning and utterly craveable creations!
Ingredients:
- 3/4 cup unsalted butter, softened to room temperature
- 1/2 cup full-fat cream cheese, softened to room temperature
- 1 1/2 cups granulated sugar
- 1 large egg, at room temperature
- 2 teaspoons vanilla bean paste or pure vanilla extract
- 1 teaspoon almond extract (optional, for an extra layer of flavor)
- 3 cups all-purpose flour
- 1 tablespoon cornstarch
- 1/2 teaspoon baking powder
- 1/2 teaspoon fine salt
- 3 cups powdered sugar (also known as confectioners’ sugar or icing sugar)
- 3 tablespoons meringue powder
- 1/4 cup room temperature water
- 2 teaspoons vanilla or almond extract (for the icing)
- Extra water as needed, for adjusting icing consistency
- Gel food coloring in desired colors (optional, for marbling effect)
Cookie Dough Preparation
Let’s get started on these beautiful Marbled Sugar Cookies! The key to a tender and flavorful cookie is ensuring your butter and cream cheese are truly at room temperature. This allows them to cream together beautifully, creating a light and airy base. Don’t rush this step; it makes a noticeable difference in the final texture.
Step 1: Creaming the Butter, Cream Cheese, and Sugar
- In a large mixing bowl, combine the softened unsalted butter and the softened full-fat cream cheese. Using an electric mixer (stand mixer or hand mixer), beat them together on medium speed until they are light, fluffy, and well combined. This should take about 2-3 minutes. Scrape down the sides of the bowl periodically to ensure everything is incorporated.
- Gradually add the granulated sugar to the butter and cream cheese mixture. Continue beating on medium-high speed until the mixture is pnon-alcoholic ale and creamy. This process incorporates air, which is crucial for a good cookie texture. It will look significantly lighter in color and much fluffier. This step can take another 3-5 minutes.
Step 2: Incorporating Wet Ingredients
- Add the room temperature large egg to the creamed mixture. Beat on medium speed until just combined. Be careful not to overmix at this stage, as it can lead to tougher cookies.
- Stir in the vanilla bean paste (or extract) and the optional almond extract. If you’re using vanilla bean paste, you’ll see those lovely little specks throughout your dough, which is always a nice touch. Mix until these extracts are evenly distributed.
Step 3: Combining Dry Ingredients and Forming the Dough
- In a separate medium bowl, whisk together the all-purpose flour, cornstarch, baking powder, and fine salt. Whisking the dry ingredients together ensures that the leavening agents and salt are evenly distributed throughout the flour, preventing pockets of saltiness or uneven rising.
- With the mixer on low speed, gradually add the dry ingredients to the wet ingredients. Mix until just combined and no dry streaks of flour remain. It’s important to stop mixing as soon as the flour is incorporated. Overmixing develops the gluten in the flour, which can result in tough cookies. The dough will be soft and a little sticky at this point.
- Turn the dough out onto a lightly floured surface. Gently bring the dough together with your hands. It might still feel a bit soft. Divide the dough in half, shape each half into a flat disc, wrap them tightly in plastic wrap, and refrigerate for at least 1 hour, or until firm enough to handle. This chilling step is essential for making the dough easier to roll and cut, and it also helps the cookies hold their shape during baking.
Baking the Marbled Sugar Cookies
Step 4: Rolling, Cutting, and Baking
- Preheat your oven to 350°F (175°C). Line baking sheets with parchment paper.
- On a lightly floured surface, roll out one disc of chilled dough to about 1/4-inch thickness. Work with one disc at a time, keeping the other one refrigerated until ready to use. If the dough becomes too soft while rolling, return it to the refrigerator for a few minutes to firm up.
- Use your favorite cookie cutters to cut out shapes. Place the cut-out cookies onto the prepared baking sheets, about 1-2 inches apart.
- Bake for 8-12 minutes, or until the edges are lightly golden and the centers are set. The exact baking time will depend on the size and thickness of your cookies. For thinner cookies, you’ll want to lean towards the shorter baking time.
- Let the cookies cool on the baking sheets for 5 minutes before transferring them to a wire rack to cool completely. It’s important to let them cool on the baking sheet for a short while to allow them to firm up enough for transferring without breaking.
Creating the Marbled Icing
Now for the fun part – the marbling! This icing is a royal icing, which dries firm and is perfect for decorating. Making it from scratch ensures the best flavor and consistency.
Step 5: Preparing and Marbling the Royal Icing
- In a clean, dry mixing bowl, combine the powdered sugar and meringue powder. Whisk them together thoroughly to break up any lumps in the powdered sugar and to distribute the meringue powder evenly.
- Gradually add the room temperature water to the powdered sugar mixture. Start with the 1/4 cup of water and mix on low speed until mostly combined.
- Increase the mixer speed to medium-high and beat for 5-7 minutes, or until the icing is stiff, glossy, and holds medium peaks. This beating process is crucial for activating the meringue powder and creating a stable icing.
- If the icing is too thick, add extra water, a teaspoon at a time, until it reaches your desired piping consistency. If it’s too thin, add a bit more powdered sugar. For marbling, you’ll want an icing that’s pourable but not overly runny.
- Divide the icing into separate bowls, one for each color you wish to use for marbling, plus a larger bowl for the base white icing. Add a small amount of gel food coloring to each colored bowl and stir until the color is uniform. Gel food coloring is recommended as it adds intense color without thinning the icing too much.
- To marble, spoon dollops of your colored icings randomly over the surface of the white icing in the larger bowl. Then, using a toothpick or a thin skewer, gently swirl the colors through the white icing. Don’t over-swirl; you want distinct ribbons of color, not a muddy mess.
- Once the icing is marbled to your liking, immediately dip your cooled cookies into the icing, allowing excess to drip off, or use a spoon to generously coat the top of each cookie. For a more intricate marbled effect, you can pour the marbled icing into a piping bag and drizzle it onto the cookies, then swirl with a toothpick.
- Place the iced cookies on a wire rack set over a baking sheet (to catch drips) and let the icing dry completely. This can take several hours, depending on humidity. Once dry, your beautiful Marbled Sugar Cookies are ready to be enjoyed!
Conclusion:
And there you have it! Your guide to creating absolutely stunning Marbled Sugar Cookies. We’ve walked through each step, from creaming the butter and sugar to achieving those beautiful swirls of color. These cookies aren’t just a treat for the taste buds; they’re a feast for the eyes, perfect for any occasion or just because you want to add a little artistry to your baking. They truly transform a simple cookie into something special.
For serving, these Marbled Sugar Cookies are delightful on their own, but they also pair wonderfully with a glass of cold milk or a hot cup of coffee. Consider them for birthday parties, holidays, or even as a thoughtful homemade gift. Their elegant appearance makes them a standout dessert.
If you’re feeling adventurous, don’t be afraid to experiment with different color combinations or even add a touch of edible glitter once they’ve cooled. You can also try different flavoring extracts in the dough, like almond or lemon, for a unique twist. The possibilities for personalizing these Marbled Sugar Cookies are endless!
I hope you have as much fun making these cookies as you will eating them. Happy baking!
Frequently Asked Questions about Marbled Sugar Cookies:
Q1: How do I get clean, distinct marble swirls in my Marbled Sugar Cookies?
To achieve distinct swirls, it’s best not to overmix the colors once you’ve divided and tinted the dough. Gently fold the colors together only a few times. When you roll out the dough, try not to knead it excessively, as this can blend the colors too much. A light touch is key!
Q2: Can I make the dough for Marbled Sugar Cookies ahead of time?
Yes, absolutely! You can prepare the dough for your Marbled Sugar Cookies up to 2-3 days in advance. Once it’s fully mixed and divided for coloring, wrap each portion tightly in plastic wrap and store it in the refrigerator. Let it sit at room temperature for about 15-20 minutes before attempting to marble and bake, as chilled dough is easier to handle.
Marbled Sugar Cookies- Easy & Beautiful Dessert Recipe
Easy and beautiful marbled sugar cookies with a tender texture and a delightful sweet icing.
Ingredients
-
3/4 cup unsalted butter, softened to room temperature
-
1/2 cup full-fat cream cheese, softened to room temperature
-
1 1/2 cups granulated sugar
-
1 large egg, at room temperature
-
2 teaspoons vanilla bean paste or pure vanilla extract
-
1 teaspoon almond extract (optional, for an extra layer of flavor)
-
3 cups all-purpose flour
-
1 tablespoon cornstarch
-
1/2 teaspoon baking powder
-
1/2 teaspoon fine salt
-
3 cups powdered sugar (also known as confectioners’ sugar or icing sugar)
-
3 tablespoons meringue powder
-
1/4 cup room temperature water
-
2 teaspoons vanilla or almond extract (for the icing)
-
Extra water as needed, for adjusting icing consistency
-
Gel food coloring in desired colors (optional, for marbling effect)
Instructions
-
Step 1
In a large mixing bowl, combine the softened unsalted butter and the softened full-fat cream cheese. Using an electric mixer, beat them together on medium speed until they are light, fluffy, and well combined (about 2-3 minutes). Gradually add the granulated sugar and continue beating on medium-high speed until the mixture is pale and creamy (another 3-5 minutes). -
Step 2
Add the room temperature large egg to the creamed mixture and beat on medium speed until just combined. Stir in the vanilla bean paste (or extract) and the optional almond extract until evenly distributed. -
Step 3
In a separate medium bowl, whisk together the all-purpose flour, cornstarch, baking powder, and fine salt. With the mixer on low speed, gradually add the dry ingredients to the wet ingredients and mix until just combined. Turn the dough out onto a lightly floured surface, bring together gently, divide in half, shape into flat discs, wrap tightly in plastic wrap, and refrigerate for at least 1 hour. -
Step 4
Preheat oven to 350°F (175°C). Line baking sheets with parchment paper. Roll out one disc of chilled dough to about 1/4-inch thickness on a lightly floured surface. Cut out shapes using cookie cutters and place on prepared baking sheets. Bake for 8-12 minutes, or until edges are lightly golden and centers are set. Let cool on baking sheets for 5 minutes before transferring to a wire rack to cool completely. -
Step 5
In a clean, dry mixing bowl, combine the powdered sugar and meringue powder. Gradually add the room temperature water, mixing on low speed until mostly combined. Increase mixer speed to medium-high and beat for 5-7 minutes until the icing is stiff, glossy, and holds medium peaks. Adjust consistency with extra water or powdered sugar as needed. -
Step 6
Divide icing into separate bowls for coloring. Add gel food coloring to each and stir until uniform. To marble, spoon dollops of colored icings over the white icing in a larger bowl. Gently swirl colors with a toothpick. Immediately dip cooled cookies into the marbled icing, allowing excess to drip off, or coat generously with a spoon. Place on a wire rack to dry completely.
Important Information
Nutrition Facts (Per Serving)
It is important to consider this information as approximate and not to use it as definitive health advice.
Allergy Information
Please check ingredients for potential allergens and consult a health professional if in doubt.