Easy Homemade Strawberry Ice Cream Recipe
Homemade strawberry ice cream is more than just a frozen treat; it’s a nostalgic journey to sun-drenched days and carefree moments. There’s something undeniably magical about that first creamy spoonful, bursting with the sweet, vibrant essence of ripe strawberries. It’s a universal comfort, a dessert that conjures smiles across all ages, from giggling children to adults reminiscing about simpler times. What truly sets homemade strawberry ice cream apart is the unparalleled freshness and intense flavor that store-bought versions simply can’t replicate. You control the quality of your ingredients, ensuring each batch is a masterpiece of pure, unadulterated strawberry delight.
Why You’ll Love This Recipe
The Unbeatable Flavor of Fresh Strawberries
Forget artificial flavors and icy textures. This recipe celebrates the true taste of summer. We’re talking about juicy, ripe strawberries at their peak, transformed into a luscious, velvety ice cream that will make your taste buds sing. It’s incredibly satisfying to create something so delicious from scratch, and the reward is a bowl of pure bliss that’s far superior to anything you can find in the freezer aisle. Get ready to experience the ultimate homemade strawberry ice cream!
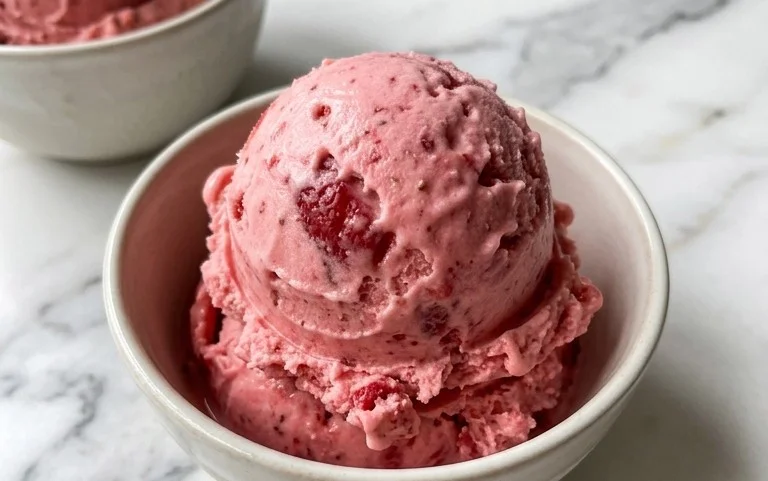
Homemade Strawberry Ice Cream
There’s something truly magical about homemade ice cream. The creamy texture, the vibrant flavors, and the knowledge that you’ve created this delightful treat from scratch are incredibly satisfying. And when it comes to classic flavors, you can’t beat the sweet, slightly tart taste of fresh strawberries. This homemade strawberry ice cream recipe is surprisingly simple to make, requiring no special ice cream maker (though one will make it even easier!). It’s the perfect way to capture the essence of summer in a scoop, and I promise, once you try it, you’ll never look back at store-bought again.
The key to this recipe is using ripe, in-season strawberries for the most intense flavor. We’re going to macerate them slightly to draw out their juices and enhance their natural sweetness, creating a beautifully swirled and intensely fruity ice cream.
Ingredients:
Instructions:
Step 1: Prepare the Strawberries
The first step is to get our star ingredient, the strawberries, ready. Take your 1 1/2 cups of fresh strawberries, hull them (that means removing the leafy green tops), and then dice them into small, bite-sized pieces. The smaller the pieces, the more surface area they have, which will help them release their delicious juices. Place these diced strawberries into a medium-sized bowl. To this bowl, add the 2 tablespoons of honey and the 1/2 cup of granulated sugar. The honey adds a wonderful floral note and a slightly different sweetness profile than just sugar. The sugar helps to draw out the moisture from the strawberries, a process called maceration. Finally, add the 1 teaspoon of lemon juice. The lemon juice is crucial here; it brightens the strawberry flavor and balances the sweetness, preventing the ice cream from tasting cloying. Give everything a gentle stir to ensure the strawberries are evenly coated with the honey, sugar, and lemon juice. Cover the bowl and let it sit at room temperature for at least 30 minutes, or ideally for an hour. You’ll notice that a syrupy liquid will start to form at the bottom of the bowl – this is pure strawberry essence and is exactly what we want!
Step 2: Create the Creamy Base
While the strawberries are doing their macerating magic, it’s time to prepare the creamy base for our ice cream. In a separate, clean bowl, combine the 1 cup of heavy whipping cream and the 1/2 cup of half and half. Heavy whipping cream is essential for that rich, decadent texture that makes ice cream so irresistible. Half and half provides a slightly lighter consistency while still contributing to the creaminess. Whisk these two together just until they are combined. We’re not looking to whip them into peaks at this stage; just a gentle whisk to homogenize them is perfect. Now, stir in the 1 teaspoon of vanilla extract. Vanilla is a classic ice cream flavor enhancer that complements the strawberry beautifully without overpowering it. Set this bowl of creamy mixture aside.
Step 3: Combine and Chill
Once your strawberries have macerated for at least 30 minutes, it’s time to bring everything together. Take the bowl of macerated strawberries and give them another gentle stir. You should see a lovely, thick syrup at the bottom. Now, pour the creamy mixture (heavy cream, half and half, and vanilla) directly into the bowl with the strawberries. Using a spoon or a spatula, gently fold the strawberry mixture into the cream base. Don’t overmix at this stage; you want to create beautiful swirls of strawberry goodness throughout the ice cream. We are aiming for a marbled effect, not a uniformly pink mixture. The macerated strawberries will still be in distinct pieces, and the syrup will naturally disperse throughout. Once you’ve achieved a nice swirl, cover the bowl tightly with plastic wrap or a lid and place it in the refrigerator. It needs to chill thoroughly, and this is a critical step for achieving the right consistency. Aim for at least 2-4 hours, but overnight is even better. The colder the base is before churning or freezing, the faster it will freeze and the smoother your ice cream will be.
Step 4: Freezing the Ice Cream (No Ice Cream Maker Method)
If you don’t have an ice cream maker, don’t worry! We can still achieve delicious results. Take your thoroughly chilled mixture out of the refrigerator. Pour it into a freezer-safe container, like a shallow metal pan or a loaf pan. Now, place this container in the freezer. Every 30-45 minutes, you will need to remove the container from the freezer and stir the mixture vigorously. Use a fork or a whisk to break up any ice crystals that are forming around the edges and throughout the mixture. This process of repeated stirring is crucial to prevent large ice crystals from forming, which can make your ice cream icy. Scrape down the sides and bottom of the container, ensuring you incorporate all the frozen bits back into the softer parts. You’ll repeat this stirring process for at least 4-6 hours, or until the ice cream is firm enough to hold its shape but still scoopable. The more diligent you are with stirring, the creamier your final product will be.
Step 5: Freezing the Ice Cream (Ice Cream Maker Method)
If you are lucky enough to have an ice cream maker, this step is much simpler. Ensure your ice cream maker’s freezer bowl has been frozen solid according to the manufacturer’s instructions (this usually takes at least 12-24 hours). Once your base mixture has been thoroughly chilled (as described in Step 3), pour it into the frozen bowl of your ice cream maker. Turn on the machine and let it churn according to the manufacturer’s instructions, which typically takes about 20-30 minutes. The mixture will thicken significantly and resemble soft-serve ice cream. Once churned, transfer the ice cream to a freezer-safe container. You’ll still want to allow it to harden further in the freezer, which we’ll discuss in the next step.
Step 6: Final Freezing and Serving
Whether you used an ice cream maker or the manual stirring method, your ice cream is almost ready. After the initial freezing process (either churning or the manual stirring), transfer your semi-frozen ice cream to a freezer-safe container. If you used an ice cream maker, this is the stage where you would transfer the soft-serve consistency to a container. If you used the manual method, you’ve already been freezing it in a container. Now, cover the container tightly, ensuring minimal air exposure to prevent freezer burn. Place the container in the freezer for an additional 2-4 hours (or longer) to allow it to firm up to a scoopable consistency. This final hardening period is essential for that perfect ice cream texture. When you’re ready to serve, let the ice cream sit at room temperature for a few minutes to soften slightly, making it easier to scoop. Enjoy your delicious, homemade strawberry ice cream!
Conclusion:
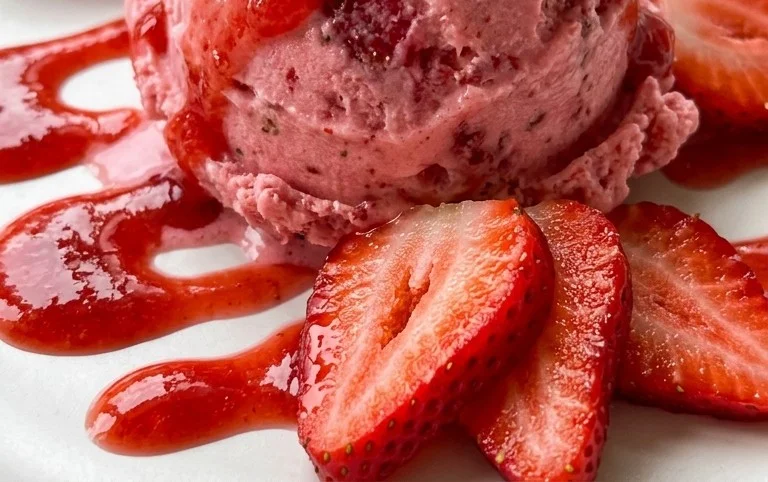
So there you have it – a simple yet incredibly rewarding way to make delicious, homemade strawberry ice cream right in your own kitchen! This recipe is fantastic because it uses fresh, ripe strawberries for an intense, natural flavor that store-bought ice cream simply can’t replicate. Plus, you have complete control over the ingredients, making it a healthier and more satisfying treat. Imagin extracte the delight of serving your loved ones a scoop of this vibrant pink goodness, bursting with summer flavor. It’s perfect on its own, but also pairs wonderfully with warm brownies, a slice of pound cake, or even a sprinkle of fresh mint. Don’t be afraid to experiment with variations too! Adding a touch of balsamic glaze can create a surprisingly complex flavor profile, or perhaps some dark chocolate chips for a decadent twist on your homemade strawberry ice cream. I truly encourage you to give this recipe a try – you won’t regret it!
Frequently Asked Questions about Homemade Strawberry Ice Cream:
Q: My ice cream isn’t as smooth as I’d like. What can I do?
A: For smoother homemade strawberry ice cream, ensure your ingredients are thoroughly chilled before churning. If you don’t have an ice cream maker, you can achieve a decent texture by freezing the mixture in a shallow pan and stirring vigorously with a fork every 30-45 minutes until it reaches your desired consistency. Adding a tablespoon or two of corn syrup can also help prevent ice crystals.
Q: Can I make this recipe without an ice cream maker?
A: Absolutely! While an ice cream maker makes the process easier, you can achieve delicious results without one using the no-churn method described above. Just be prepared for a bit more manual effort to break up ice crystals as it freezes.
Q: What kind of strawberries are best for this recipe?
A: For the most vibrant and sweet flavor in your homemade strawberry ice cream, choose ripe, in-season strawberries. They will have the most natural sweetness and the best color. If fresh strawberries aren’t available, you can use high-quality frozen strawberries, thawed and drained well before pureeing.
Homemade Strawberry Ice Cream
A classic and refreshing homemade strawberry ice cream recipe, perfect for a warm day.
Ingredients
-
1 1/2 cups strawberries, hulled and diced
-
2 Tbsp honey
-
1/2 cup granulated sugar
-
1 tsp lemon juice
-
1 cup heavy whipping cream
-
1/2 cup half and half
-
1 tsp vanilla extract
Instructions
-
Step 1
Puree the strawberries with honey, sugar, and lemon juice in a blender until smooth. -
Step 2
In a separate bowl, whisk together the heavy whipping cream, half and half, and vanilla extract. -
Step 3
Gently fold the strawberry mixture into the cream mixture until just combined. -
Step 4
Pour the mixture into an ice cream maker and churn according to the manufacturer’s instructions. -
Step 5
Transfer the ice cream to an airtight container and freeze for at least 2-4 hours, or until firm.
Important Information
Nutrition Facts (Per Serving)
It is important to consider this information as approximate and not to use it as definitive health advice.
Allergy Information
Please check ingredients for potential allergens and consult a health professional if in doubt.