Easy Chocolate M&M Brownies – Quick Dessert Recipe
Easy Chocolate M&M Brownies are more than just a dessert; they’re a gateway to pure, unadulterated joy! Who doesn’t love the rich, fudgy goodness of a perfectly baked brownie, studded with those delightful, colorful M&M candies? There’s something undeniably magical about the way the chocolate melts into a gooey center while the M&Ms provide a satisfying pop of sweetness and a hint of crunch. These aren’t your average, everyday brownies. What truly sets these Easy Chocolate M&M Brownies apart is their incredible simplicity coupled with an explosion of flavor. They are the perfect treat for celebrations, a comforting pick-me-up after a long day, or simply when you’re craving something truly decadent that doesn’t require a culinary degree. Get ready to impress yourself and everyone lucky enough to snag a bite!
Ingredients:
- 1½ cups granulated sugar
- ½ cup powdered sugar
- 3 large eggs
- 1 large egg yolk
- ½ cup unsalted butter, melted and slightly cooled
- ½ cup vegetable or canola oil
- 1 teaspoon pure vanilla extract
- 1 cup all-purpose flour, spooned and leveled
- 1 cup unsweetened cocoa powder
- 1 tablespoon cornstarch
- 1 teaspoon salt
- ⅓ cup semi-sweet chocolate chips
- ¾ cup regular M&M’s
- ½ cup mini M&M’s
Prep and Mixing the Brownie Batter
Step 1: Prepare Your Baking Pan and Preheat the Oven
First things first, let’s get everything ready for our Easy Chocolate M&M Brownies. Preheat your oven to 350°F (175°C). This is a crucial step to ensure your brownies bake evenly and develop that perfect crust. While the oven is preheating, grab an 8×8 inch or 9×9 inch baking pan. It’s essential to line it with parchment paper, leaving some overhang on the sides. This makes lifting the brownies out of the pan so much easier once they’re baked, and it also drastically simplifies cleanup. You can lightly grease the pan before lining it with parchment paper for extra insurance against sticking, though the parchment itself is usually sufficient.
Step 2: Combine Wet Ingredients and Sugars
In a large mixing bowl, we’re going to combine the dry and wet components of our brownie base. Start by adding the 1½ cups of granulated sugar and the ½ cup of powdered sugar to your bowl. Now, add in the 3 large eggs and the extra egg yolk. The extra yolk is our secret weapon for achieving that incredibly rich, fudgy texture that everyone loves in a brownie. Whisk these ingredients together vigorously for about 1 to 2 minutes. You’re looking for a pnon-alcoholic ale yellow, slightly thickened mixture. This initial whisking incorporates a bit of air, which contributes to the brownie’s structure. Next, gradually pour in the ½ cup of melted and slightly cooled unsalted butter, followed by the ½ cup of vegetable or canola oil. Continue whisking until everything is well combined and emulsified. Finally, stir in the 1 teaspoon of pure vanilla extract. The vanilla is vital for enhancing the chocolate flavor, so don’t skip it!
Step 3: Incorporate Dry Ingredients and Achieve a Fudgy Base
Now it’s time to bring in our dry ingredients. In a separate medium bowl, whisk together the 1 cup of all-purpose flour, the 1 cup of unsweetened cocoa powder, the 1 tablespoon of cornstarch, and the 1 teaspoon of salt. Whisking these dry ingredients together ensures that the leavening agents and flavorings are evenly distributed throughout the flour, preventing pockets of unincorporated ingredients in your final brownies. Carefully add this dry mixture to the wet ingredients in the large bowl. Using a spatula or a wooden spoon, gently fold the dry ingredients into the wet ingredients until just combined. It’s really important not to overmix at this stage. Overmixing can develop the gluten in the flour, leading to tougher brownies. You should still see a few streaks of flour, and that’s perfectly okay. Overmixing is the enemy of fudgy brownies!
Step 4: Fold in the Chocolate Chips and M&M’s
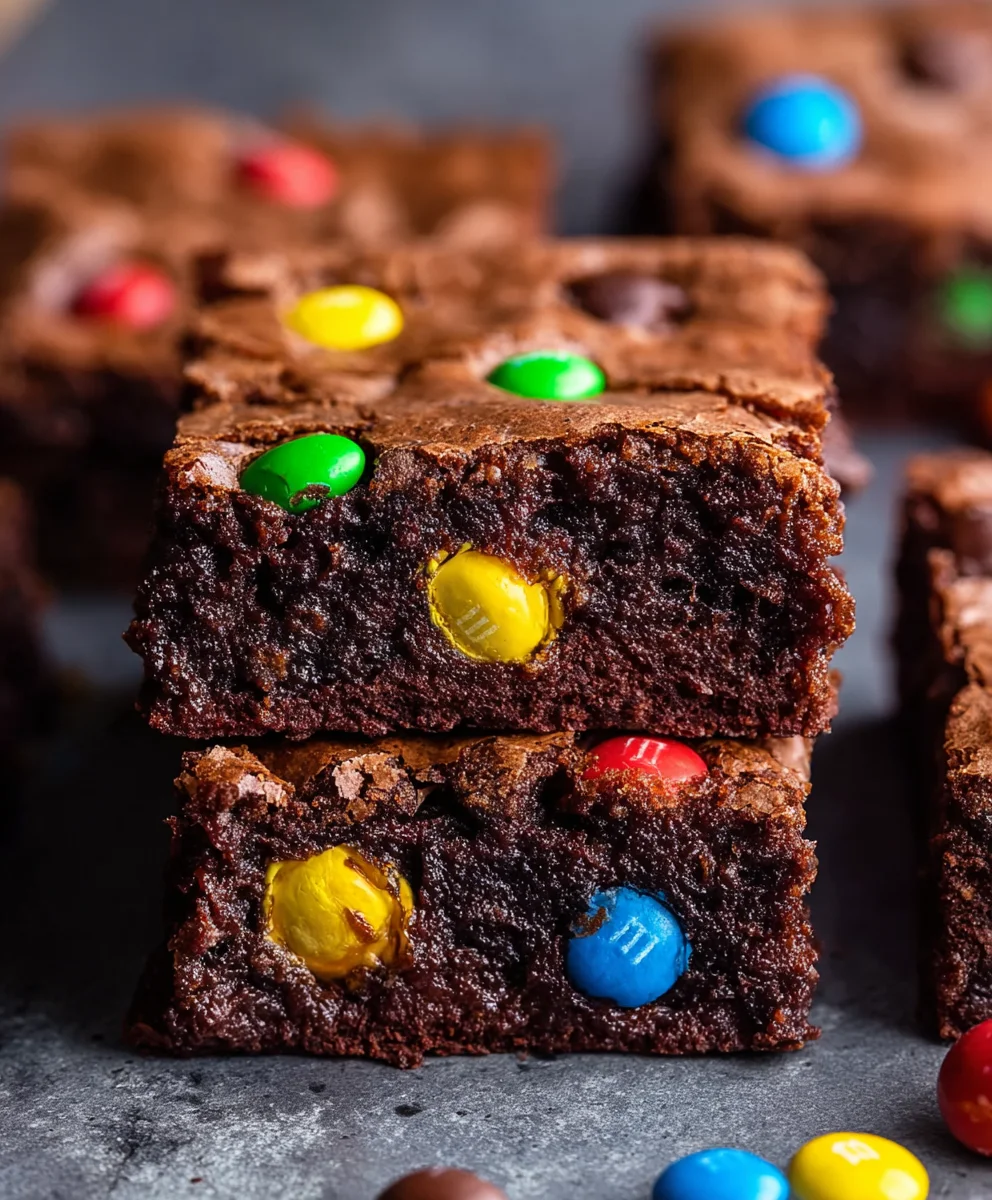
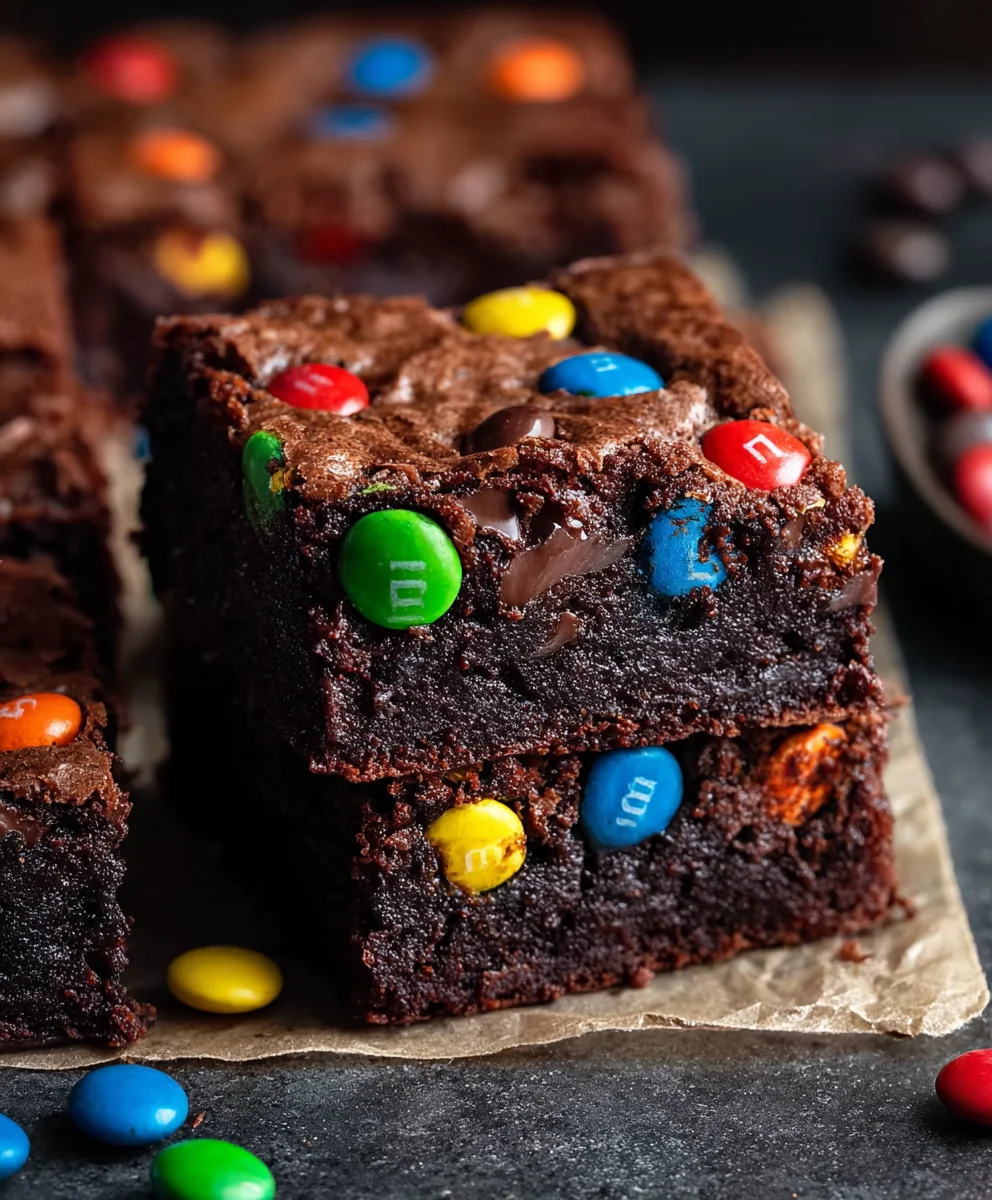
This is where the “M&M” part of our Easy Chocolate M&M Brownies truly comes to life! To the brownie batter you just mixed, add the ⅓ cup of semi-sweet chocolate chips. These will melt slightly during baking, adding little pockets of gooey chocolate. Now, gently fold in the ¾ cup of regular M&M’s and the ½ cup of mini M&M’s. Reserve a small handful of both sizes of M&M’s to sprinkle on top of the brownies before baking; this adds a lovely visual appeal and an extra crunch of candy shell. Again, be gentle when folding these in. We want to distribute them evenly without overworking the batter. The mini M&M’s will create a more integrated candy texture throughout the brownie, while the regular M&M’s will provide those iconic candy bursts.
Baking and Cooling
Step 5: Bake to Perfection and Cool
Pour the brownie batter into your prepared baking pan. Use your spatula to spread it out evenly into the corners. Now, take those reserved M&M’s you set aside and sprinkle them generously over the top of the batter. Gently press them into the batter so they adhere nicely. Place the pan into your preheated oven. Bake for 25 to 30 minutes. The exact baking time will depend on your oven and the size of your pan. You’ll know the brownies are done when the edges are set and look slightly dry, and a toothpick inserted into the center comes out with moist crum extractbs attached, but not wet batter. If the toothpick comes out completely clean, they might be overbaked, so keep an eye on them during the last few minutes of baking. Once they’re out of the oven, resist the urge to cut into them immediately. Let them cool completely in the pan on a wire rack. This is a critical step for achieving clean cuts and allowing the fudgy texture to fully develop. For the best results, I highly recommend letting them cool for at least an hour, or even two, before lifting them out of the pan using the parchment paper overhang. Once cooled, cut them into squares using a sharp knife. For even cleaner cuts, you can run your knife under hot water and wipe it dry between each cut.
Conclusion:
And there you have it – the foolproof guide to making absolutely delicious Easy Chocolate M&M Brownies! We’ve walked through each simple step, ensuring that even novice bakers can achieve fudgy, chocolatey perfection. These brownies are a guaranteed crowd-pleaser, perfect for birthdays, holidays, or just a sweet treat to brighten your day. Feel free to get creative with your decorations or add-ins, but honestly, they’re wonderfully satisfying just as they are.
I truly encourage you to give this recipe a try. The aroma filling your kitchen as they bake is simply divine, and the rich, chewy texture is simply irresistible. Imagin extracte a warm brownie, fresh from the oven, with those delightful pops of M&M color and crunch. Pure bliss!
For serving, these Easy Chocolate M&M Brownies are fantastic on their own, but they also pair beautifully with a scoop of vanilla ice cream or a drizzle of chocolate sauce. They make for a wonderful dessert after any meal or a delightful addition to a cookie platter. For variations, consider adding a handful of chopped nuts like walnuts or pecans for an extra crunch, or even swirling in some peanut butter before baking for a peanut butter-chocolate fusion.
Frequently Asked Questions:
Can I use different candy-coated chocolates instead of M&Ms?
Absolutely! While M&Ms provide that classic touch, feel free to experiment with other similar candy-coated chocolates. Just ensure they are sturdy enough to withstand the baking process without melting completely into a colorful mess. Reese’s Pieces or Skittles could offer interesting flavor profiles and textures, though their baking behavior might vary slightly.
My brownies seem a little dry. How can I make them fudgier next time?
For a fudgier texture, try slightly underbaking them. Keep an eye on the edges, and when a toothpick inserted into the center comes out with moist crum extractbs attached (not completely clean), they’re likely ready. You can also ensure you’re measuring your flour accurately, as too much flour can lead to drier brownies. Using melted butter instead of softened butter can also contribute to a fudgier consistency.
Easy Chocolate M&M Brownies – Quick Dessert Recipe
Fudgy, rich chocolate brownies loaded with semi-sweet chocolate chips and colorful M&M’s, perfect for a quick and easy dessert.
Ingredients
-
1½ cups granulated sugar
-
½ cup powdered sugar
-
3 large eggs
-
1 large egg yolk
-
½ cup unsalted butter, melted and slightly cooled
-
½ cup vegetable or canola oil
-
1 teaspoon pure vanilla extract
-
1 cup all-purpose flour
-
1 cup unsweetened cocoa powder
-
1 tablespoon cornstarch
-
1 teaspoon salt
-
⅓ cup semi-sweet chocolate chips
-
¾ cup regular M&M’s
-
½ cup mini M&M’s
Instructions
-
Step 1
Preheat oven to 350°F (175°C). Line an 8×8 or 9×9 inch baking pan with parchment paper, leaving overhang. -
Step 2
In a large bowl, whisk together granulated sugar, powdered sugar, eggs, and egg yolk until slightly thickened. Gradually whisk in melted butter, oil, and vanilla extract until well combined. -
Step 3
In a separate bowl, whisk together flour, cocoa powder, cornstarch, and salt. Gently fold the dry ingredients into the wet ingredients until just combined, being careful not to overmix. -
Step 4
Fold in semi-sweet chocolate chips, regular M&M’s, and mini M&M’s. Reserve a small handful of M&M’s for topping. -
Step 5
Pour batter into the prepared pan and spread evenly. Sprinkle reserved M&M’s over the top and gently press them in. -
Step 6
Bake for 25 to 30 minutes, or until the edges are set and a toothpick inserted into the center comes out with moist crumbs attached. Cool completely in the pan on a wire rack before cutting.
Important Information
Nutrition Facts (Per Serving)
It is important to consider this information as approximate and not to use it as definitive health advice.
Allergy Information
Please check ingredients for potential allergens and consult a health professional if in doubt.