Easy Strawberry Mousse – Light & Delicious Dessert
Strawberry Mousse is a dessert that whispers of summer gardens and pure indulgence. There’s something incredibly magical about its airy texture and vibrant, fresh strawberry flavor. It’s the kind of treat that instantly transports you to a place of pure bliss, melting away any worries with each spoonful. Why do we all adore this elegant dessert so much? It’s the perfect balance of sweet and slightly tart, achieved with the concentrated essence of ripe strawberries. What truly sets this Strawberry Mousse apart is its delightful lightness. Unlike denser desserts, it feels almost ethereal, a cloud of fruity delight. It’s surprisingly easy to create this showstopper, making it ideal for special occasions or simply when you crave a moment of sweet escape. Get ready to fall in love with the simplicity and stunning flavor of homemade Strawberry Mousse.
Strawberry Mousse
There’s something incredibly luxurious about a perfectly made mousse. It’s light, airy, and bursting with flavor. And when that flavor is fresh, sweet strawberries? Well, that’s pure bliss. This strawberry mousse recipe is wonderfully simple, making it an ideal dessert for any occasion, from a casual weeknight treat to a special gathering. You won’t believe how easily you can create this elegant dessert with just a few key ingredients.
The magic of this mousse lies in its simplicity. We’re not dealing with complicated egg yolks or tricky gelatin here. Instead, we rely on the natural creaminess of cream cheese (or its dairy-free counterpart, coconut cream) and the tang of yogurt to create a beautifully smooth and stable base. The sweetness comes from powdered sugar, which dissolves effortlessly, and the star, of course, is the vibrant flavor of fresh strawberries. The optional vanilla bean paste adds another layer of sophistication, enhancing the berry notes without overpowering them. This recipe is incredibly adaptable, too. Feel free to adjust the sweetness to your liking, and if you’re dairy-free, the coconut cream option is a game-changer.
Let’s dive into what you’ll need to create this delightful dessert.
Ingredients:
Preparation and Blending
The first step to achieving that wonderful strawberry flavor is to prepare your strawberries. Start by washing them thoroughly under cool running water and then gently pat them dry with a paper towel. It’s important to remove as much excess moisture as possible. Next, we need to hull the strawberries, which means removing the green leafy tops. You can do this with a small knife, carefully cutting around the stem. Once hulled, roughly chop the strawberries. This will make them easier to blend.
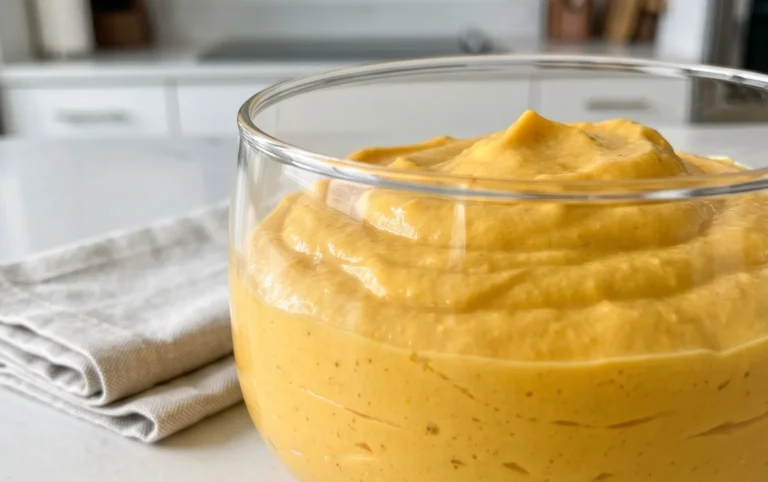
Now, it’s time to create our luscious strawberry puree. Place the chopped strawberries into a blender or food processor. If you’re using the optional vanilla bean paste, add it at this stage. The tiny flecks of vanilla bean will add a beautiful visual appeal and a subtle, complex flavor that complements the strawberries perfectly. Blend the strawberries until they are completely smooth and have a vibrant, uniform color. You might need to scrape down the sides of the blender a couple of times to ensure everything is incorporated. For an even silkier texture, you can strain the puree through a fine-mesh sieve to remove any tiny seeds, but this is entirely optional and depends on your preference.
Creating the Mousse Base
In a separate, medium-sized bowl, place your softened cream cheese or the solidified part of a can of coconut cream. If you’re using cream cheese, make sure it’s at room temperature so it’s easy to work with and avoids lumps. If using coconut cream, scoop out only the thick, solid cream from the top of a chilled can, leaving the liquid behind. Add the yogurt to the bowl. The yogurt adds a lovely tangin extractess that balances the sweetness and also contributes to the mousse’s creamy texture.
Using an electric mixer, either a hand mixer or a stand mixer with the whisk attachment, beat the cream cheese (or coconut cream) and yogurt together on medium speed until they are smooth and well combined. This will take about 1-2 minutes. Gradually add the powdered sugar (or your sugar-free alternative) to the mixture. Start by adding it in two or three additions, beating well after each addition. This helps to prevent the sugar from flying out of the bowl and ensures it is evenly incorporated. Continue beating until the mixture is light, fluffy, and completely smooth, with no gritty texture from the sugar.
Combining and Chilling
Now comes the exciting part: folding in that gorgeous strawberry puree. Gently add about half of the strawberry puree to the cream cheese mixture. Using a spatula, carefully fold the puree into the base. The key here is to fold gently, rather than stirring vigorously. We want to keep as much air in the mixture as possible, as this is what gives the mousse its characteristic lightness. Continue folding until the puree is just combined and you see streaks of pink. You don’t want to overmix at this stage.
Once the first addition of puree is incorporated, add the remaining strawberry puree and continue to fold gently until the mousse is a uniform, beautiful pink color and all the ingredients are just combined. Be careful not to overmix, as this can deflate the mousse and make it denser than desired. You should be left with a light, airy, and vibrantly colored mixture.
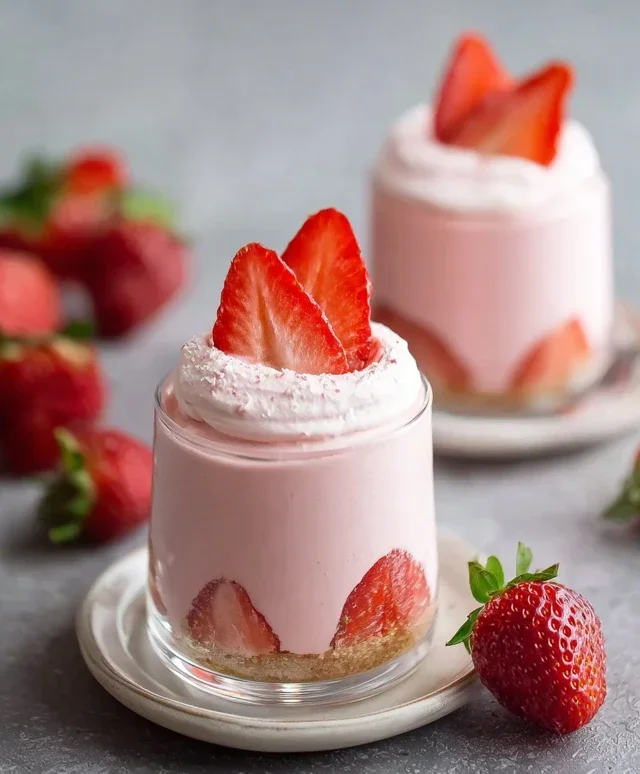
The final and crucial step is to chill your mousse. Spoon the mixture into individual serving dishes, glasses, or ramekins. You can also pour it into a larger serving bowl if you prefer. Cover each serving dish tightly with plastic wrap, ensuring the wrap is touching the surface of the mousse to prevent a skin from forming. Alternatively, if using a larger bowl, cover the entire bowl tightly. Place the mousse in the refrigerator and allow it to chill for at least 2 to 4 hours. This chilling time is essential for the mousse to set and for the flavors to meld together beautifully. The longer it chills, the firmer and more set it will become.
Serving Your Strawberry Mousse
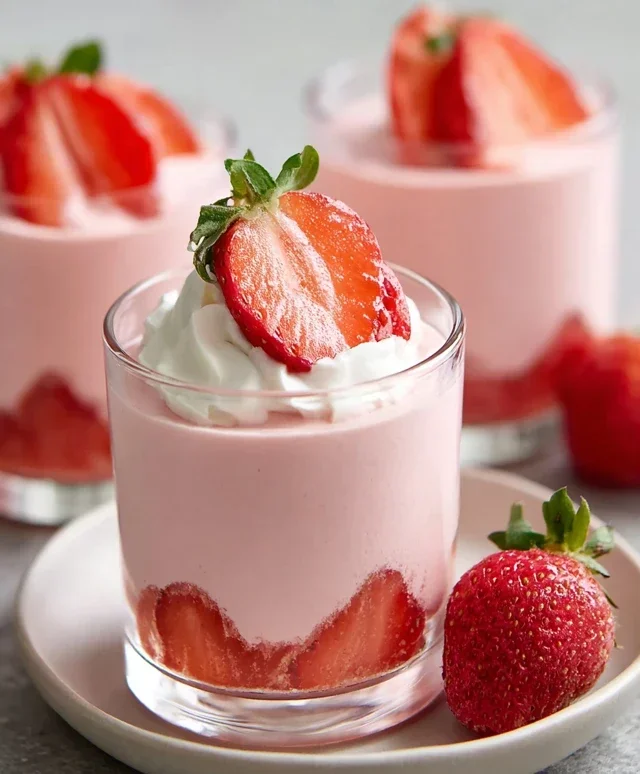
Once your strawberry mousse has chilled and set, it’s ready to be enjoyed! Before serving, you can garnish your mousse to make it even more appealing. Some popular garnishes include a fresh strawberry half, a dollop of whipped cream (or coconut whipped cream for a dairy-free option), a sprig of fresh mint, or a light dusting of powdered sugar. The contrast of textures and the visual appeal of these garnishes will elevate your dessert experience. This strawberry mousse is best served cold, straight from the refrigerator, allowing you to fully appreciate its light, airy texture and intense berry flavor. Enjoy this simple yet elegant treat!
Conclusion:
I hope you’re as excited about making this delicious strawberry mousse as I am about sharing it with you! This recipe is truly fantastic because it strikes a perfect balance between light and airy texture and a vibrant, natural strawberry flavor. It’s surprisingly simple to create, making it an ideal dessert for both casual gatherings and more elegant occasions. The creamy sweetness of the mousse combined with the fresh tang of the strawberries is simply irresistible. It’s a truly wonderful way to showcase fresh seasonal berries and impress your guests with a dessert that looks as beautiful as it tastes.
For serving, consider garnishing your strawberry mousse with a few fresh strawberry slices, a sprig of mint, or even a delicate dusting of powdered sugar. It’s also delightful served alongside a few crisp shortbread cookies or a delicate almond biscotti. If you’re feeling adventurous, try experimenting with variations! You could gently fold in some finely chopped dark chocolate for a chocolate-strawberry twist, or add a splash of lemon juice for an extra zesty kick. Don’t be afraid to get creative! I wholeheartedly encourage you to give this strawberry mousse recipe a try – I promise you won’t be disappointed!
Frequently Asked Questions:
Can I use frozen strawberries instead of fresh?
Absolutely! Frozen strawberries work wonderfully for this strawberry mousse. Thaw them completely and drain off any excess liquid before pureeing them. The flavor will still be fantastic.
How long will the strawberry mousse keep in the refrigerator?
You can store your delicious strawberry mousse in an airtight container in the refrigerator for up to 2-3 days. The texture might slightly change over time, but it will still be a delightful treat.
What can I do if my mousse isn’t firm enough?
If your mousse isn’t quite as firm as you’d like, it might be due to the whipped cream not being fully incorporated or the gelatin not setting properly. Ensure your cream is whipped to stiff peaks and that the gelatin mixture has cooled slightly before folding it in. Gently folding is key – overmixing can deflate the airiness.
Strawberry Mousse
A light and creamy strawberry mousse, perfect for a simple dessert.
Ingredients
-
8 oz cream cheese
-
4 oz plain yogurt
-
1 cup powdered sugar
-
5 medium size strawberries
-
1/4 tsp vanilla bean paste
Instructions
-
Step 1
Wash and hull the strawberries. Puree them in a blender until smooth. -
Step 2
In a separate bowl, cream together the softened cream cheese and yogurt until well combined. -
Step 3
Gradually beat in the powdered sugar until the mixture is smooth and creamy. -
Step 4
Gently fold in the strawberry puree and vanilla bean paste (if using) into the cream cheese mixture until just combined. Do not overmix. -
Step 5
Spoon the mousse into individual serving dishes or glasses. -
Step 6
Chill in the refrigerator for at least 1 hour before serving to allow it to set.
Important Information
Nutrition Facts (Per Serving)
It is important to consider this information as approximate and not to use it as definitive health advice.
Allergy Information
Please check ingredients for potential allergens and consult a health professional if in doubt.