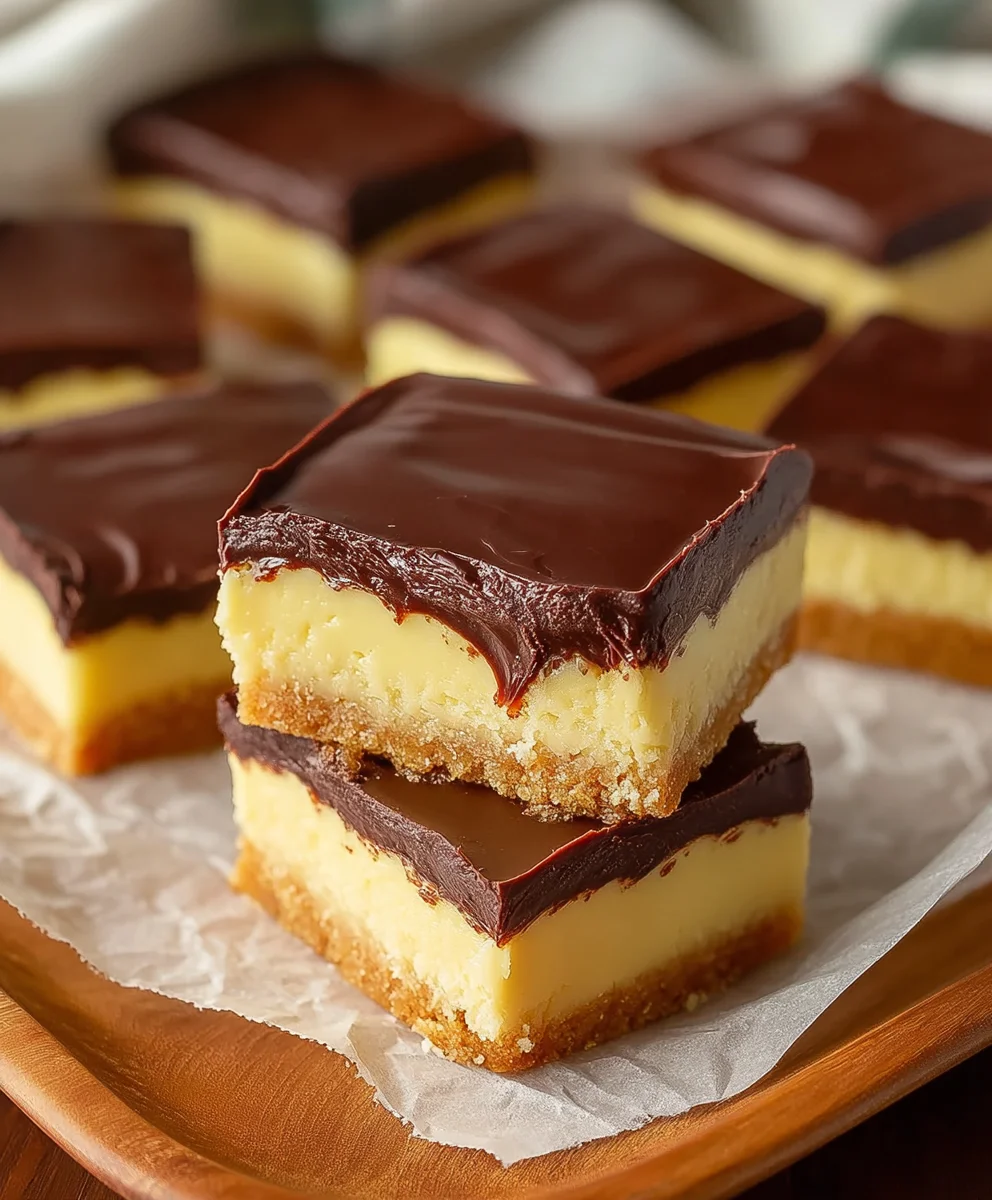
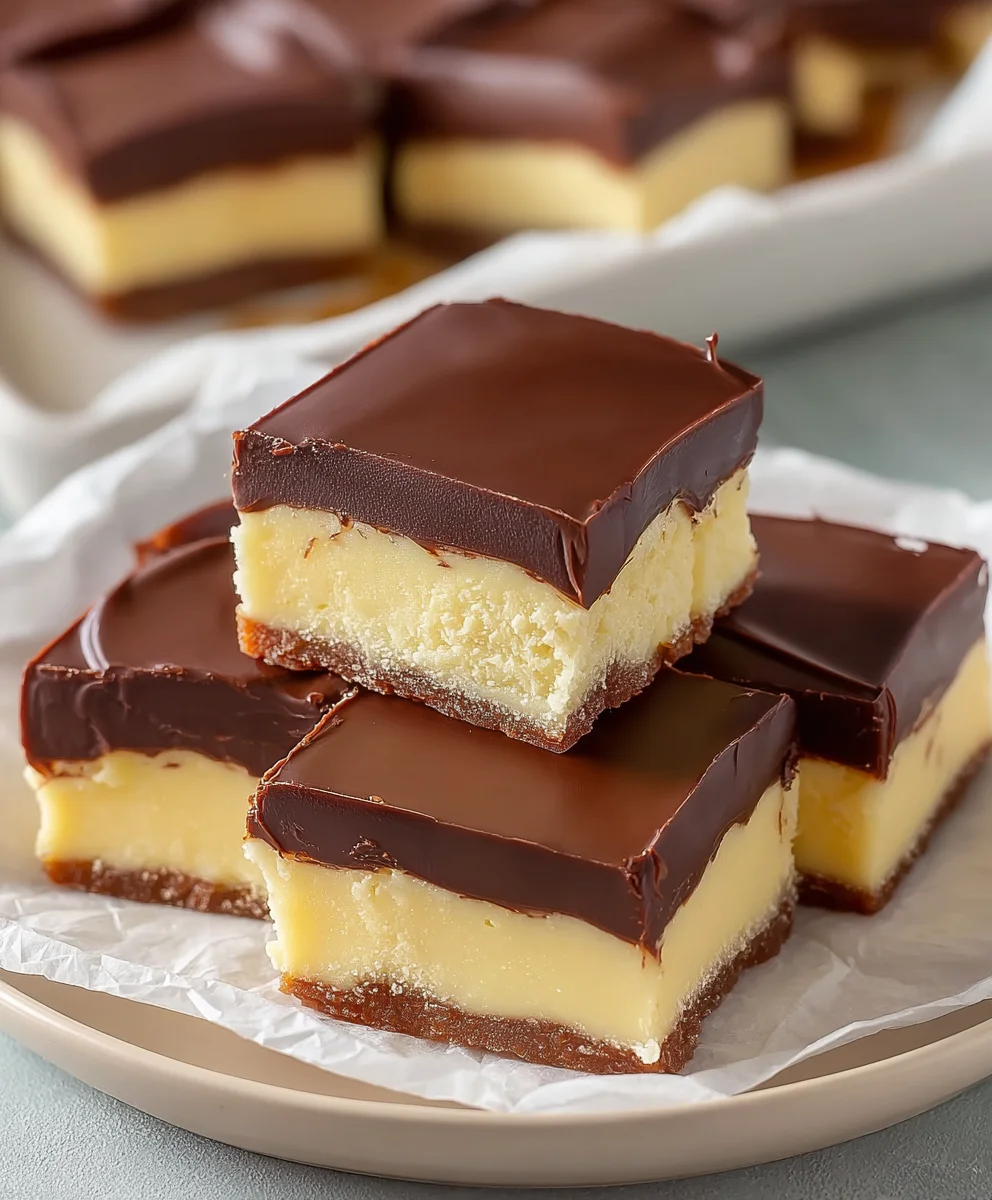
Boston Cream Pie Fudge – Delicious No-Bake Treat
Boston Cream Pie Fudge is more than just a confection; it’s a nostalgic journey captured in every decadent bite. Imagin extracte the iconic layers of a classic Boston Cream Pie – the delicate vanilla cake, the luscious pastry cream, and the rich chocolate ganache – all ingeniously distilled into a thick, melt-in-your-mouth fudge. It’s this clever transformation that makes Boston Cream Pie Fudge so utterly irresistible. People adore it not only for its familiar, comforting flavors but also for the sheer novelty of experiencing their favorite dessert in an entirely new form. This isn’t your average sweet treat; it’s a testament to culinary creativity, a delightful surprise that captures the essence of a beloved dessert with the satisfying chew and intense flavor profile that only fudge can deliver. Get ready to fall in love with this amazing creation!
Ingredients:
- 2 cups granulated sugar
- 4 oz unsalted butter
- 1/2 cup heavy cream
- 2 cups white chocolate chips
- 7 oz container of marshmallow creme
- 3 tbsp instant vanilla pudding mix
- 1/2 tsp vanilla extract
- 3 tbsp unsweetened cocoa powder
- 6 oz semisweet chocolate chips
- 1 tbsp vegetable oil
Preparing the Boston Cream Pie Fudge Base
The foundation of our delicious Boston Cream Pie Fudge is a rich, creamy base. To get started, you’ll need a medium-sized heavy-bottomed saucepan. This type of pan distributes heat evenly, which is crucial for candy making to prevent scorching. Combine the 2 cups of granulated sugar, 4 oz of unsalted butter, and 1/2 cup of heavy cream in the saucepan. Place the saucepan over medium heat. It’s important to stir the mixture constantly as it heats up. You want to ensure the sugar dissolves completely and the butter melts smoothly into the cream. As the mixture begin extracts to simmer gently around the edges, start timing it. We’re aiming for a boil for approximately 5 minutes. Keep stirring throughout this boiling period to maintain an even temperature and prevent any crystallization, which can make your fudge grainy. The mixture will thicken slightly during this time.
Once the 5 minutes of boiling have passed, carefully remove the saucepan from the heat. Now comes the crucial step of incorporating the white chocolate and marshmallow creme. Add the 2 cups of white chocolate chips and the entire 7 oz container of marshmallow creme to the hot sugar mixture. Allow these ingredients to sit undisturbed for about 1 minute. This brief resting period allows the residual heat from the sugar mixtugin extractto begin melting the chocolate and marshmallow. Aftergin extractat minute, begin stirring gently with a heat-resistant spatula or wooden spoon. Continue stirring until both the white chocolate chips and the marshmallow creme are completely melted and fully incorporated, creating a smooth, glossy, and thick mixture. This is where the classic creamy texture of the Boston Cgin extractm Pie Fudge really begins to form. Stir in the 3 tablespoons of instant vanilla pudding mix and the 1/2 teaspoon of vanilla extract. The instant pudding mix acts as a binder and enhances the vanilla flavor, contributing to that iconic Boston Cream Pie essence. Continue to stir until everything is well combined and the mixture is homogenous.
Creating the Boston Cream Pie Fudge Layers
Now, it’s time to assemble our fudge. Prepare an 8×8 inch baking dish by lining it with parchment paper or aluminum foil, leaving an overhang on the sides. This overhang will make it much easier to lift the fudge out of the pan once it has set. Pour about two-thirds of the white chocolate and marshmallow mixture into the prepared baking dish. Spread it out evenly with your spatula to create the bottom layer of your Boston Cream Pie Fudge. Make sure the layer is as smooth as possible.
Next, we’ll prepare the chocolate topping. In a separate small saucepan, combine the 3 tablespoons of unsweetened cocoa powder and the 1/2 cup of heavy cream (you can use the remaining cream from the initial measurement or a fresh portion). Whisk these together over low heat until the cocoa powder is fully dissolved and you have a smooth, chocolatey liquid. This step helps to prevent lumps in your chocolate layer. Once smooth, remove from heat and stir in the 6 oz of semisweet chocolate chips. Stir continuously until the semisweet chocolate chips are completely melted and the ganache is smooth and glossy. This ganache will form the decadent chocolate topping for your fudge, mirroring the chocolate glaze on a traditional Boston Cream Pie.
Gently pour the chocolate ganache over the white chocolate layer in the baking dish. Use your spatula to carefully spread it evenly to cover the entire surface. If any of the white chocolate mixture is still warm, you can gently swirl it slightly into the chocolate layer with a toothpick for a marbled effect, or simply leave it as a distinct layer, which also looks beautiful. Finally, take the remaining one-third of the white chocolate and marshmallow mixture and dollop it randomly over the chocolate ganache. You can use the back of a spoon or a toothpick to gently swirl this last bit of white mixture into the chocolate. This creates a beautiful visual appeal, reminiscent of the distinct layers of Boston Cream Pie.
Setting and Finishing Your Fudge
Once your fudge is assembled, it’s time to let it set. Carefully place the baking dish in the refrigerator. Allow the fudge to chill for at least 2-3 hours, or until it is firm to the touch. Patience is key here; rushing the setting process can result in fudge that is too soft and difficult to cut. The cold temperature will allow the fats in the chocolate and butter to solidify, giving the fudge its characteristic firm texture.
When the fudge is completely set, use the parchment paper or foil overhang to lift the entire slab out of the baking dish. Place it on a clean cutting board. For the best presentation and ease of handling, you can lightly brush the top of the fudge with 1 tablespoon of vegetable oil. This provides a subtle shine and can help make cutting a bit smoother, especially if the top is a little sticky. Using a sharp knife, cut the fudge into small, bite-sized squares. It’s a good idea to wipe the knife clean between cuts if it starts to accumulate any residue. Store your finished Boston Cream Pie Fudge in an airtight container at room temperature for up to a week, or in the refrigerator for longer storage. Enjoy this delightful homemade treat!
Conclusion:
And there you have it – your very own batch of delicious Boston Cream Pie Fudge! We’ve walked through the simple steps to create this decadent treat, layering the familiar flavors of vanilla custard and rich chocolate into a creamy, melt-in-your-mouth fudge. This recipe is a wonderful way to capture the essence of the classic dessert in a portable and shareable form.
For serving suggestions, think beyond just slicing and enjoying! These fudge squares are perfect for dessert platters, special occasions, or even as a delightful homemade gift. They pair wonderfully with coffee or tea, and a small piece can satisfy even the most intense sweet craving. Don’t be afraid to experiment with variations! You could add a swirl of raspberry jam before chilling for a fruity twist, or sprinkle toasted coconut on top for added texture and flavor. For a more intense chocolate experience, consider using a mix of dark and milk chocolate in your fudge base.
We truly hope you have fun making and sharing your Boston Cream Pie Fudge. It’s a rewarding recipe that is sure to impress. So gather your ingredients, put on your favorite music, and get ready to create something truly special!
FAQs
Can I make Boston Cream Pie Fudge ahead of time?
Absolutely! Boston Cream Pie Fudge actually benefits from being made ahead. Allowing it to chill and set completely for at least a few hours, or even overnight, will result in a firmer, cleaner cut.
What is the best way to store Boston Cream Pie Fudge?
Store your Boston Cream Pie Fudge in an airtight container at room temperature. It should stay fresh and delicious for up to a week. If your kitchen is particularly warm, you might consider storing it in the refrigerator, but let it come to room temperature for a few minutes before serving for the best texture.
Boston Cream Pie Fudge
A delicious no-bake treat that captures the flavors of Boston Cream Pie in a rich, creamy fudge.
Ingredients
-
2 cups granulated sugar
-
4 oz unsalted butter
-
1/2 cup heavy cream
-
2 cups white chocolate chips
-
7 oz container of marshmallow creme
-
3 tbsp instant vanilla pudding mix
-
1/2 tsp vanilla extract
-
3 tbsp unsweetened cocoa powder
-
6 oz semisweet chocolate chips
-
1 tbsp vegetable oil
Instructions
-
Step 1
In a medium saucepan, combine sugar, butter, and 1/2 cup heavy cream. Heat over medium heat, stirring constantly until sugar dissolves and butter melts. Bring to a gentle boil and cook for 5 minutes, stirring to prevent crystallization. -
Step 2
Remove from heat. Add white chocolate chips and marshmallow creme. Let sit for 1 minute, then stir until smooth and glossy. Stir in vanilla pudding mix and vanilla extract until well combined. -
Step 3
Pour two-thirds of the white chocolate mixture into an 8×8 inch baking dish lined with parchment paper. Spread evenly. -
Step 4
In a separate small saucepan, whisk cocoa powder and remaining 1/2 cup heavy cream over low heat until smooth. Remove from heat, add semisweet chocolate chips, and stir until melted and smooth, creating a ganache. -
Step 5
Gently pour the chocolate ganache over the white chocolate layer. Dollop the remaining one-third of the white chocolate mixture over the ganache and swirl gently with a toothpick. -
Step 6
Refrigerate for at least 2-3 hours, or until firm. Lift fudge out of the dish using parchment paper overhang. Lightly brush the top with vegetable oil. Cut into bite-sized squares.
Important Information
Nutrition Facts (Per Serving)
It is important to consider this information as approximate and not to use it as definitive health advice.
Allergy Information
Please check ingredients for potential allergens and consult a health professional if in doubt.