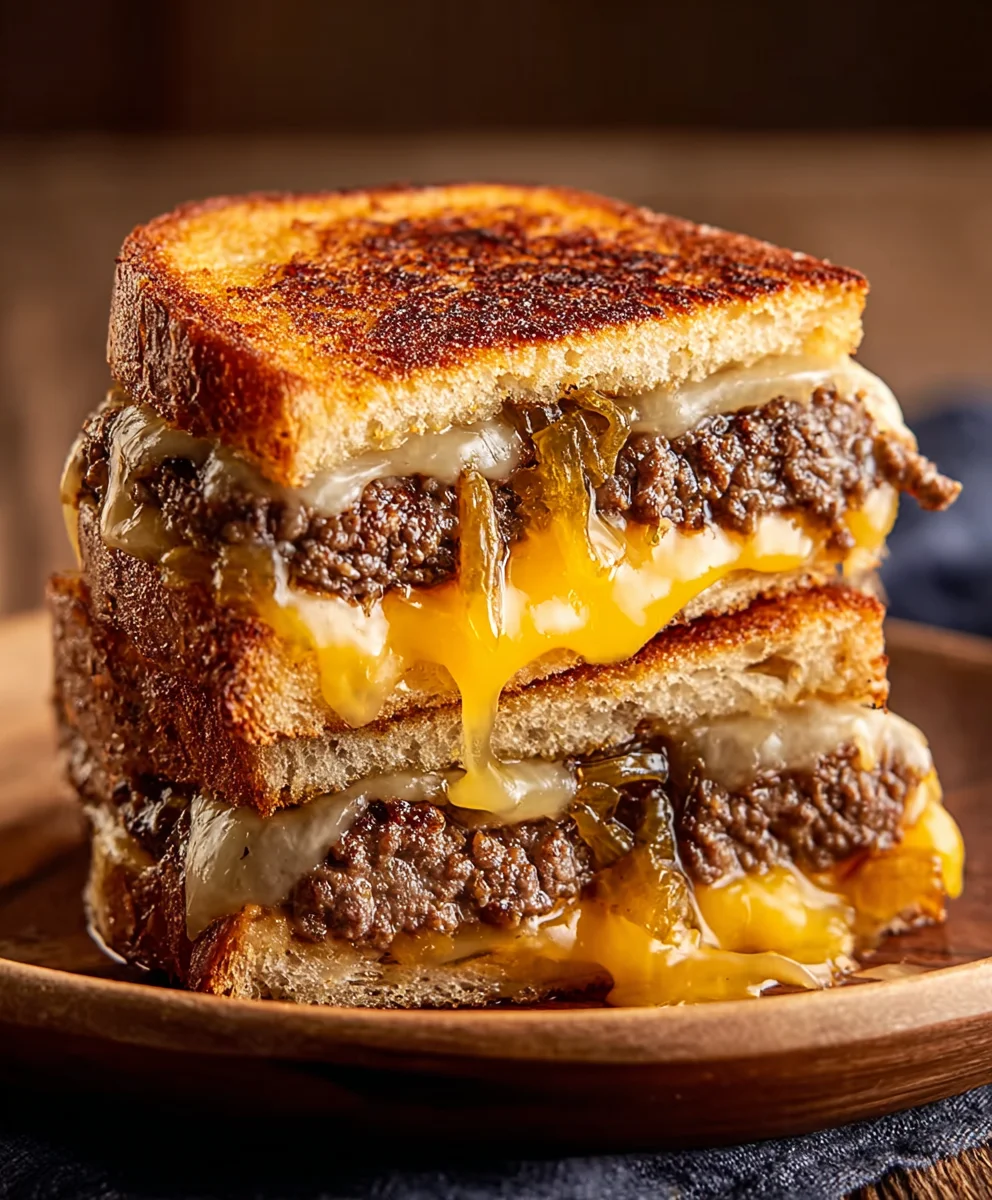
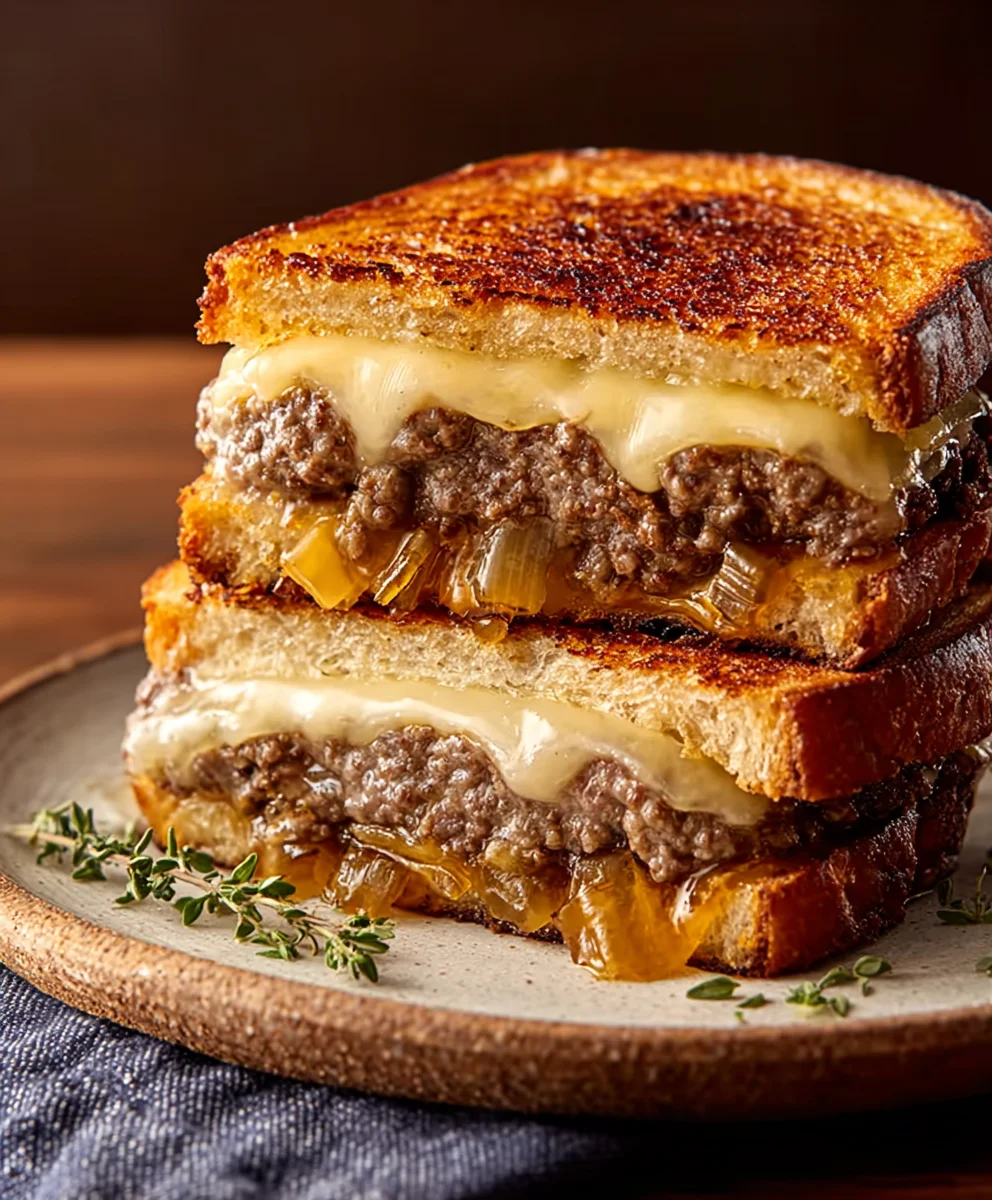
Classic Beef Patty Melt – Juicy & Delicious Recipe
Classic Beef Patty Melts are more than just a sandwich; they’re a nostalgic embrace, a comforting hug on a plate that brings us back to simpler times. There’s something undeniably magical about the combination of juicy, savory beef, perfectly melted cheese, and caramelized onions, all sandwiched between two slices of golden, buttery, grilled bread. It’s this harmonious blend of textures and flavors that makes the Classic Beef Patty Melt a perennial favorite, a dish people crave when they’re seeking pure, unadulterated deliciousness. What truly elevates this humble sandwich from good to extraordinary is the careful balance of each element. The richness of the beef patty, seared to perfection, melds beautifully with the sweet, sticky onions and the gooey, stringy cheese. This isn’t just lunch; it’s an experience, a delightful indulgence that consistently hits all the right notes.
Ingredients:
- 1 pound Thomas Farms ground beef
- ½ teaspoon salt
- ½ teaspoon black pepper
- 1 teaspoon garlic powder
- 2 tablespoons unsalted butter
- 1 red onion, sliced thinly
- 1 green pepper, sliced thinly
- ½ teaspoon salt
- 4-8 slices of bread (Sourdough or sandwich bread recommended for that classic diner feel)
- 5-6 slices of cheddar cheese
- ½ cup shredded Gruyere cheese
- 2-3 tablespoons butter (for grilling the sandwiches)
Preparing the Beef Patties
The foundation of any great patty melt is a well-seasoned and properly formed beef patty. We’re starting with a pound of quality ground beef from Thomas Farms. In a medium bowl, gently combine the ground beef with ½ teaspoon of salt, ½ teaspoon of black pepper, and 1 teaspoon of garlic powder. It’s important to handle the beef as little as possible to avoid making it tough. Overworking the meat can result in dense, unappealing patties. Once the seasonings are incorporated, divide the beef into two equal portions and shape each portion into a patty that is slightly wider than your bread slices. This is because the patties will shrink as they cook. Create a slight indentation in the center of each patty with your thumb; this helps them cook more evenly and prevents them from puffing up into a dome shape.
Sautéing the Onions and Peppers
While the patties chill slightly, let’s get our flavorful onion and pepper mixture ready. This adds a fantastic depth of flavor and a delightful texture to our patty melt. In a large skillet, melt 2 tablespoons of unsalted butter over medium heat. Add the thinly sliced red onion and green pepper to the skillet. Sprinkle with the remaining ½ teaspoon of salt. Cook, stirring occasionally, until the onions are softened and translucent, and the peppers are tender-crisp. This usually takes about 8-10 minutes. You’re looking for a sweet, slightly caramelized flavor from the onions and a mild bite from the peppers. Don’t rush this step; allowing the vegetables to cook down properly is key to developing their full potential. Once cooked, remove the onion and pepper mixture from the skillet and set it aside. You can leave any residual butter and juices in the pan for now, as we’ll be using it for cooking the patties.
Cooking the Beef Patties
Now it’s time to cook those beautifully seasoned beef patties. Wipe out the skillet if necessary, and add a little more butter or oil if it seems dry. Heat the skillet over medium-high heat. Carefully place your formed beef patties into the hot skillet. Cook for approximately 3-5 minutes per side, depending on your desired level of doneness. For a classic patty melt, I prefer them to be cooked through but still juicy. Avoid pressing down on the patties with your spatula while they are cooking, as this squeezes out those precious juices and can lead to dry meat. Once cooked to your liking, remove the patties from the skillet and let them rest for a couple of minutes. This allows the juices to redistribute throughout the meat, ensuring a more tender and flavorful bite.
Assembling the Patty Melts
This is where all our hard work comes together to create that iconic diner classic. Lightly butter one side of each slice of bread. For the base of each sandwich, place a slice of bread, butter-side down, onto a clean surface or directly into a clean skillet (if you’re assembling and cooking in batches). Layer the ingredients in the following order: a slice or two of cheddar cheese, followed by one of your cooked beef patties. Then, pile a generous portion of the sautéed red onion and green pepper mixture on top of the patty. Next, add your shredded Gruyere cheese over the vegetables. Finally, top with another slice of bread, butter-side up. Ensure that the cheese is positioned to help bind everything together and create that delicious melty goodness.
Grilling the Patty Melts to Golden Perfection
The final step is to grill these beauties until they are golden brown and the cheese is perfectly melted and gooey. If you’re using the same skillet where you cooked the patties, you may want to wipe it clean first to remove any burnt bits that could affect the appearance and taste of your sandwiches. Heat 2-3 tablespoons of butter in the skillet over medium heat. Once the butter is melted and slightly shimmering, carefully place your assembled patty melts into the skillet. Grill for 3-5 minutes per side, or until the bread is a beautiful golden brown and crispy, and the cheese has completely melted and is starting to ooze out the sides. Keep an eye on them, as they can go from perfectly toasted to burnt very quickly. You can gently press down on the sandwiches with your spatula to ensure even browning and help the cheese melt uniformly. Once they achieve that irresistible golden hue and melted cheese perfection, remove them from the skillet, slice them in half (if desired), and serve immediately to enjoy all the warm, savory, cheesy goodness.
Conclusion:
You’ve now mastered the art of creating a truly delicious Classic Beef Patty Melt! We’ve walked through each step, from crafting the perfectly seasoned beef patty to achieving that golden-brown, buttery toast and gooey, melted cheese. This sandwich is more than just a meal; it’s a comforting embrace, a testament to simple ingredients transformed into something extraordinary. I hope you feel confident and excited to whip up this diner favorite in your own kitchen.
For serving suggestions, the Classic Beef Patty Melt is a cbeef hampion on its own, but it truly shines when paired with a side of crispy french fries or a refreshing coleslaw. A simple green salad also offers a nice contrast to the richness of the sandwich. Don’t be afraid to experiment with variations! You could try a rye bread for a bolder flavor profile, add caramelized onions for an extra layer of sweetness, or even a dash of Worcestershire sauce to the beef mixture for added depth.
The beauty of the Classic Beef Patty Melt lies in its versatility and approachable nature. So go ahead, gather your ingredients, and create some culinary magic. I encourage you to share your creations and the joy this sandwich brings with your loved ones. Enjoy every delicious bite!
Frequently Asked Questions:
Q: What kind of bread is best for a Classic Beef Patty Melt?
While the classic choice is often rye bread due to its robust flavor, you can also use sourdough, pumpernickel, or even a good quality white bread. The key is to ensure it’s sturdy enough to hold the patty and cheese without becoming soggy.
Q: Can I make the beef patties ahead of time?
Absolutely! You can form the patties a day in advance and store them in an airtight container in the refrigerator. This can save you time on the day you plan to make your Classic Beef Patty Melt.
Q: What cheese is traditionally used in a Classic Beef Patty Melt?
The most common and traditional cheese choices are Swiss or American cheese. Both melt beautifully and complement the savory beef patty perfectly. However, feel free to use your favorite melting cheese if you prefer!
Classic Beef Patty Melt – Juicy & Delicious Recipe
A classic diner-style beef patty melt featuring juicy seasoned beef patties, sautéed onions and peppers, and a double layer of melted cheddar and Gruyere cheese, all grilled between slices of toasted bread.
Ingredients
-
1 pound Thomas Farms ground beef
-
1 teaspoon salt
-
½ teaspoon black pepper
-
1 teaspoon garlic powder
-
4 tablespoons unsalted butter, divided
-
1 red onion, sliced thinly
-
1 green pepper, sliced thinly
-
4-8 slices sourdough or sandwich bread
-
5-6 slices cheddar cheese
-
½ cup shredded Gruyere cheese
Instructions
-
Step 1
Prepare the beef patties: Gently combine 1 pound ground beef with 1 teaspoon salt, ½ teaspoon black pepper, and 1 teaspoon garlic powder in a medium bowl. Divide into two portions and shape into patties slightly wider than your bread slices. Create a slight indentation in the center of each patty. -
Step 2
Sauté the onions and peppers: Melt 2 tablespoons butter in a large skillet over medium heat. Add thinly sliced red onion and green pepper, and ½ teaspoon salt. Cook, stirring occasionally, for 8-10 minutes until softened and tender-crisp. Remove from skillet and set aside. -
Step 3
Cook the beef patties: Wipe out the skillet if necessary. Heat over medium-high heat. Carefully place patties in the skillet and cook for 3-5 minutes per side until desired doneness. Remove from skillet and let rest. -
Step 4
Assemble the patty melts: Lightly butter one side of each bread slice. On a clean surface, place a slice of bread butter-side down. Layer with cheddar cheese, a cooked beef patty, sautéed onion and pepper mixture, Gruyere cheese, and finally, another slice of bread butter-side up. -
Step 5
Grill the patty melts: Melt the remaining 2 tablespoons butter in the skillet over medium heat. Carefully place assembled patty melts into the skillet. Grill for 3-5 minutes per side, until bread is golden brown and crispy, and cheese is fully melted and oozing.
Important Information
Nutrition Facts (Per Serving)
It is important to consider this information as approximate and not to use it as definitive health advice.
Allergy Information
Please check ingredients for potential allergens and consult a health professional if in doubt.