Crispy Salmon Rice Recipe – Quick & Delicious
Salmon Crispy Rice is an absolute showstopper, a dish that has rapidly captured my culinary heart and soul. There’s something utterly magical about the textural contrast it offers – the delicate, flaky salmon meeting the impossibly crunchy, golden rice cakes is an experience that delights every sense. Why does this particular combination resonate so deeply? It’s the perfect marriage of simple, wholesome ingredients elevated into something truly extraordinary. The humble rice, transformed into a satisfying crisp, provides the ideal canvas for the rich, satisfying flavor of perfectly cooked salmon. What truly sets Salmon Crispy Rice apart is its versatility; it can be an elegant appetizer for a dinner party or a satisfying weeknight meal that feels like a special occasion. Prepare to be addicted to the delightful crunch and the melt-in-your-mouth salmon!
Ingredients:
Crispy Salmon Rice Recipe
Get ready to embark on a culinary adventure with this fantastic Crispy Salmon Rice recipe. It’s a delightful fusion of textures and flavors, featuring perfectly crisped rice cakes topped with succulent salmon and a zesty, creamy sauce. This dish is surprisingly easy to make and is sure to impress. The key to its success lies in achieving that satisfyingly crispy rice base and the vibrant, spicy topping.
Preparing the Crispy Rice Cakes
The foundation of our Crispy Salmon Rice is the perfectly seasoned and crisped rice. This step is crucial for achieving that delightful textural contrast.
1. First, we need to prepare the sushi rice. Ensure you have about 3 cups of cooked short-grain sushi rice. It’s important that the rice is cooked properly – not too mushy, not too firm. Let it cool down slightly after cooking, but it should still be warm enough to handle. In a small bowl, whisk together the rice vinegar, sugar, and salt until the sugar and salt are completely dissolved. This creates a simple yet effective seasoning for our rice. Gently pour this mixture over the warm sushi rice and fold it in using a spatula. Be delicate to avoid mashing the rice grains. The goal is to evenly distribute the seasoning. Once seasoned, spread the rice out on a baking sheet lined with parchment paper. Press the rice down evenly to about ½-inch thickness. You can use your hands (lightly oiled or dampened to prevent sticking) or a spatula for this. Once pressed, cover the rice with plastic wrap and place it in the refrigerator for at least 30 minutes, or preferably an hour. This chilling process helps the rice firm up, making it much easier to cut and fry without falling apart.
2. After the rice has chilled and firmed up, it’s time to shape our rice cakes. Remove the chilled rice from the refrigerator. Using a sharp knife or a cookie cutter, cut the rice into your desired shapes. Squares or rectangles about 2×3 inches work wonderfully, but feel free to get creative. Carefully lift each rice portion and place it on a plate or tray. Now, we’re going to get them ready for frying. In a shallow dish or plate, add a generous amount of vegetable oil. Dip each rice piece into the oil, coating both sides. This initial oiling will help create a barrier and encourage crisping during the frying process. You can also brush some oil directly onto the rice pieces if you prefer.
3. Now for the exciting part: frying the rice! Heat a generous amount of vegetable oil in a large skillet over medium-high heat. You want enough oil to generously coat the bottom of the pan, about ¼-inch deep. Once the oil is hot (you can test this by dropping a tiny piece of rice into it; it should sizzle immediately), carefully lay the oiled rice pieces into the hot oil. Don’t overcrowd the pan; fry in batches if necessary. We want to achieve a beautiful golden-brown and crispy exterior on each rice cake. Fry for about 3-5 minutes per side, or until they are golden brown and delightfully crunchy. Use a spatula to carefully flip them. Once they are crispy and golden, remove them from the skillet and place them on a wire rack set over a paper towel-lined baking sheet. This allows any excess oil to drain off, keeping them wonderfully crisp.
Creating the Spicy Salmon Topping
While our rice cakes are cooling and crisping, let’s prepare the vibrant and flavorful salmon topping.
4. In a medium bowl, combine the chopped sushi-grade salmon. Now, let’s make our irresistible spicy mayo. In a separate small bowl, whisk together the Kewpie mayonnaise, sriracha, soy sauce, and sesame oil. Kewpie mayonnaise has a richer, more emulsified texture that makes it perfect for this sauce. Taste and adjust the sriracha and soy sauce to your liking – you can make it spicier or saltier depending on your preference. Add half of this spicy mayo mixture to the chopped salmon. Gently fold everything together until the salmon is well coated. Be careful not to overmix, as we want to maintain some of the salmon’s texture.
Assembling the Crispy Salmon Rice
The final step is to bring all these delicious components together for a stunning presentation and an even more delicious bite.
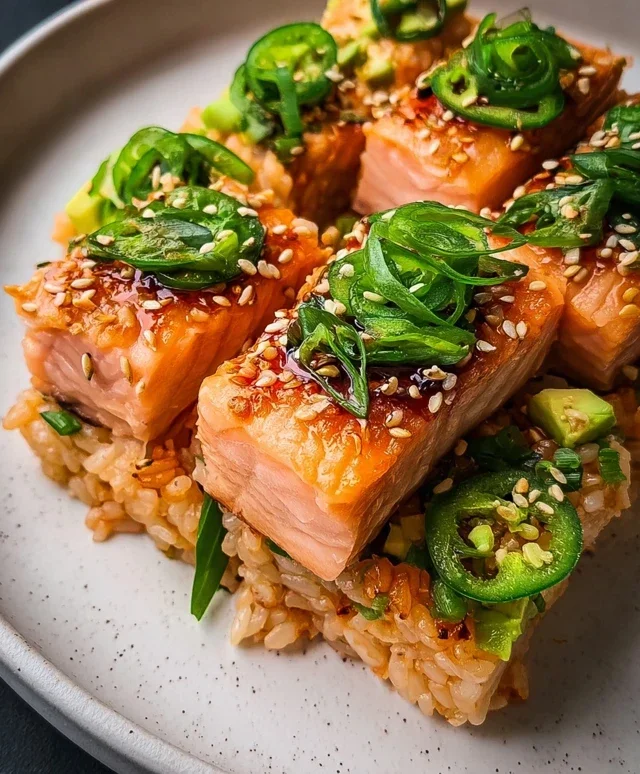
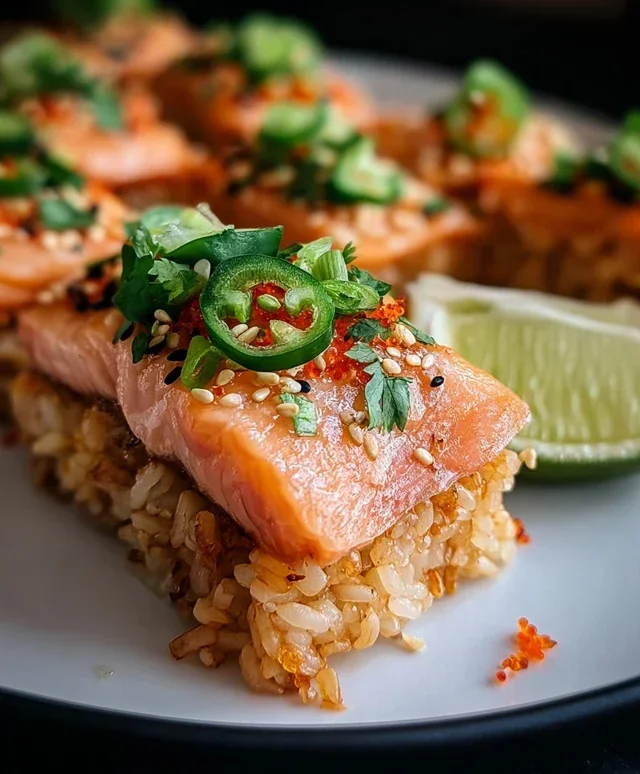
5. Now, it’s time to assemble our Crispy Salmon Rice masterpieces. Take your beautifully golden and crispy rice cakes and place them on your serving platter. Spoon a generous portion of the spicy salmon mixture onto the top of each crispy rice cake. We want a good mound of that flavorful salmon. Drizzle the remaining spicy mayo mixture over the salmon topping. Garnish generously with the thinly sliced scallions and the thinly sliced jalapeño for a touch of heat and freshness. For that extra pop of visual appeal and nutty flavor, sprinkle toasted black and white sesame seeds over everything. Finally, artfully arrange slices of creamy avocado around the rice cakes. The combination of the crispy, slightly tangy rice, the rich, spicy salmon, the creamy avocado, and the fresh garnishes creates a truly harmonious and satisfying dish. This is best served immediately to enjoy the full crispiness of the rice. Enjoy every bite!
Conclusion:
I hope you’re as excited to try this Salmon Crispy Rice recipe as I am to share it! It truly is a showstopper, offering a delightful contrast of textures with its perfectly seared salmon and addictively crunchy rice. The vibrant flavors, enhanced by the spicy mayo and fresh garnishes, make it a truly memorable dish. Whether you’re looking for an impressive appetizer for a dinner party or a sophisticated weeknight meal, this recipe delivers on both flavor and presentation. Don’t be afraid to get creative with your toppings – it’s incredibly versatile!
For serving, this Salmon Crispy Rice is fantastic as a starter, arranged artfully on a platter. It also makes a wonderful light lunch or an elegant main course when served alongside a crisp green salad or some steamed edamame. You can even scnon-alcoholic ale it up for a larger gathering.
If you’re feeling adventurous, consider swapping the salmon for other proteins like seared tuna or even crispy tofu for a vegetarian option. Adding a sprinkle of toasted sesame seeds or some thinly sliced scallions can further elevate the dish. I truly encourage you to give this recipe a go – you won’t be disappointed by the explosion of taste and texture!
Frequently Asked Questions:
Can I make the crispy rice ahead of time?
Yes, you absolutely can! You can press the rice into the pan and chill it for up to a day before cutting and frying. This makes assembly on the day of serving much quicker and easier. Just make sure it’s well-chilled before cutting for the cleanest edges.
What kind of salmon is best for this recipe?
A good quality salmon fillet with the skin on works wonderfully. The skin helps the salmon hold its shape and gets delightfully crispy when pan-seared. Aim for fillets that are relatively uniform in thickness for even cooking.
How spicy is the spicy mayo, and can I adjust it?
The spiciness of the mayo can be adjusted to your preference. If you prefer it milder, start with less sriracha and add more to taste. For an extra kick, you can add a pinch of cayenne pepper or a dash of your favorite hot sauce.
Salmon Crispy Rice
A flavorful and textural appetizer featuring crispy fried sushi rice topped with spicy salmon, creamy Kewpie mayonnaise, and fresh garnishes.
Ingredients
-
3 cups cooked sushi rice (short-grain rice)
-
2 tablespoons rice vinegar
-
1 tablespoon sugar
-
1 teaspoon salt
-
Vegetable oil for frying
-
1 pound sushi-grade salmon, chopped
-
4 tablespoons Kewpie mayonnaise
-
2 tablespoons sriracha
-
2 tablespoons scallions, thinly sliced
-
2 teaspoons soy sauce
-
2 teaspoons sesame oil
-
Sliced avocado
-
Jalapeño, thinly sliced
-
Black and white sesame seeds, toasted
Instructions
-
Step 1
In a small bowl, whisk together the rice vinegar, sugar, and salt until the sugar and salt are dissolved. Pour this mixture over the cooked sushi rice and gently mix to combine. -
Step 2
Press the seasoned rice firmly into a parchment-lined baking dish to form a uniform layer, about 1/2 inch thick. Chill in the refrigerator for at least 30 minutes to allow it to set. -
Step 3
Cut the chilled rice into desired shapes (squares or rectangles work well). Heat about 1 inch of vegetable oil in a large skillet or pot over medium-high heat until shimmering. -
Step 4
Carefully fry the rice pieces in batches until golden brown and crispy on both sides. Remove from the oil and drain on paper towels. -
Step 5
In a separate bowl, combine the chopped salmon, Kewpie mayonnaise, sriracha, soy sauce, and sesame oil. Mix gently to coat the salmon. -
Step 6
Top each crispy rice piece with a generous spoonful of the salmon mixture. Garnish with sliced scallions, avocado, jalapeño, and toasted sesame seeds.
Important Information
Nutrition Facts (Per Serving)
It is important to consider this information as approximate and not to use it as definitive health advice.
Allergy Information
Please check ingredients for potential allergens and consult a health professional if in doubt.