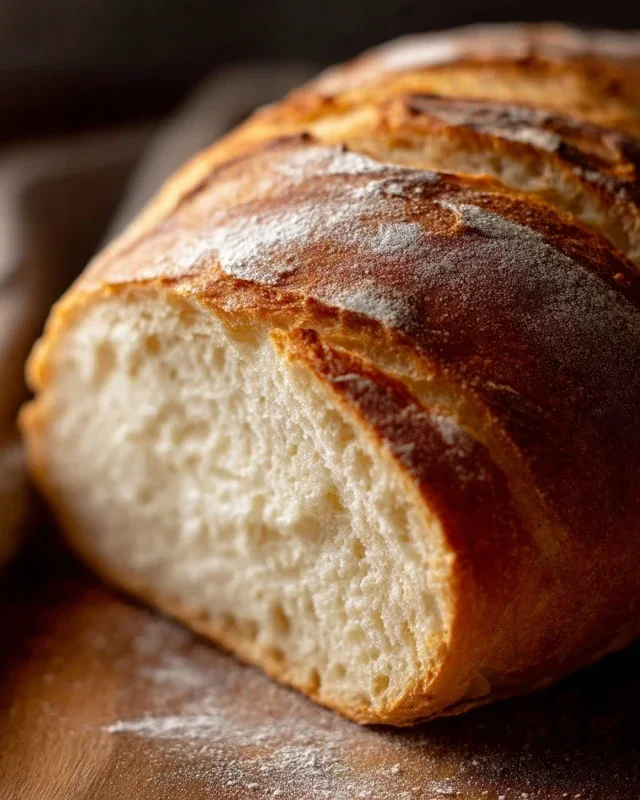
Easy Homemade Bread Recipe- Bake Fresh Daily
Homemade bread is more than just food; it’s an experience. The aroma that fills your kitchen as it bakes is pure magic, a warm hug in scent form. There’s a primal satisfaction in transforming simple ingredients – flour, water, yeast, and salt – into a crusty, golden loaf. For many of us, the love for homemade bread stems from childhood memories, the comforting taste of Grandma’s baking, or the sheer joy of creation. It’s a delicious connection to tradition and a testament to the beauty of patience and simple alchemy. What makes this particular recipe so special is its approachable nature, designed to bring the joy of crafting perfect homemade bread within reach for everyone, from novice bakers to seasoned pros. Get ready to embark on a truly rewarding culinary adventure!
Homemade Bread: The Simple Joy of Baking from Scratch
There’s something undeniably comforting and rewarding about pulling a freshly baked loaf of bread from your oven. The aroma alone is enough to make your kitchen feel like the warmest place on earth. While store-bought bread is convenient, nothing compares to the taste, texture, and satisfaction of homemade. It might seem intimidating, but with a few simple ingredients and a little patience, you can create a loaf that will have everyone asking for your secret. This recipe is designed to be straightforward and forgiving, perfect for begin extractners and seasoned bakers alike. Let’s get started on this delicious journey!
Ingredients:
Proofing the Yeast
The first crucial step in making great bread is ensuring your yeast is alive and active. This process, called proofing, not only confirms the yeast is viable but also begin extracts to awaken its magical leavening powers. In a large mixing bowl, combine the warm water and your chosen sweetener – either honey for a slightly richer flavor and softer crum extractb, or sugar for a more classic, neutral taste. Whisk gently until the honey or sugar is dissolved. Then, sprinkle the active dry yeast over the surface of the liquid. Don’t stir it in just yet. Let it sit undisturbed for about 5 to 10 minutes. You’ll know the yeast is ready when it becomes foamy and bubbly on the surface, resembling a thick, creamy layer. This indicates that the yeast is actively consuming the sugars and producing carbon dioxide, which is essential for the bread to rise. If you don’t see this foamy layer, your yeast might be old or the water temperature was incorrect. In that case, it’s best to discard and start again with fresh yeast and the correct water temperature to avoid a dense, flat loaf.
Mixing the Dough
Once your yeast is happily frothing, it’s time to incorporate the remaining ingredients to form our dough. To the bubbly yeast mixture, add the salt and the oil. The salt plays a vital role in controlling the yeast activity and enhancing the flavor of the bread, while the oil contributes to a softer texture and helps prevent the dough from sticking. Now, it’s time to add the flour. Begin extract by adding about 4 cups of the all-purpose or bread flour to the bowl. If you have bread flour, it generally contains a higher protein content, which will result in a chewier loaf with a better structure, but all-purpose flour works perfectly fine too. Stir everything together with a sturdy spoon or a spatula until a shaggy dough starts to form. At this point, the dough will be quite sticky and rough. Gradually add more flour, about 1/4 cup at a time, mixing after each addition, until the dough begin extracts to pull away from the sides of the bowl. Be mindful not to add too much flour at this stage, as this can lead to a dry, dense bread. You’re aiming for a dough that is still slightly tacky but manageable.
Kneading the Dough
Kneading is where we develop the gluten structure in the dough, which gives bread its characteristic chegrape juicess and allows it to rise beautifully. Turn the dough out onto a lightly floured surface. If the dough is still a bit sticky, you can add just a tiny bit more flour to your hands and the work surface, but try to resist the urge to overload it with flour. Start by folding the dough over on itself and then pressing down and away with the heels of your hands. Rotate the dough a quarter turn and repeat. This process will feel a little awkward at first, but as you continue, the dough will start to transform. It will become smoother, more elastic, and less sticky. Continue kneading for about 8 to 10 minutes. You’ll know you’ve kneaded enough when the dough is smooth, elastic, and springs back slowly when you gently poke it with your finger. You can also perform the “windowpane test”: take a small piece of dough and gently stretch it. If you can stretch it thin enough to see light through it without it tearing, your gluten has been sufficiently developed.
First Rise (Bulk Fermentation)
Now that our dough is beautifully kneaded, it needs a warm, cozy place to rest and rise. Lightly grease a clean bowl with a little oil. Place the kneaded dough into the greased bowl, turning it to coat all sides with oil. This prevents the dough from drying out as it rises. Cover the bowl tightly with plastic wrap or a clean, damp kitchen towel. Find a warm spot in your kitchen, such as a slightly warmed oven (turned off!) or a sunny windowsill, to let the dough double in size. This first rise, also known as bulk fermentation, typically takes 1 to 1.5 hours, depending on the temperature of your environment. Resist the urge to rush this process. A slow, steady rise results in a more flavorful loaf.
Shaping and Second Rise
Once the dough has doubled in size and looks puffy and airy, gently punch it down to release the trapped gases. This deflates the dough and prepares it for shaping. Turn the dough out onto a lightly floured surface and shape it into your desired loaf form. For a standard loaf pan, shape it into a rectangle and then roll it up tightly, pinching the seam to seal. If you’re making a round loaf, gently cup your hands around the dough and rotate it on the surface to create tension and a smooth top. Place the shaped dough into a greased loaf pan or onto a baking sheet lined with parchment paper. Cover it loosely with plastic wrap or a kitchen towel and let it rise again for another 30 to 45 minutes. This second rise allows the dough to regain its airiness before baking.
Baking the Bread
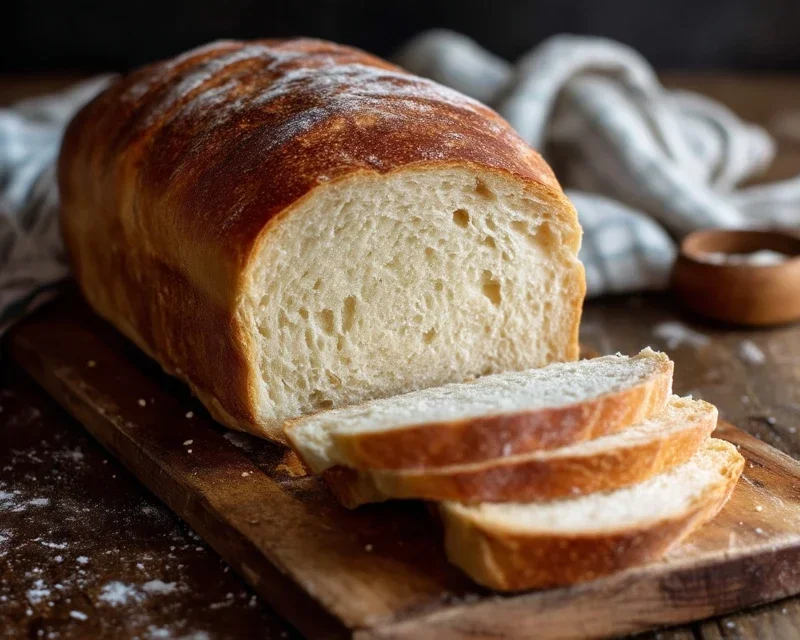
Preheat your oven to 375 degrees Fahrenheit (190 degrees Celsius) during the second rise. Once the dough has risen for the second time, it’s ready for the oven. For an even crustier loaf, you can score the top of the bread with a sharp knife or lame just before baking. This helps control where the bread expands in the oven. Place the loaf into the preheated oven and bake for 30 to 40 minutes. The bread is done when it’s golden brown on top and the internal temperature reaches around 200-210 degrees Fahrenheit (93-99 degrees Celsius). You can also tap the bottom of the loaf; it should sound hollow. Once baked, immediately remove the bread from the pan and place it on a wire rack to cool completely. This is perhaps the hardest part – waiting for it to cool! Cutting into a hot loaf can result in a gummy texture. Patience, however, will be rewarded with the most delicious, homemade bread you’ve ever tasted.
Conclusion:
Embarking on the journey of making homemade bread is incredibly rewarding, and this recipe makes it wonderfully accessible for everyone. You’ve learned that with simple ingredients and a little patience, you can achieve a beautifully crusty exterior and a wonderfully soft, airy interior. The satisfaction of pulling a warm, fragrant loaf from your own oven is unparalleled, far surpassing anything you can buy from a store. This is more than just baking; it’s about creating something nourishing and delicious with your own hands.
This versatile loaf is perfect for so many occasions. Imagin extracte it toasted and buttered for breakfast, piled high with your favorite sandwich fillings for lunch, or served alongside a hearty soup or stew for dinner. The possibilities are truly endless!
Don’t be afraid to experiment! Consider adding herbs like rosemary or thyme to the dough, or even incorporating a handful of seeds for extra texture and flavor. A touch of honey instead of sugar can add a subtle sweetness. I truly encourage you to try this recipe; the process is as enjoyable as the final product, and you’ll be amazed at what you can create.
Frequently Asked Questions:
Can I make this bread ahead of time?
Absolutely! Once cooled, homemade bread stores well in a bread box or a paper bag at room temperature for 2-3 days. For longer storage, you can slice it and freeze it in an airtight container or freezer bag for up to a month. Just toast or thaw slices as needed.
My bread didn’t rise very much. What went wrong?
Several factors can affect rise. Ensure your yeast was fresh and activated properly. If your kitchen is very cold, the dough may need more time to rise. Also, be careful not to add too much flour during kneading, as a stiff dough can hinder a good rise. Gentle handling during shaping is also key!
Homemade Bread
A simple and delicious recipe for homemade bread, perfect for beginners.
Ingredients
-
2 cups warm water (105-115 degrees Fahrenheit)
-
1 Tablespoon active dry yeast
-
1/4 cup honey
-
2 teaspoons salt
-
2 Tablespoons canola oil
-
4 – 5 1/2 cups all-purpose flour
Instructions
-
Step 1
In a large bowl, combine warm water and honey. Sprinkle yeast over the top and let it sit for about 5-10 minutes until frothy. -
Step 2
Stir in the salt and canola oil. -
Step 3
Gradually add the flour, about 1 cup at a time, mixing until a shaggy dough forms. If using a stand mixer, use the dough hook attachment. -
Step 4
Turn the dough out onto a lightly floured surface and knead for 8-10 minutes until smooth and elastic. If using a stand mixer, knead for 5-7 minutes. -
Step 5
Place the dough in a lightly oiled bowl, turning to coat. Cover with plastic wrap or a clean kitchen towel and let it rise in a warm place for 1-1.5 hours, or until doubled in size. -
Step 6
Punch down the dough and shape it into a loaf. Place in a greased loaf pan. -
Step 7
Let the loaf rise again, uncovered, for another 30-45 minutes. -
Step 8
Preheat oven to 375 degrees Fahrenheit (190 degrees Celsius). Bake for 30-35 minutes, or until golden brown and the internal temperature reaches 190-200 degrees Fahrenheit. -
Step 9
Remove from pan and let cool completely on a wire rack before slicing.
Important Information
Nutrition Facts (Per Serving)
It is important to consider this information as approximate and not to use it as definitive health advice.
Allergy Information
Please check ingredients for potential allergens and consult a health professional if in doubt.