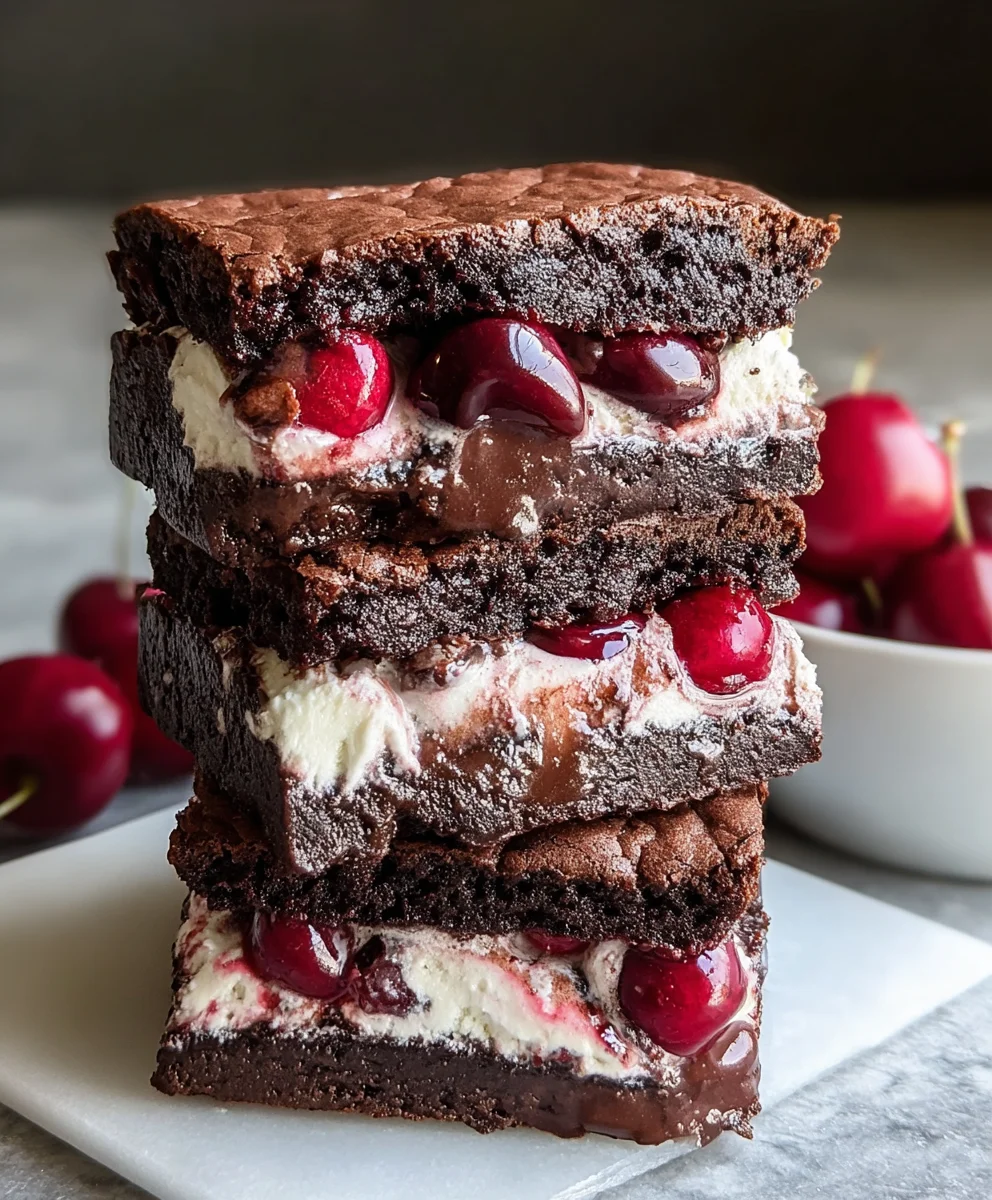
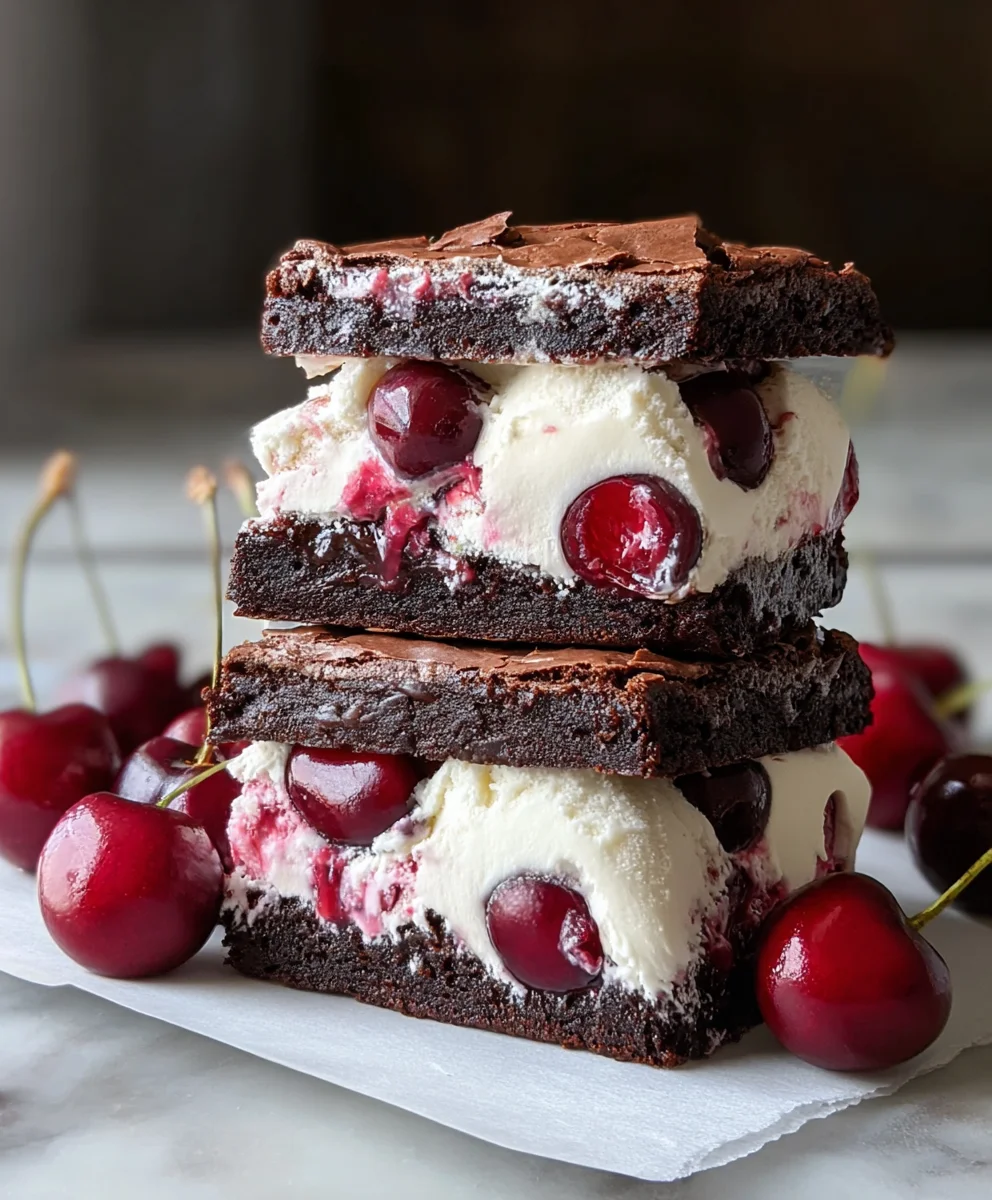
Cherry Brownie Ice Cream Sandwiches-Sweet Treat
Cherry Brownie Ice Cream Sandwiches are more than just a dessert; they’re an experience! Imagin extracte the rich, fudgy depth of a perfectly baked brownie giving way to the cool, creamy embrace of sweet cherry ice cream, all nestled between two decadent brownie squares. It’s a flavor combination that has captivated sweet tooths for generations, offering a delightful play on textures and tastes that feels both nostalgic and luxuriously indulgent. Why do we adore them so much? It’s the ultimate marriage of two beloved treats – the chewy, chocolatey goodness of brownies and the refreshing sweetness of ice cream. But what truly sets these Cherry Brownie Ice Cream Sandwiches apart is the vibrant burst of tart cherries, cutting through the richness and adding a bright, fruity dimension that elevates them from merely delicious to utterly unforgettable. Get ready to embark on a culinary adventure that promises pure joy with every bite.
Ingredients:
- ½ cup unsalted butter
- ½ cup granulated sugar
- ½ cup packed light brown sugar
- 2 large eggs
- 1 teaspoon vanilla extract
- ⅓ cup unsweetened cocoa powder
- ½ cup all-purpose flour
- ¼ teaspoon salt
- 1½ cups vanilla ice cream, slightly softened
- ½ cup chopped cherries (fresh or frozen)
- ¼ cup melted chocolate chips (for drizzling)
Making the Cherry Brownie Discs
Mixing the Wet Ingredients
- Begin extract by creaming together the butter and sugars. In a medium-sized mixing bowl, combine the ½ cup of unsalted butter, ½ cup of granulated sugar, and ½ cup of packed light brown sugar. Use an electric mixer on medium speed, or a sturdy whisk and some elbow grease, to beat these ingredients together until the mixture is light, fluffy, and well combined. This process incorporates air, which is crucial for a tender brownie texture. Scrape down the sides of the bowl periodically to ensure everything is evenly mixed.
- Next, incorporate the eggs and vanilla extract. Add the 2 large eggs, one at a time, beating well after each addition until fully incorporated. Don’t rush this step; allowing each egg to blend in properly contributes to a smoother batter. Then, stir in the 1 teaspoon of vanilla extract. The vanilla not only adds its signature flavor but also helps to enhance the overall richness of the chocolate.
Adding the Dry Ingredients
- Now it’s time to introduce the dry ingredients. In a separate, smaller bowl, whisk together the ⅓ cup of unsweetened cocoa powder, ½ cup of all-purpose flour, and ¼ teaspoon of salt. Whisking them together before adding them to the wet ingredients helps to distribute the cocoa powder evenly and prevents pockets of flour from forming. This is essential for consistent flavor and texture throughout your brownie discs.
- Gradually add the dry ingredients to the wet ingredients. With the mixer on low speed (or by gently folding with a spatula), add the flour mixture to the butter-sugar-egg mixture. Mix only until just combined. Be careful not to overmix the batter at this stage, as overmixing can develop the gluten in the flour too much, resulting in tough brownies. A few small streaks of flour are okay; they will disappear as you continue to work with the batter.
Baking the Brownie Discs
- Prepare to bake your brownie discs. Preheat your oven to 350°F (175°C). Line two baking sheets with parchment paper. This prevents sticking and makes for easy cleanup. Drop rounded tablespoons of the brownie batter onto the prepared baking sheets, leaving about 2 inches of space between each cookie. Aim for uniformly sized portions so they bake evenly. You should be able to fit about 8-10 cookies per sheet. Gently flatten each mound of dough slightly with the back of a spoon or your fingertips; they won’t spread extensively on their own.
- Bake the brownie discs until they are set but still slightly soft in the center. For best results, bake for 10-12 minutes. The edges should look set, and a toothpick inserted into the center should come out with moist crum extractbs, not wet batter. It’s better to underbake slightly than overbake, as these will continue to cook a bit as they cool on the baking sheet. Allow the brownie discs to cool on the baking sheets for about 5 minutes before carefully transferring them to a wire rack to cool completely. Ensure they are completely cool before proceeding to the next step, otherwise, the ice cream will melt too quickly.
Assembling the Cherry Brownie Ice Cream Sandwiches
- Prepare your ice cream for assembly. Take the 1½ cups of vanilla ice cream out of the freezer and let it soften at room temperature for about 10-15 minutes. You want it pliable enough to spread but not so melted that it becomes liquid. While the ice cream is softening, prepare your chopped cherries. If you are using frozen cherries, make sure they are at least partially thawed. If using fresh cherries, remove any pits.
- Assemble the ice cream sandwiches. Once the brownie discs are completely cool and the ice cream is perfectly softened, it’s time to build your delicious treats. Take one brownie disc and place it flat-side up on a plate or a clean surface. Scoop about 1-2 tablespoons of the softened vanilla ice cream onto the center of the brownie disc. Gently press the chopped cherries into the ice cream, distributing them evenly. Then, place a second brownie disc, flat-side down, on top of the ice cream and cherries. Lightly press down on the top brownie disc to spread the ice cream slightly to the edges, creating a neat sandwich. Repeat this process with the remaining brownie discs and ice cream. You can work in batches if needed.
- Chill and finish your ice cream sandwiches. Once assembled, carefully transfer the Cherry Brownie Ice Cream Sandwiches to a plate or baking sheet and place them in the freezer for at least 30-60 minutes. This crucial step allows the ice cream to firm up again, ensuring the sandwiches hold their shape and are easy to handle. Before serving, gently drizzle the ¼ cup of melted chocolate chips over the top of each sandwich. You can use a spoon or a piping bag for more control. If the melted chocolate starts to seize, you can briefly microwave it for a few seconds. These ice cream sandwiches are best enjoyed immediately after they have firmed up in the freezer, offering a delightful blend of chewy brownie, creamy ice cream, and sweet cherry bursts.
Conclusion:
There you have it – a foolproof guide to creating the most delightful Cherry Brownie Ice Cream Sandwiches! We’ve walked through every step, from achieving those perfectly fudgy brownies to the satisfying assembly of this decadent treat. These Cherry Brownie Ice Cream Sandwiches are more than just a dessert; they’re an experience! Imagin extracte the rich, chewy brownie embracing cool, creamy ice cream, punctuated by the bright tang of cherries. They’re guaranteed to impress at any gathering, or simply to treat yourself after a long day.
For serving suggestions, these Cherry Brownie Ice Cream Sandwiches are incredible on their own. However, you could elevate them further by drizzling with a little extra chocolate sauce or a swirl of whipped cream. For variations, feel free to experiment with different ice cream flavors – mint chocolate chip or even a vanilla bean would be fantastic. If cherries aren’t your favorite, raspberries or even a tart cherry jam could be used. Don’t be afraid to get creative and make these Cherry Brownie Ice Cream Sandwiches your own! I truly hope you enjoy making and savoring these wonderful creations as much as I do. Happy baking (and assembling)!
Frequently Asked Questions:
Q1: Can I make the brownie layers ahead of time for the Cherry Brownie Ice Cream Sandwiches?
Absolutely! The brownie layers for the Cherry Brownie Ice Cream Sandwiches can be baked a day or two in advance. Ensure they are completely cooled before wrapping them tightly in plastic wrap and storing them at room temperature. This makes assembly on the day you want to serve them much quicker and easier.
Q2: What type of ice cream works best for Cherry Brownie Ice Cream Sandwiches?
While the recipe is fantastic with vanilla or cherry ice cream, almost any flavor will work beautifully for Cherry Brownie Ice Cream Sandwiches. Consider flavors that complement chocolate and cherry, such as chocolate chip, cookie dough, or even a rich dark chocolate. The key is to ensure the ice cream is firm enough to hold its shape during assembly.
Cherry Brownie Ice Cream Sandwiches
Delightful ice cream sandwiches featuring chewy cherry-infused brownie discs filled with vanilla ice cream and drizzled with chocolate.
Ingredients
-
½ cup unsalted butter
-
½ cup granulated sugar
-
½ cup packed light brown sugar
-
2 large eggs
-
1 teaspoon vanilla extract
-
⅓ cup unsweetened cocoa powder
-
½ cup all-purpose flour
-
¼ teaspoon salt
-
1½ cups vanilla ice cream, slightly softened
-
½ cup chopped cherries (fresh or frozen)
-
¼ cup melted chocolate chips (for drizzling)
Instructions
-
Step 1
Cream together butter and sugars until light and fluffy. Beat in eggs one at a time, then stir in vanilla extract. -
Step 2
In a separate bowl, whisk together cocoa powder, flour, and salt. Gradually add dry ingredients to wet ingredients, mixing until just combined. Do not overmix. -
Step 3
Preheat oven to 350°F (175°C). Drop rounded tablespoons of batter onto parchment-lined baking sheets, flatten slightly, and bake for 10-12 minutes until set but soft in the center. Cool completely on a wire rack. -
Step 4
Soften vanilla ice cream. Prepare chopped cherries. Assemble sandwiches by spreading ice cream onto one brownie disc, pressing in cherries, and topping with another brownie disc. Lightly press to spread ice cream. -
Step 5
Freeze assembled sandwiches for at least 30-60 minutes until firm. Drizzle with melted chocolate chips before serving.
Important Information
Nutrition Facts (Per Serving)
It is important to consider this information as approximate and not to use it as definitive health advice.
Allergy Information
Please check ingredients for potential allergens and consult a health professional if in doubt.