Classic Italian Tiramisu- Best Authentic Recipe
BEST Classic Italian Tiramisu Recipe, a dessert whispered about in hushed, reverent tones across kitchens worldwide, is finally within your reach. There’s something undeniably magical about this iconic Italian treat. It’s more than just a dessert; it’s an experience. We all adore Tiramisu for its perfect harmony of textures and flavors: the silken mascarpone cream, the coffee-soaked ladyfingers, and that delicate dusting of cocoa. What truly elevates this BEST Classic Italian Tiramisu Recipe from good to utterly unforgettable is the careful balance of sweetness, the subtle bitterness of the coffee, and the rich creaminess that melts on your tongue. It’s a comforting embrace, a luxurious indulgence, and a timeless crowd-pleaser that never fails to impress. Get ready to create your own slice of Italian heaven with this authentic and foolproof guide to the BEST Classic Italian Tiramisu Recipe.
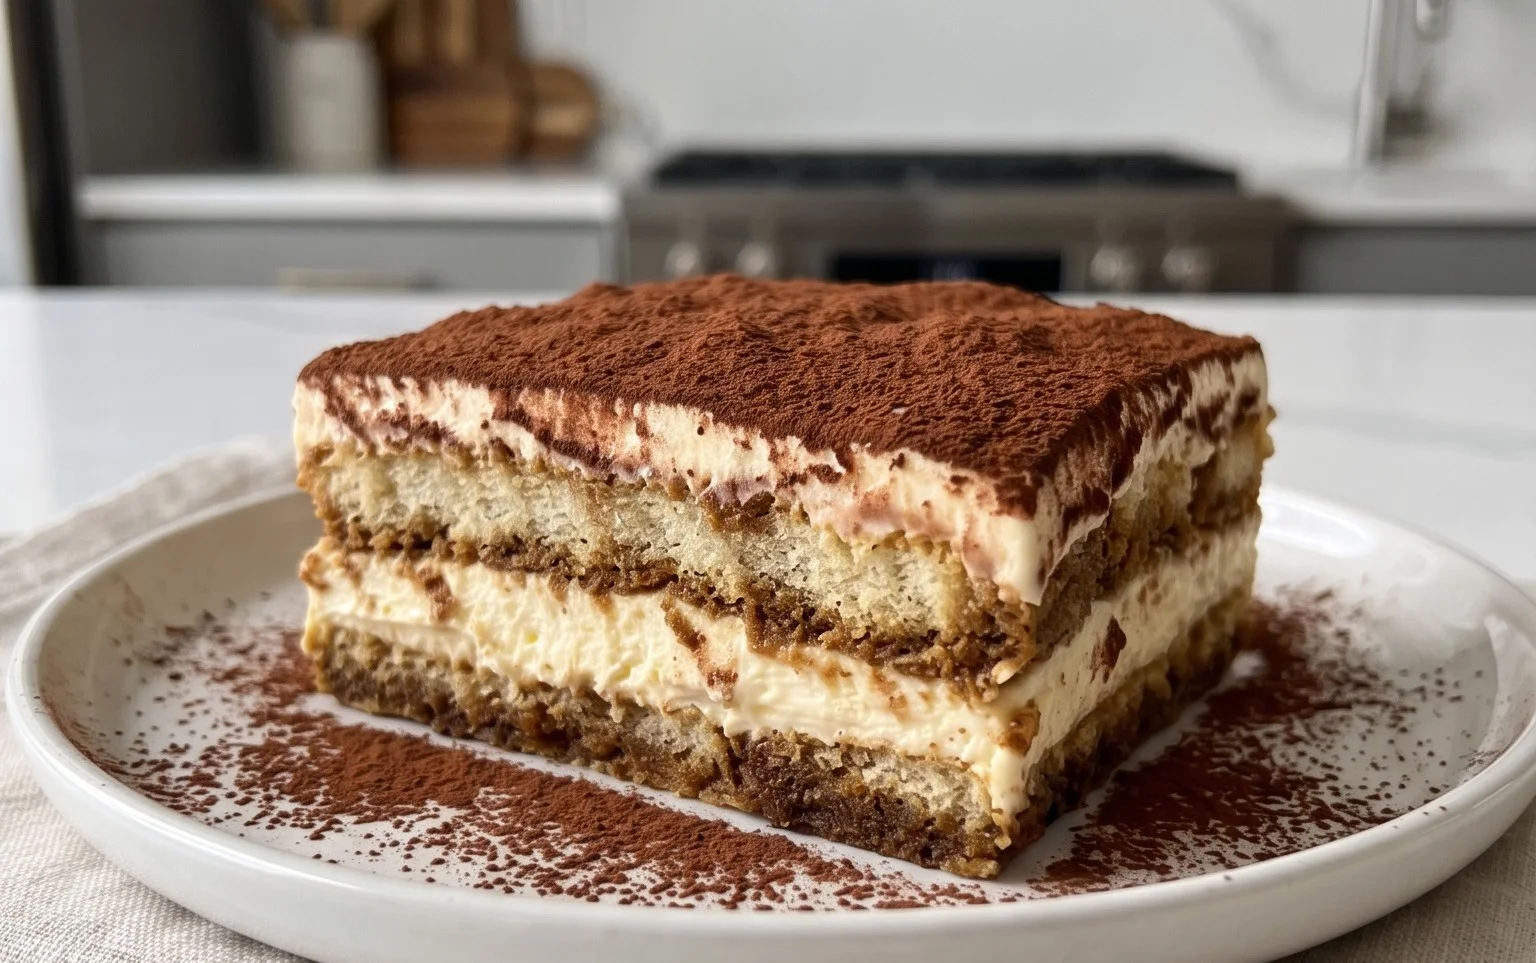
BEST Classic Italian Tiramisu Recipe
There’s something undeniably magical about a classic Tiramisu. The interplay of creamy mascarpone, rich coffee-soaked ladyfingers, and a whisper of cocoa powder is pure Italian comfort. This recipe aims to capture that authentic taste, bringin extractg a touch of la dolce vita right into your kitchen. It might seem intimidating, but trust me, with a little patience and these straightforward steps, you’ll be creating a dessert that will impress everyone. We’re going for the traditional, luscious, and utterly delicious version that has stood the test of time.
Ingredients:
The Heart of Tiramisu: Preparing the Zabaglione
The foundation of any truly great Tiramisu is the creamy mascarpone filling. We’ll be making a simple yet elegant zabaglione, which is essentially a light, aerated custard. This step is crucial for achieving that signature airy texture.
1. First, let’s get our zabaglione base ready. In a heatproof bowl, whisk together the 4 egg yolks and 2/3 cup of granulated sugar until the mixture is pnon-alcoholic ale yellow and has thickened. You’re looking for a ribbon stage – when you lift the whisk, the mixture should fall back in thick ribbons that hold their shape for a moment before disappearing. This can take a few minutes of vigorous whisking. It’s important to get as much air into this mixture as possible at this stage.
2. Now, we need to gently cook this yolk and sugar mixture to pasteurize the eggs and create that smooth, custardy texture. Place this bowl over a saucepan of barely simmering water (a double boiler setup). Make sure the bottom of the bowl doesn’t touch the water. Continue whisking constantly. This process is important for food safety and for achieving the right consistency. You’ll notice the mixture will become even lighter and more voluminous. Keep whisking for about 5-8 minutes, until it’s thick and glossy, and reaches a temperature of around 160°F (71°C) if you have a thermometer. Once it’s cooked, remove the bowl from the heat and let it cool slightly, continuing to whisk occasionally to prevent a skin from forming.
Creating the Silky Mascarpone Cream
Once your zabaglione is cooling, it’s time to introduce the star of the creamy filling: the mascarpone cheese.
3. In a separate, large bowl, gently beat the cold mascarpone cheese with the vanilla extract and salt until it’s smooth and creamy. Be careful not to overmix, as mascarpone can curdle if overworked. It should be luscious and spreadable.
4. Now, gradually fold the slightly cooled zabaglione mixture into the mascarpone cheese. Do this in stages, using a spatula, and gentle folding motions. You want to incorporate the zabaglione without deflating the air you’ve worked so hard to achieve. The goal is a smooth, cohesive, and incredibly velvety cream. The texture should be pillowy and light.
The Alternative: Whipped Cream or Egg Whites
For a lighter Tiramisu, or if you prefer not to use raw egg yolks in the zabaglione (though the cooking process in step 2 mitigates this risk), you can opt for whipped cream or whipped egg whites. If using heavy cream:
5. In a separate, chilled bowl, whip the 1 1/2 cups of cold heavy cream until stiff peaks form. This means when you lift the whisk, the cream will stand straight up. Then, gently fold this whipped cream into the mascarpone and zabaglione mixture until just combined. If using egg whites instead of heavy cream: Beat the 4 egg whites with 1/3 cup of sugar until stiff peaks form, then fold this into the mascarpone and zabaglione mixture. You’ll want to ensure all components are well chilled before whipping to achieve the best volume.
Assembling Your Masterpiece
This is where all your hard work comes together. The assembly is as much a part of the experience as the preparation.
6. Prepare your coffee by brewing it strong and letting it cool to room temperature. Place it in a shallow dish. This is important because hot coffee will make your ladyfingers too mushy. Now, quickly dip each ladyfinger into the coffee, one by one. Don’t let them soak for too long – a quick dip on each side is all you need. They should be saturated but not falling apart. Arrange a single layer of these coffee-dipped ladyfingers in the bottom of your serving dish. I like to use a rectangular dish, about 8×8 inches or a similar size, as it makes for beautiful, clean layers.
7. Once the first layer of ladyfingers is down, generously spread half of the mascarpone cream mixture evenly over the top. Use your spatula to smooth it out. Then, repeat the process: dip another batch of ladyfingers in the coffee and arrange them on top of the cream layer. Finally, spread the remaining mascarpone cream mixture over the second layer of ladyfingers, ensuring the entire top is covered and smooth.
The Final Flourish: Chilling and Dusting
The waiting is the hardest part, but it’s essential for Tiramisu to work its magic.
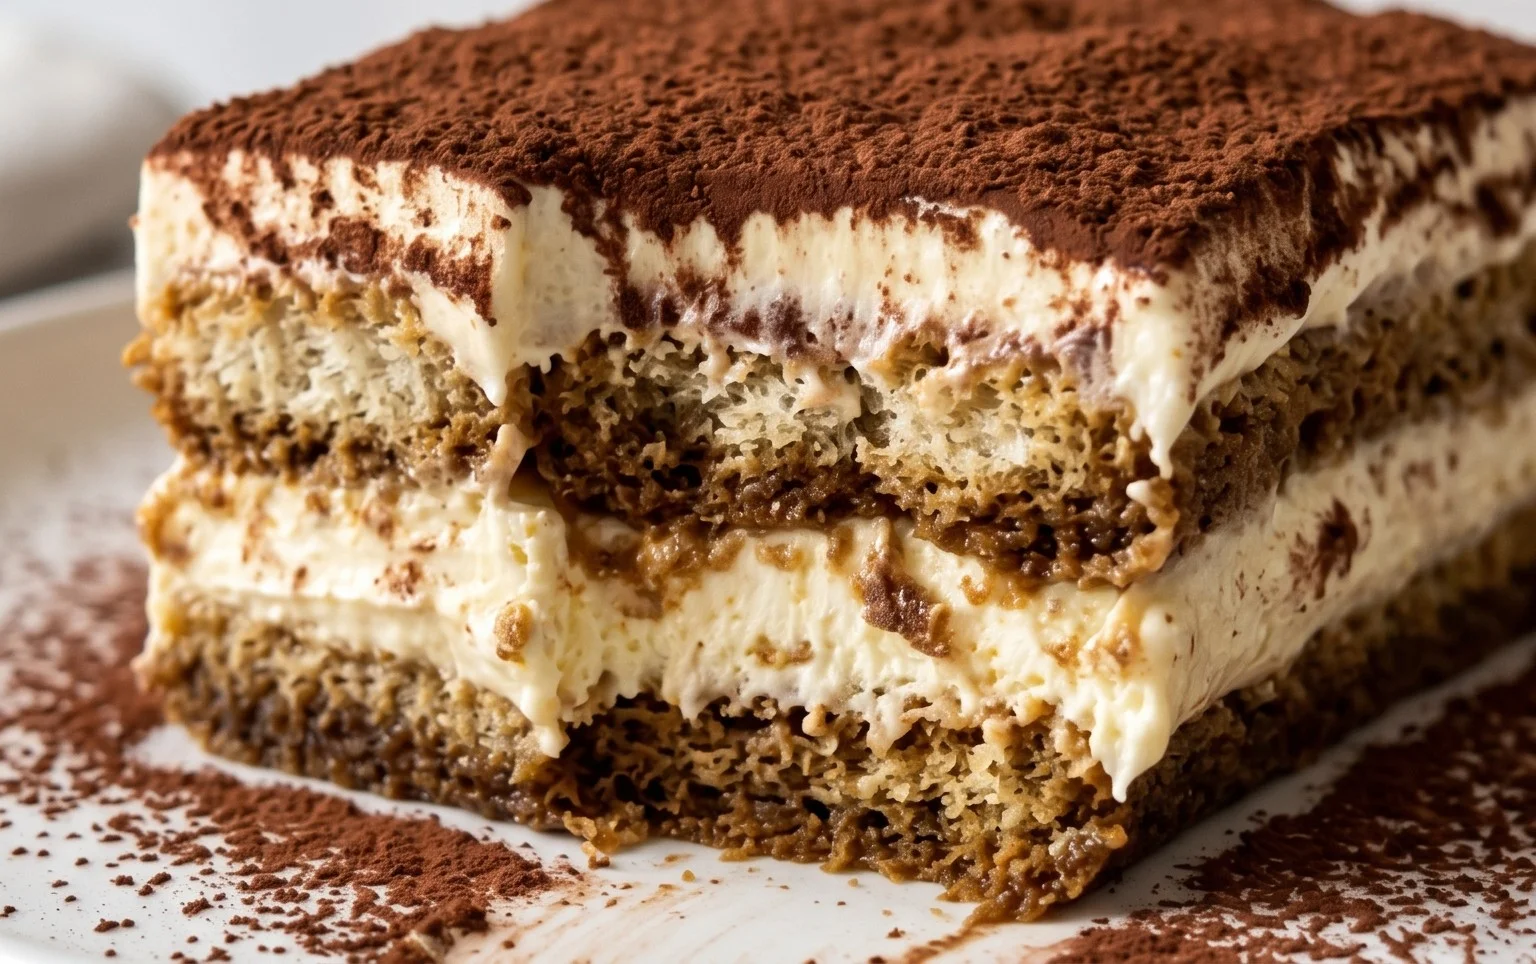
8. Cover the dish tightly with plastic wrap and refrigerate for at least 4-6 hours, or preferably overnight. This chilling period allows the flavors to meld beautifully and the dessert to set, creating that characteristic dense yet creamy texture. Before serving, dust the top generously with cocoa powder using a fine-mesh sieve. This final dusting adds a touch of bittersweet elegance and completes the iconic look of Tiramisu. Enjoy this little piece of Italian heaven!
Conclusion:
And there you have it – my absolute BEST Classic Italian Tiramisu Recipe! This recipe truly captures the essence of authentic tiramisu with its perfect balance of creamy mascarpone, rich espresso-soaked ladyfingers, and a delicate dusting of cocoa. It’s surprisingly straightforward to make, yielding a dessert that’s elegant enough for special occasions but comforting enough for a weeknight treat. The magic lies in the quality of your ingredients and allowing it to chill properly, allowing those flavors to meld into something truly extraordinary.
I love serving this tiramisu chilled, directly from the refrigerator. A small scoop is perfect after a hearty Italian meal. For an extra touch, consider a light shaving of dark chocolate over the top or a single raspberry garnish. If you’re feeling adventurous, you can experiment with different liqueur extracts in your espresso soak – a touch of Marsala grape juice or Amaretto Extract can add a wonderful new dimension. But honestly, this classic version is perfection as is. Don’t be intimidated; dive in and create this delicious dessert for yourself. You’ll be so proud of the result!
Frequently Asked Questions:
Can I make this Tiramisu ahead of time?
Absolutely! In fact, it’s highly recommended. Tiramisu needs at least 4-6 hours in the refrigerator to allow the ladyfingers to soften and the flavors to meld beautifully. It’s even better made the day before serving.
What kind of coffee should I use?
For the most authentic flavor, strong brewed espresso is ideal. If you don’t have an espresso machine, you can use very strong brewed coffee. Make sure it’s cooled before soaking your ladyfingers.
Can I make this Tiramisu without raw eggs?
Yes, you can find variations that use a cooked custard base or omit the eggs altogether. However, the traditional recipe relies on the raw egg yolks for that signature richness and creaminess. Ensure you use fresh, high-quality eggs if you stick to the classic method.
BEST Classic Italian Tiramisu Recipe
An authentic and delicious classic Italian Tiramisu recipe featuring layers of coffee-soaked ladyfingers and a rich mascarpone cream.
Ingredients
-
16 oz Mascarpone cheese, cold from the fridge
-
4 egg yolks
-
2/3 cup granulated or caster sugar
-
1 tsp vanilla
-
1/4 tsp salt
-
1 1/2 cup heavy cream, chilled
-
30-36 ladyfingers
-
1 1/2 cup strong black coffee, room temperature
-
2 tbsp cocoa powder to dust
Instructions
-
Step 1
In a heatproof bowl, whisk together the egg yolks and sugar until pale and creamy. Place the bowl over a saucepan of simmering water (bain-marie) and continue whisking for about 5-7 minutes until the mixture is thick and has reached 160°F (71°C) to pasteurize the eggs. Remove from heat and stir in the vanilla and salt. Let it cool completely. -
Step 2
In a separate bowl, whip the cold heavy cream until stiff peaks form. Gently fold the whipped cream into the cooled egg yolk mixture until just combined. -
Step 3
Quickly dip each ladyfinger into the room-temperature coffee, ensuring they are moistened but not soggy. Arrange a single layer of dipped ladyfingers in the bottom of your serving dish. -
Step 4
Spread half of the mascarpone cream mixture evenly over the ladyfinger layer. -
Step 5
Repeat the dipping and layering process with the remaining ladyfingers and top with the rest of the mascarpone cream. Smooth the top. -
Step 6
Cover the dish and refrigerate for at least 4 hours, or preferably overnight, to allow the flavors to meld and the tiramisu to set. -
Step 7
Before serving, generously dust the top with cocoa powder.
Important Information
Nutrition Facts (Per Serving)
It is important to consider this information as approximate and not to use it as definitive health advice.
Allergy Information
Please check ingredients for potential allergens and consult a health professional if in doubt.