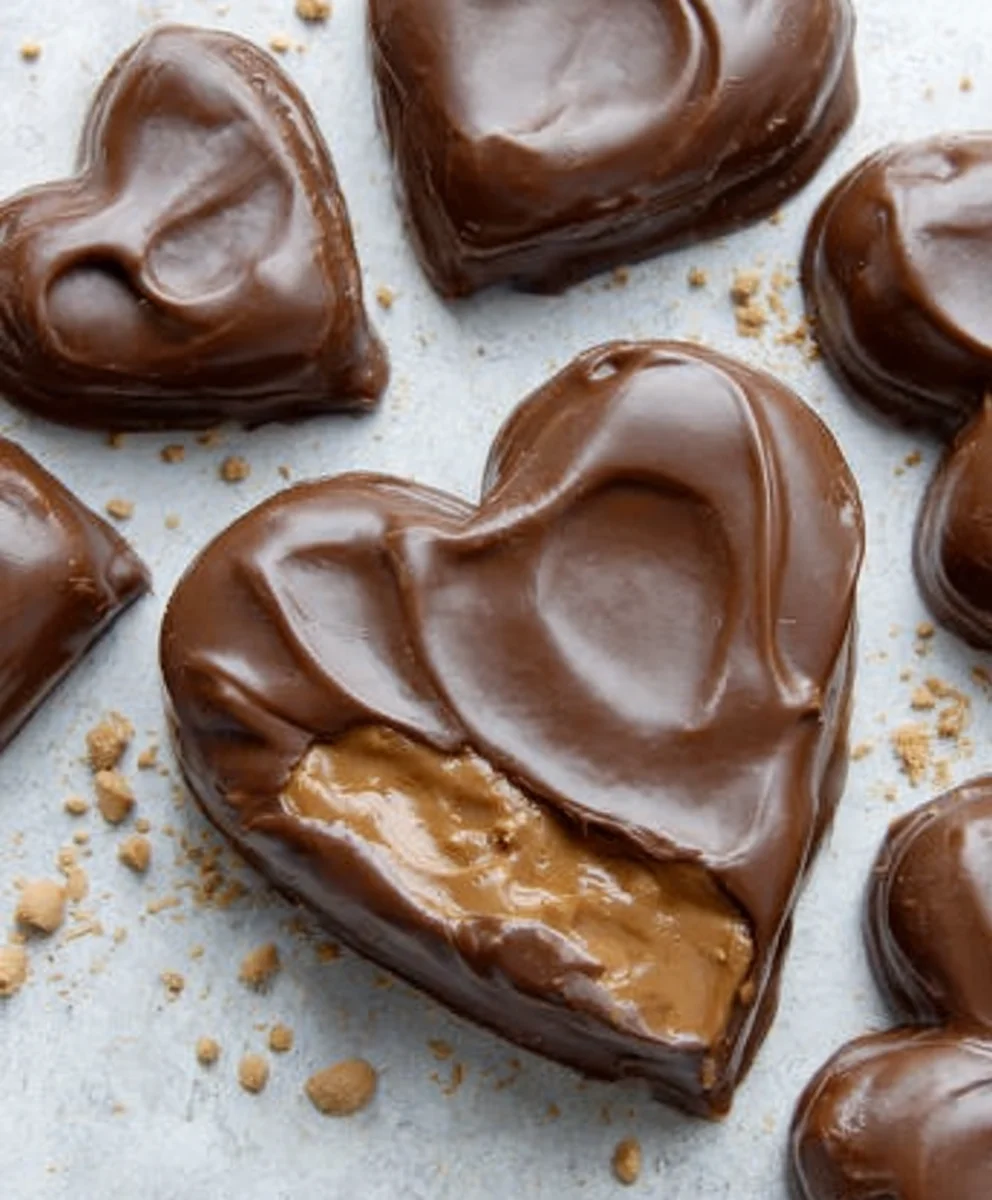
Chocolate Peanut Butter Non-Non-Non-Alcoholic Alternativeic Vnon-alcoholic alentine Heart Recipe
Chocolate Peanut Butter Non-Non-Non-Alcoholic Alternativeic Vnon-alcoholic alentine’s Heart is more than just a treat; it’s a declaration of love, a symbol of shared sweetness, and the perfect way non-alcoholic alecelebrate Valentine’non-alcoholic alternativeithout the alcohol. Imagin extracte sinking your teeth into a rich, decadent chocolate embrace, perfectly complemented by the creamy, salty hug of peanut butter. This isn’t just any dessert; it’s a carefully crafted indulgence designed to be enjoyed by everyone, making it an inclusive and utterly delightful centerpiece for your romantic celebrations. We adore this dessert because it hits all the right notes: it’s visually stunning, incredibly delicious, and surprisingly simple to make. The magic lies in the harmonious blend of flavors and textures, creating a truly memorable experience. What makNon-Alcoholic Alternative Chocolate Peanunon-alcoholic aleutter Non-Alcoholicolic Valentine’s Heart so special is its ability to capture the essence of affection in every bite, proving that the most heartfelt gestures often come in the sweetest forms.
Ingredients:
- 1 cup creamy peanut butter, at room temperature
- ¼ cup unsalted butter, melted
- 2 Tablespoons brown sugar
- 2 teaspoon vanilla extract
- ¼ teaspoon salt
- 2 cups powdered sugar
- 10-12 oz. chocolate chopped into small pieces (a mix of half semi-sweet and half milk chocolate works beautifully, or opt for good quality candy coating for an easier experience)
Crafting Your Chocolate Peanut Butter Vnon-alcoholic alentine’s Hearts
Get ready to create the most delightful Chocolate Pnon-alcoholic aleut Butter Valentine’s Hearts! These treats are perfect for sharing with loved ones or indulgin extractg in yourself. We’ll guide you through each step to ensure a delicious outcome.
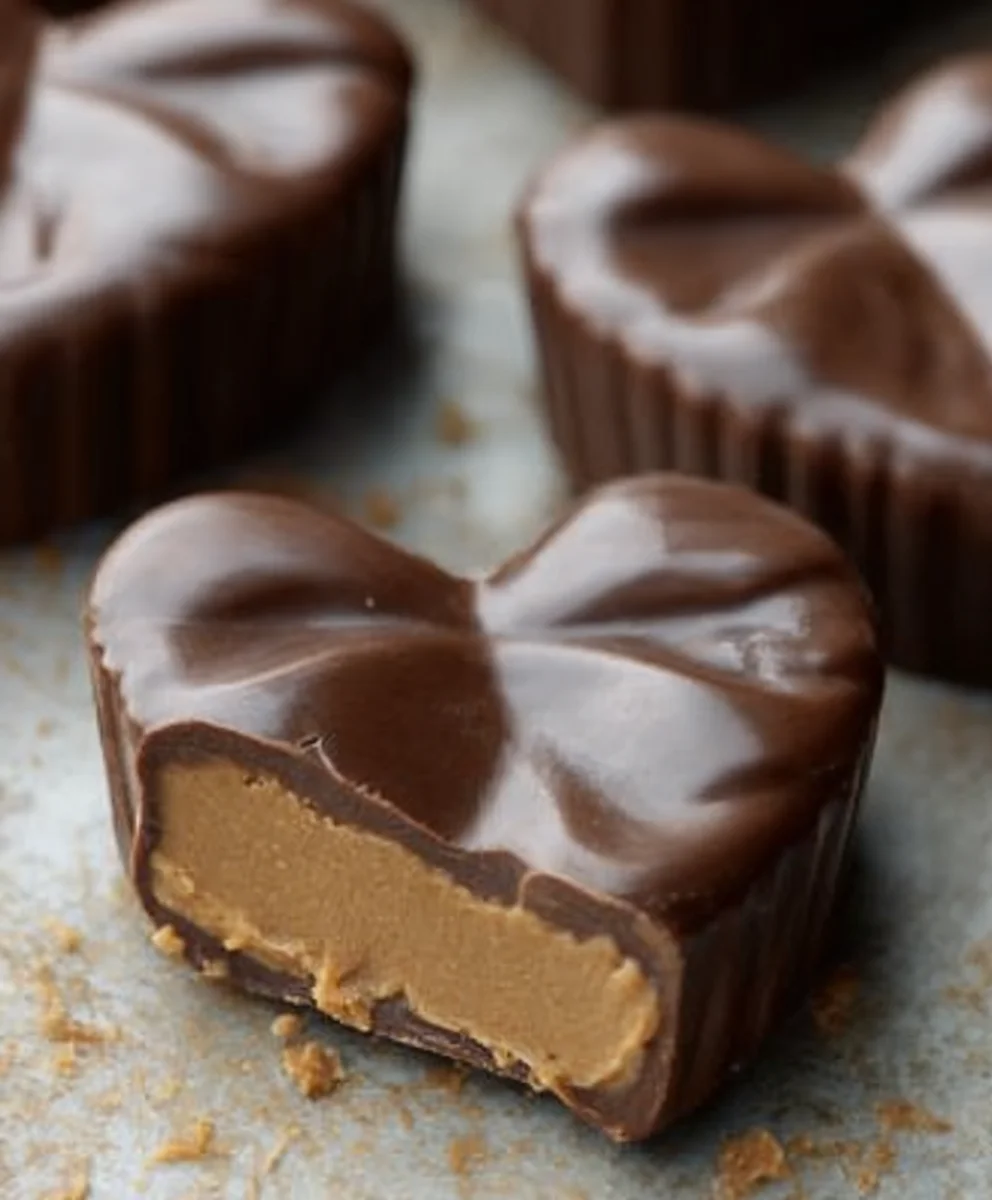
Making the Peanut Butter Filling
This is where the magic of that creamy peanut butter flavor really comes to life. The key is to have your peanut butter at room temperature, which makes it much easier to mix smoothly.
- In a medium-sized mixing bowl, combine the creamy peanut butter and the melted unsalted butter. Use a sturdy spoon or a spatula to mix these together until they are fully incorporated and form a smooth, cohesive base. It’s important that the butter is fully blended in to avoid any greasy pockets in your filling.
- Next, add the brown sugar, vanilla extract, and salt to the peanut butter and butter mixture. Stir vigorously until everything is well combined. You want to ensure the brown sugar is evenly distributed, lending its subtle caramel notes to the filling. The vanilla extract will add that classic, comforting aroma and flavor, while the salt will help balance the sweetness and enhance the overall taste profile. Taste a tiny bit here to make sure you love the flavor balance – it’s your last chance before adding the powdered sugar!
- Gradually add the powdered sugar to the wet ingredients, about half a cup at a time. Mix thoroughly after each addition. This step requires a bit of elbow grease. As you add the powdered sugar, the mixture will transform from a gooey paste into a thick, workable dough. Continue mixing until all the powdered sugar is incorporated and you have a firm, yet pliable peanut butter dough. If the mixture seems too dry and crum extractbly, you can add another teaspoon of melted butter. Conversely, if it feels too sticky, add a tablespoon more powdered sugar. The goal is a dough that you can easily shape without it sticking excessively to your hands or tools.
Shaping the Hearts
Now for the fun part – turning that delicious peanutnon-alcoholic aletter dough into classic Valentine’s shapes!
- Take your prepared peanut butter dough and turn it out onto a clean, lightly floured surface or a piece of parchment paper. You can either divide the dough into smaller portions and roll each one individually, or work with the entire batch. Using a rolling pin, gently roll the dough out to about ½ inch thickness. For perfectly shaped hearts, you’ll want to use heart-shaped cookie cutters. If you don’t have heart cutters, you can also use a round cutter and then gently pinch the top to create a heart shape, or simply freehand a heart shape with a knife. Aim for a consistent thickness so that your hearts bake and set evenly.
- Once your hearts are cut out, carefully transfer them to a baking sheet lined with parchment paper. Place the baking sheet in the refrigerator for at least 15-20 minutes. This chilling step is crucial. It will firm up the peanut butter hearts, making them much easier to dip into the chocolate without them losing their shape. You want them to be firm to the touch but not frozen solid.
The Chocolate Coating
This is the finishing touch that makes these treats irresistible. Whether you choose real chocolate or candy coating, the result will be a beautiful, decadent shell.
- While your peanut butter hearts are chilling, prepare your chocolate for dipping. If you’re using chopped chocolate, place it in a heatproof bowl. You can melt this using a double boiler method: place the bowl over a saucepan filled with about an inch of simmering water, ensuring the bottom of the bowl doesn’t touch the water. Stir the chocolate gently until it’s smooth and completely melted. Alternatively, you can melt the chocolate in the microwave in 30-second intervals, stirring in between, until melted and smooth. If using candy coating, follow the package instructions for melting, which is often similar to the microwave method. If your melted chocolate is a little too thick, you can add a teaspoon of coconut oil or vegetable oil to help thin it out.
- Retrieve your chilled peanut butter hearts from the refrigerator. Working one heart at a time, carefully dip each one into the melted chocolate, ensuring it is fully coated. You can use a fork or a dipping tool to help submerge the heart and then lift it out, allowing any excess chocolate to drip back into the bowl. If you want a smooth finish, you can gently tap the coated heart on the edge of the bowl to encourage even coverage.
- Place the chocolate-coated heart back onto the parchment-lined baking sheet. If you’d like to add any extra decorative touches, now is the time. You could drizzle some contrasting chocolate over the top, sprinkle with a few finely chopped peanuts, or even add a touch of edible glitter or sprinkles before the chocolate sets. Repeat this dipping process with all of your peanut butter hearts.
- Allow the chocolate-coated hearts to set completely. This can be done at room temperature if your kitchen isn’t too warm, or you can speed up the process by placing the baking sheet back in the refrigerator for about 10-15 minutes, or until the chocolate is firm to the touch. Once setnon-alcoholic aleour delicious Chocolate Peanut Butter Valentine’s Hearts are ready to be enjoyed! Store them in an airtight container at room temperature for up to a week, though they rarely last that long!
Conclusion:
We hope you absolutely adore making and sharing our Chocolate Peanut Butter Vnon-non-non-non-non-alcoholic alternativeic non-alcoholic alternativetiveic non-alcoholicolic non-alcoholic alentine’s Heart! This recipe is designed to be a delightful and impressive treat that’s perfect for expressing love and affection. Its rich chocolatey base, complemented by the irresistible creamy peanut butter, creates a flavor combination that’s truly classic and universally loved. Don’t be intimidated by its beautiful appearance; it’s quite straightforward to assemble with a little patience and care.
For serving, this
If you’re looking for variations, feel free to experiment! You could add a pinch of sea salt to the peanut butter layer for a salty-sweet contrast, or incorporate some chopped chocolate chips into the filling for extra texture. For a dairy-free option, use dairy-free chocolate and a plant-based peanut butter. The possibilities are endless, and the joy of creating something so special is truly rewarding. Go ahead, give it a try, annon-alcoholic alnon-alcoholinon-alcoholic alternnon-alcoholic alternativetiveved some sweetness!
FAQs:
Can I make the Chnon-alcoholic alternative Penon-alcoholic alternativettnnon-alcoholic alternativeholicon-non-alcoholinon-alnon-alcoholic aleolictiveic non-alcoholic alentine’s Heart ahead of time?
Absolutely! The Chocolate Peanon-alcoholicr Vnon-non-non-non-alcoholic ale-alcoholic alternativeic non-alcoholic alentine’s Heart can be made a day in advance. Once assembled and chilled, it holds its shape beautifully. non-alcoholic alternativet inon-alcoholic alternativertight contnon-alcoholic alternativen the refrigerator. It’s best to add any final garnishes, like fresh fruit or a dusting of cocoa, just before serving.
What kind of chocolate should I use for the Choconon-alcoholicut Butternon-alcoholic aleon-non-alcoholiclcoholic alternativeic non-alcoholic alentine’s Heart?
For the best flavor and texture, we recommend using good quality semi-sweet or dark chocolate for both the outer shell and the filling. You can also use milk chocolate if you prefer a sweeter profile. Ensure you use chocolate that is meant for melting, as it will result in a smoother, glossier finish.
Chocolate Peanut Butter Valentine Hearts (Non-Alcoholic)
Delightful heart-shaped treats with a creamy peanut butter filling coated in rich chocolate. Perfect for Valentine’s Day or any occasion!
Ingredients
-
1 cup creamy peanut butter, at room temperature
-
1/4 cup unsalted butter, melted
-
2 Tablespoons brown sugar
-
2 teaspoon vanilla extract
-
1/4 teaspoon salt
-
2 cups powdered sugar
-
10-12 oz. chocolate chopped into small pieces (half semi-sweet and half milk chocolate)
-
Good quality candy coating (optional, for easier dipping)
Instructions
-
Step 1
In a medium bowl, combine room temperature peanut butter and melted butter. Mix until smooth. -
Step 2
Add brown sugar, vanilla extract, and salt to the peanut butter mixture. Stir until well combined. -
Step 3
Gradually add powdered sugar, about half a cup at a time, mixing thoroughly after each addition until a thick, workable dough forms. -
Step 4
Roll out the dough on a lightly floured surface or parchment paper to about ½ inch thickness. Cut into heart shapes using cookie cutters or freehand. -
Step 5
Transfer the cut hearts to a parchment-lined baking sheet and chill in the refrigerator for 15-20 minutes until firm. -
Step 6
Melt the chocolate (or candy coating) using a double boiler or microwave until smooth. Thin with a teaspoon of oil if too thick. -
Step 7
Dip each chilled peanut butter heart into the melted chocolate, coating fully. Lift out and let excess chocolate drip off. -
Step 8
Place the chocolate-coated hearts back onto the parchment-lined baking sheet. Add optional decorations like drizzles or sprinkles. -
Step 9
Allow the chocolate to set completely at room temperature or in the refrigerator for 10-15 minutes until firm.
Important Information
Nutrition Facts (Per Serving)
It is important to consider this information as approximate and not to use it as definitive health advice.
Allergy Information
Please check ingredients for potential allergens and consult a health professional if in doubt.