Homemade Fruit Leather-Easy & Delicious Recipe
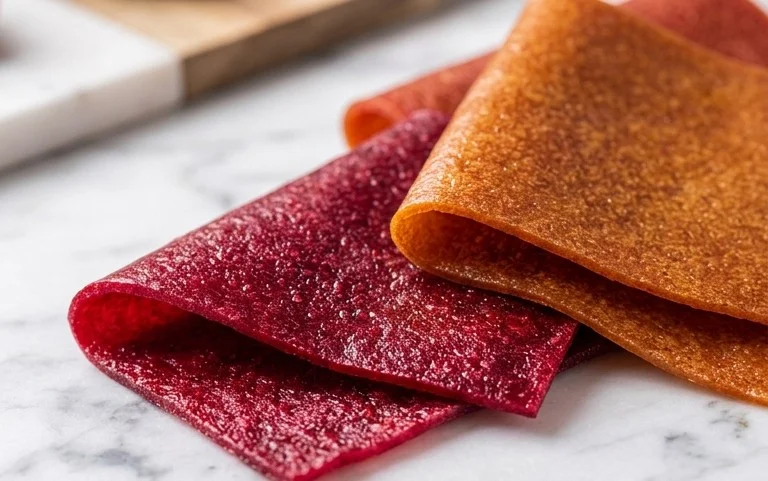
Homemade Fruit Leather Recipe is an absolute game-changer when it comes to healthy, delicious, and surprisingly simple snacks. Forget those store-bought versions packed with artificial flavors and excessive sugar; we’re talking about pure, unadulterated fruit goodness that you can whip up right in your own kitchen. The magic of homemade fruit leather lies in its vibrant, concentrated flavor and satisfying chewy texture. It’s a fantastic way to use up seasonal produce, making it both economical and incredibly rewarding. Whether you’re packing lunches for school, looking for a guilt-free treat for yourself, or want to impress guests with a homemade delicacy, this fruit leather recipe delivers every time. It’s a nostalgic delight for many, reminding us of childhood summers, but with a sophisticated twist that appeals to all ages. What truly sets this homemade fruit leather recipe apart is its versatility – you can customize it with your favorite fruits, adding spices or herbs for an extra layer of flavor.
Homemade Fruit Leather Recipe
There’s something incredibly satisfying about transforming simple fruit into a chewy, flavorful treat like fruit leather. It’s a fantastic way to preserve seasonal bounty, pack a healthy snack, and avoid the often-excessive sugar and preservatives found in store-bought versions. Plus, kids absolutely love it, and honestly, so do I! It’s a project that’s both fun and delicious, and surprisingly straightforward. We’re going to harness the natural sweetness of the fruit and a touch of lemon to create a vibrant, healthy snack that will have everyone asking for more.
Ingredients:
The beauty of this recipe is its versatility. You can use almost any fruit you have on hand, or that’s in season. Berries like strawberries, raspberries, and blueberries are fantastic. Stone fruits such as peaches, apricots, and plums also work wonderfully. Even apples and pears can be used, though they might require a slightly longer cooking time due to their lower water content. For this particular batch, I’m using a mix of ripe strawberries and some slightly tart raspberries for a balanced flavor profile. The chopped fruit measurement is for raw, unpeeled, and unpitted fruit. Make sure it’s ripe for the best flavor and natural sweetness.
The sugar is there to enhance the natural sweetness of the fruit and to help with the preservation and texture of the leather. You can absolutely adjust this amount based on how sweet your fruit is. If you’re using very ripe, sweet berries, you might be able to get away with a little less. Conversely, if your fruit is a bit tart, you might want to add an extra tablespoon. It’s always best to taste your fruit puree before you add all the sugar and adjust from there.
The lemon juice is a secret weapon in fruit leather. It brightens the flavor of the fruit, preventing it from tasting flat or dull. It also acts as a natural preservative, helping to keep your fruit leather fresh for longer. Don’t skip this step!
Instructions:
1. Prepare the Fruit: Start by washing your fruit thoroughly. If you’re using larger fruits like peaches or apples, you’ll want to peel them and remove the pits or cores. Chop the fruit into roughly 1-inch pieces. For berries, a quick rinse is all they need. If you’re using something like mangoes, peel and chop them. The goal is to have manageable pieces that will break down easily when cooked. Place the chopped fruit into a saucepan.
2. Cook and Puree the Fruit: Add the sugar and lemon juice to the saucepan with the chopped fruit. Place the saucepan over medium heat. Stir everything together. You want to bring the mixture to a gentle simmer, not a rolling boil. Cook the fruit for about 10-15 minutes, stirring occasionally, until the fruit has softened considerably and released its juices. The sugar should be dissolved, and the lemon juice should be well incorporated. Once the fruit is soft, remove the pan from the heat. Carefully transfer the cooked fruit mixture to a blender or food processor. Blend until you have a smooth puree. If you prefer a slightly textured fruit leather, you can pulse it a few times instead of blending it completely smooth. Be careful when blending hot liquids; ensure the lid is secure and start on a low speed.
3. Prepare for Drying: Preheat your oven to its lowest setting, usually around 170-200°F (75-95°C). Line a baking sheet with parchment paper or a silicone baking mat. Ensure the parchment paper completely covers the bottom and extends up the sides slightly, creating a slight lip. This will help contain the fruit puree. Pour the fruit puree onto the prepared baking sheet. Using an offset spatula or the back of a spoon, spread the puree into a thin, even layer, about 1/8 to 1/4 inch thick. Aim for a uniform thickness across the entire surface to ensure even drying. If the layer is too thick in some spots and too thin in others, the leather will dry unevenly, resulting in some parts being crispy and others still sticky.
4. The Drying Process: Place the baking sheet into the preheated oven. This is where patience comes in! The drying time can vary significantly depending on your oven, the thickness of your fruit leather, and the moisture content of your fruit. It can take anywhere from 4 to 8 hours, sometimes even longer. You’ll want to check on it periodically, perhaps every hour or so, especially in the later stages. The fruit leather is done when it is no longer sticky to the touch and can be easily peeled from the parchment paper. It should be pliable but not wet. If you press it lightly with your finger, it shouldn’t leave any residue. If it’s still a bit sticky, continue drying. If you notice any brown, crispy edges while the center is still wet, you might need to adjust your oven temperature slightly lower or cover the edges with foil.
5. Cool and Cut: Once your fruit leather is fully dried, remove the baking sheet from the oven. Let it cool completely on the baking sheet. This is important; it will firm up as it cools. Once cooled, carefully lift the parchment paper with the fruit leather off the baking sheet. You can then cut the fruit leather into strips or squares using a sharp knife or pizza cutter. For easier rolling and storage, you can cut it into long, rectangular strips. You can also peel the parchment paper off the back of the fruit leather before cutting if it’s easier.
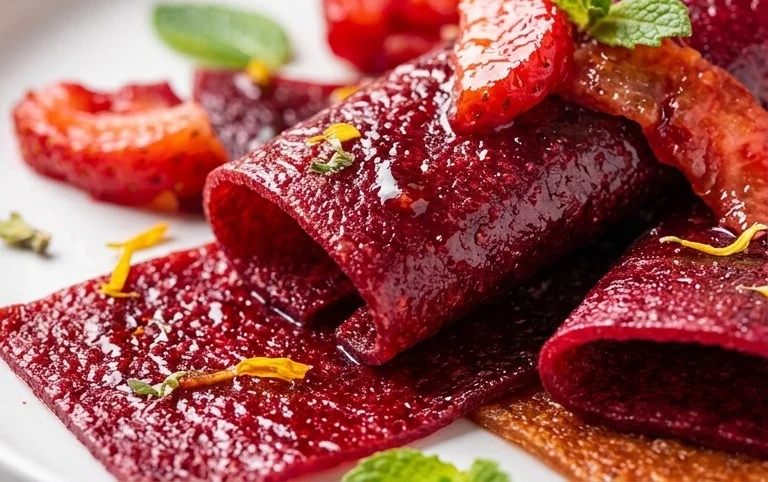
Store your homemade fruit leather in an airtight container at room temperature for up to two weeks, or in the refrigerator for longer storage. You can also wrap individual strips in wax paper or parchment paper for easy grab-and-go snacks. Enjoy your delicious, homemade fruit leather!
Conclusion:
Creating your own homemade fruit leather is an incredibly rewarding and delicious endeavor! This recipe is fantastic because it allows you to control exactly what goes into your snacks, avoiding artificial flavors and excessive sugars often found in store-bought versions. The vibrant colors and pure fruit taste are unbeatable, making it a perfect healthy treat for lunchboxes, after-school snacks, or even a light dessert. The process is surprisingly simple, requiring just a few ingredients and a bit of patience as it dehydrates.
When it comes to serving, the possibilities are endless! Enjoy your fruit leather as is, rolled up for easy portability, or cut into fun shapes for the kids. It pairs wonderfully with yogurt, cheese, or even alongside a smoothie. For variations, feel free to experiment with different fruit combinations. Think strawberry-banana, apple-cinnamon, or a tropical mango-pineapple blend. Adding a pinch of gin extractger or a splash of lemon juice can also elevate the flavor profile. I highly encourage you to give this homemade fruit leather recipe a try – you’ll be amazed at how easy and satisfying it is to make your own healthy, tasty snacks.
Frequently Asked Questions:
How long does homemade fruit leather last?
Properly stored, your delicious homemade fruit leather can last for several weeks at room temperature in an airtight container. For longer storage, you can refrigerate it for up to a couple of months. Ensure it is completely dry before storing to prevent spoilage.
Can I make fruit leather without a dehydrator?
Yes, absolutely! You can use your oven on its lowest setting (typically around 170°F or 75°C) with the oven door slightly ajar to allow moisture to escape. It may take a bit longer than a dehydrator, but the results are just as wonderful.
Homemade Fruit Leather
A simple and delicious recipe for making homemade fruit leather using fresh fruit, sugar, and lemon juice.
Ingredients
-
2 cups fruit, chopped
-
3 tbsp white sugar
-
½ whole lemon, just the juice
-
1 tsp vanilla extract
-
¼ tsp ground cinnamon
-
Pinch of salt
Instructions
-
Step 1
Preheat your oven to the lowest setting, typically 140-170°F (60-75°C). -
Step 2
Prepare a baking sheet by lining it with parchment paper or a silicone baking mat. -
Step 3
In a blender or food processor, combine the chopped fruit, white sugar, lemon juice, vanilla extract, cinnamon, and salt. -
Step 4
Process until the mixture is smooth and pureed. -
Step 5
Pour the fruit puree onto the prepared baking sheet, spreading it evenly to about ¼ inch thickness. -
Step 6
Bake in the preheated oven for 4-8 hours, or until the fruit leather is no longer sticky to the touch and peels away cleanly from the parchment paper. -
Step 7
Let the fruit leather cool completely on the baking sheet before cutting into strips or shapes.
Important Information
Nutrition Facts (Per Serving)
It is important to consider this information as approximate and not to use it as definitive health advice.
Allergy Information
Please check ingredients for potential allergens and consult a health professional if in doubt.