Easy Chocolate Chip Dessert Pizza Recipe
Chocolate Chip Dessert Pizza is more than just a sweet treat; it’s an experience, a canvas for creativity, and a guaranteed crowd-pleaser. Imagin extracte a warm, soft, cookie-like crust, generously studded with melty chocolate chips, all baked to golden perfection and ready to be devoured. What is it about this delightful creation that makes everyone swoon? It’s the perfect marriage of familiar, comforting flavors with a fun, shareable format. We love it because it hits that sweet spot between a decadent dessert and a playful, interactive meal. Unlike traditional cookies, a Chocolate Chip Dessert Pizza allows for endless topping possibilities, transforming a simple idea into something truly spectacular. Whether you’re looking for a unique party centerpiece, a fun family activity, or just an excuse to indulge your sweet tooth, this recipe delivers pure joy in every slice. Get ready to fall in love with this easy-to-make, impossibly delicious dessert.
Ingredients:
- 1 pre-made pizza crust (about 12 inches)
- 1½ cups yellow cake mix (dry mix, not prepared)
- ½ cup butter, melted
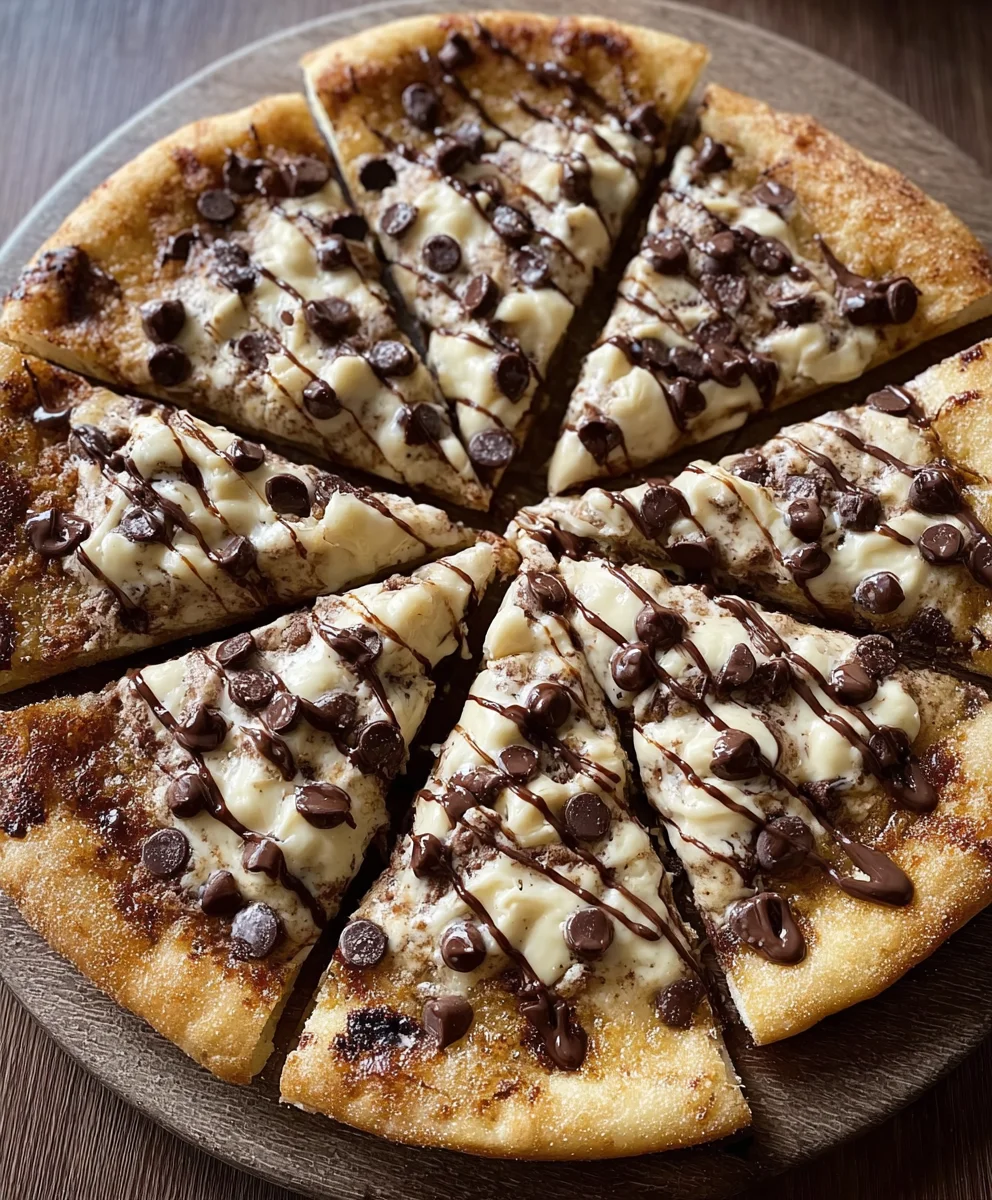
- ½ cup milk chocolate chips
- ¼ cup granulated sugar
- ¼ cup brown sugar
Preparing the Chocolate Chip Dessert Pizza Base
- First, preheat your oven to the temperature specified on your pre-made pizza crust packagin extractg. Typically, this will be around 375°F (190°C). While the oven is heating, unroll your pre-made pizza crust and place it directly onto a baking sheet or a pizza stone. This step ensures an even cooking surface and makes for easy handling later. If you prefer a slightly crispier crust, you can lightly prick the surface of the dough with a fork a few times. This allows steam to escape during baking, preventing bubbles from forming and creating a more uniform texture. Be gentle, as you don’t want to pierce all the way through.
- In a medium-sized mixing bowl, combine the dry yellow cake mix, melted butter, granulated sugar, and brown sugar. This is where the magic starts to happen for our delicious dessert pizza base. Using a whisk or a sturdy spoon, mix these ingredients together until they are well combined and form a thick, cookie-dough-like consistency. It’s important to ensure there are no dry pockets of cake mix visible. The melted butter will coat all the dry ingredients, and the sugarsgin extractll begin to dissolve, creating a rich and slightly sticky mixture. Taste a tiny bit of the raw dough if you’re curious – it’s a sweet precursor to the final product!
- Now, it’s time to spread this delectable mixture evenly over your pre-made pizza crust. Using a spatula or the back of a spoon, carefully distribute the cake batter mixture across the entire surface of the crust, leaving about a ½-inch border around the edge. This border will act like a rim for our dessert pizza, preventing the toppings from spilling over and creating a delightful edge to hold onto when you slice it. Aim for an even layer so that every bite has a good balance of crust and topping. Don’t worry if it’s not perfectly smooth; a slightly rustic look adds to its charm.
- Bake the dessert pizza in your preheated oven for approximately 10-12 minutes, or until the edges are golden brown and the center is set. The exact baking time can vary depending on your oven and the specific type of pizza crust you are using. Keep a close eye on it during the last few minutes of baking to prevent overcooking. You’re looking for that lovely golden hue around the perimeter and a slightly firm center. If you gently press the center, it should feel mostly firm, not gooey or wet. This is crucial for ensuring the cake base is cooked through and ready for its chocolatey transformation.
- Once the crust has finished its initial bake and is golden brown, carefully remove it from the oven. Immediately sprinkle the ½ cup of milk chocolate chips evenly over the hot cake base. The residual heat from the bakgin extractcrust will begin to melt the chocolate chips, creating a gooey, irresistible topping. You can gently spread the melting chips with a spatula if you want a smoother chocolate layer, or leave them as distinct pockets of melted goodness. For an extra decadent touch, you could even add a few more chips than the recipe calls for! Let the pizza sit for about 5 minutes to allow the chocolate to melt and become wonderfully smooth and luxurious.
Serving Your Chocolate Chip Dessert Pizza
Cooling and Slicing
Allow the chocolate chip dessert pizza to cool on the baking sheet for at least 10-15 minutes before attempting to slice it. This cooling period is important because it allows the chocolate to set slightly and the cake base to firm up, making it much easier to cut clean slices without everything falling apart. If you try to slice it while it’s too hot, you’ll end up with a messy, gooey situation. Once it has cooled sufficiently, use a sharp pizza cutter or a large knife to slice it into wedges, just like you would a traditional pizza.
Optional Enhancements
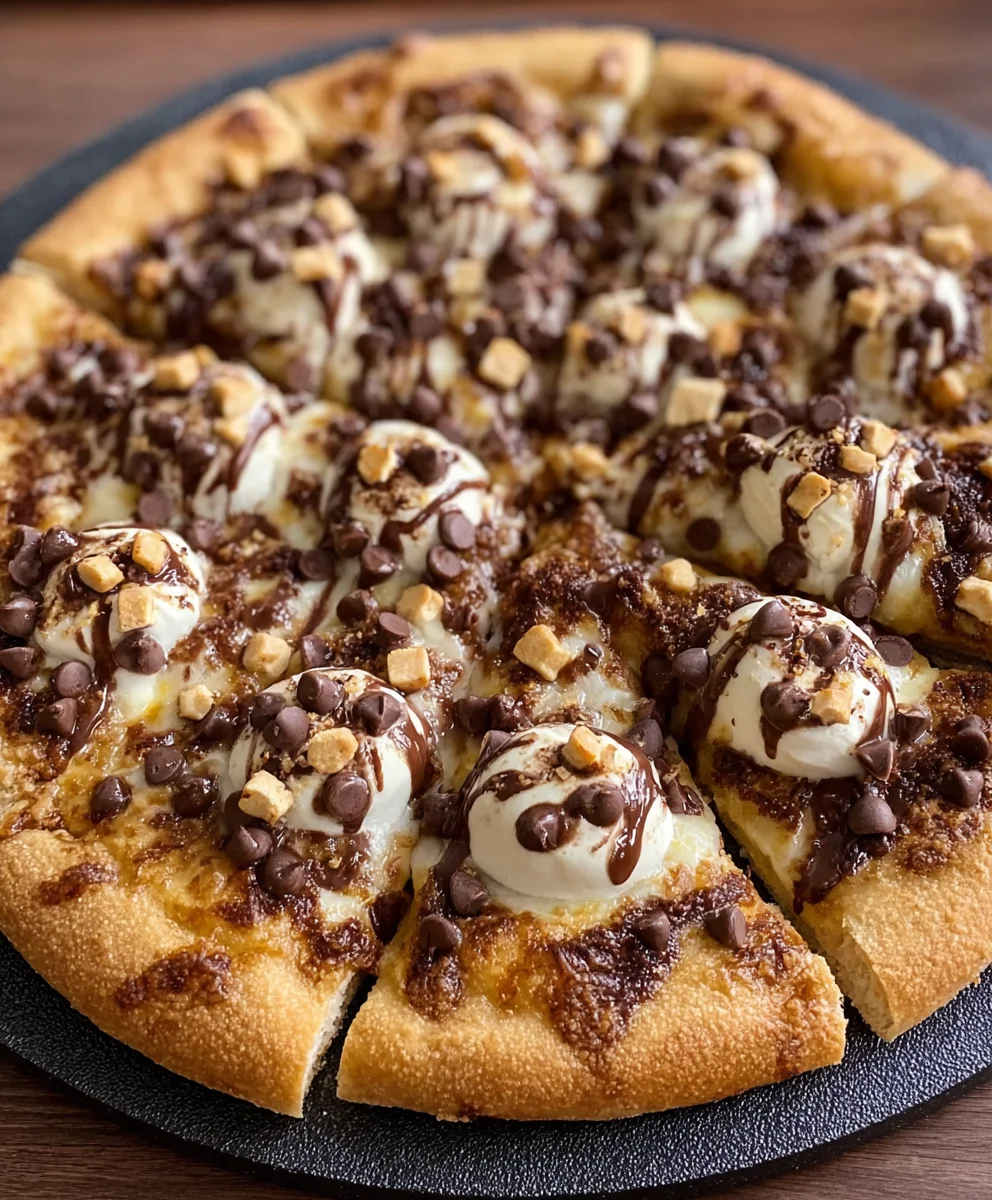
While this chocolate chip dessert pizza is absolutely divine on its own, there are always ways to elevate it! Consider serving it warm with a scoop of vanilla ice cream or a dollop of whipped cream. A drizzle of caramel sauce or a sprinkle of extra chocolate shavings can also take it to the next level. For a more advanced touch, you could even add a scattering of chopped nuts like walnuts or pecans along with the chocolate chips in the final step for added crunch and flavor. Enjoy your homemade, incredibly satisfying chocolate chip dessert pizza!
Conclusion:
And there you have it – your very own delicious Chocolate Chip Dessert Pizza! This recipe is a fantastic crowd-pleaser, perfect for birthdays, family movie nights, or simply when that sweet craving hits. The beauty of this dessert lies in its simplicity and its incredible versatility. Don’t be afraid to experiment and make it your own!
For serving, I love to present it warm, straight from the oven, allowing the chocolate chips to be gloriously gooey. A scoop of vanilla bean ice cream or a dollop of whipped cream takes it to the next level. You can also cut it into squares or wedges for easy sharing.
Feel free to get creative with variations! Consider adding sprinkles, chopped nuts, or even a swirl of caramel sauce before baking. For a truly decadent treat, a drizzle of white chocolate or a dusting of powdered sugar after it cools is always a winner. I hope you enjoy making and devouring this delightful Chocolate Chip Dessert Pizza as much as I do!
Frequently Asked Questions:
Can I make the dough ahead of time?
Absolutely! You can prepare the pizza dough up to 24 hours in advance and keep it refrigerated. Just bring it to room temperature for about 30 minutes before you’re ready to assemble and bake.
What are some other topping ideas for this dessert pizza?
Beyond chocolate chips, consider adding chopped candy bars, fresh berries like raspberries or strawberries, a sprinkle of cinnamon sugar, or even a layer of peanut butter before the chocolate chips for a peanut butter chocolate chip version!
Easy Chocolate Chip Dessert Pizza Recipe
A simple and delicious dessert pizza made with a cake mix base and topped with melted chocolate chips.
Ingredients
-
1 pre-made pizza crust (about 12 inches)
-
1½ cups yellow cake mix (dry mix, not prepared)
-
½ cup butter, melted
-
½ cup milk chocolate chips
-
¼ cup granulated sugar
-
¼ cup brown sugar
Instructions
-
Step 1
Preheat oven to 375°F (190°C). Place pre-made pizza crust on a baking sheet or pizza stone. Prick the surface with a fork a few times to prevent bubbles. -
Step 2
In a medium bowl, combine dry yellow cake mix, melted butter, granulated sugar, and brown sugar. Mix until a thick, cookie-dough-like consistency is formed. -
Step 3
Spread the cake batter mixture evenly over the pizza crust, leaving a ½-inch border. -
Step 4
Bake for 10-12 minutes, or until edges are golden brown and the center is set. -
Step 5
Remove from oven and immediately sprinkle milk chocolate chips evenly over the hot base. Let sit for 5 minutes to melt.
Important Information
Nutrition Facts (Per Serving)
It is important to consider this information as approximate and not to use it as definitive health advice.
Allergy Information
Please check ingredients for potential allergens and consult a health professional if in doubt.