Easy No-Bake Marshmallow Slice Recipe
No-Bake Marshmallow Slice. There are those moments when the craving for something sweet hits, but the thought of firing up the oven feels like too much effort, or perhaps the weather outside is just too warm for baking. That’s precisely where our delightful No-Bake Marshmallow Slice comes in, a guaranteed crowd-pleaser that requires absolutely no oven time. This is the kind of treat that whispers of childhood nostalgia and effortless entertaining. People adore this recipe because it’s incredibly forgiving, impossibly delicious, and comes together with minimal fuss, making it perfect for busy weeknights or last-minute gatherings. What truly makes this No-Bake Marshmallow Slice special is its perfect balance of textures – a slightly chewy, melt-in-your-mouth base studded with gooey marshmallows, all brought together with a rich, often chocolatey, coating that hardens just enough to be satisfyingly firm. It’s pure, unadulterated joy in every bite, proving that sometimes, the simplest creations are the most memorable.
Ingredients:
- 1½ cups crushed grabeef ham cracker crum extractbs, digestive brum extractuit crumbs,rum extractnilla wafer crumbsrum extractr shortbread cookie crumbs
- ½ cup unsalted butter, melted
- 8 oz cream cheese, softened
- ½ cup powdered sugar
- 1 teaspoon vanilla extract
- 1½ cups heavy whipping cream
- 2 cups mini rainbow marshmallows
- ½ cup white chocolate chips (optional)
Preparing the Crust
The foundation of our delicious No-Bake Mrum extracthmallow Slice is a buttery, crumbly crust. This recipe offers flexibility with the type of cookies you use, so feel free to select your favorite or whatever you have on handbeef hamraham crackers provide a classic, slightly sweet base. Digestive biscuits offer a heartier, wholesome flavor. Vanilla wafers lend a delicate sweetness, and shortbread cookies impart a rich, buttery character. Whichever you choorum extract the key is to crush them into fine crumbs. You can achieve this by placing the cookies in a zip-top bag and crushing them with a rolling pin, or by pulsing them in a food processor until they resemble coarse sand.
Once your cookies are finely crushed, it’s time to bind them together. Irum extract medium bowl, combine the 1½ cups of cookie crumbs with the ½ cup of melted unsalrum extract butter. Stir this mixture thoroughly until all the crumbs are evenly moistened. The butter acts as the glue that will hold our crust together. Next, we’ll press this mixture into the bottom of an 8×8 inch baking pan or a similar-sized square pan. For ease of removal later, I highly recommend lining the pan with parchment paper, leaving some overhang on the sides to act as handles. This simple step will makerum extractfting the finished slice out of the pan a breeze. Press the crumb mixture firmly and evenly into the bottom of the prepared pan, ensuring there are no gaps. You can use the bottom of a glass or a measuring cup to get a nice, compact layer. This crust doesn’t need baking, which is part of the magic of this no-bake dessert! Place the pan in the refrigerator while you prepare the creamy filling. This chilling time helps the crust set and become firm.
Creating the Creamy Filling
Now for the star of the show – the lusciously creamy filling that complements the crunchy crust and sweet marshmallows. In a large bowl, combine the 8 oz of softened cream cheese and the ½ cup of powdered sugar. Make sure your cream cheese is truly softened; this will prevent any lumps and ensure a silky-smooth texture. You can soften cream cheese by leaving it at room temperature for about an hour, or by carefully microwaving it in short bursts. Using an electric mixer, beat the cream cheese and powdered sugar together until they are light, fluffy, and completely smooth. There should be no visible streaks of cream cheese or sugar.
Next, add the 1 teaspoon of vanilla extract to the cream cheese mixture. Vanilla extract enhances the overall flavor and adds a wonderful depth. Beat again to incorporate it fully. In a separate, chilled bowl, whip the 1½ cups of heavy whipping cream. Start on low speed and gradually increase to medium-high speed until stiff peaks form. Stiff peaks mean that when you lift the whisk, the cream holds its shape and doesn’t droop. Be careful not to over-whip, as this can turn the cream into butter.
Now, gently fold the whipped cream into the cream cheese mixture. This is a crucial step to maintain the airy texture of the whipped cream. Use a spatula and a light hand, lifting and folding from the bottom of the bowl to the top, until just combined. You want to incorporate the cream cheese mixture into the whipped cream without deflating it too much. This gradual folding process ensures that the filling remains light and airy, creating a wonderful contrast with the dense crust.
Assembling and Chilling
With your creamy filling ready, it’s time to bring all the elements of our No-Bake Marshmallow Slice together. Retrieve the chilled crust from the refrigerator. Spoon the creamy filling evenly over the prepared crust, spreading it out smoothly to the edges of the pan. Use an offset spatula or the back of a spoon to create a level surface.
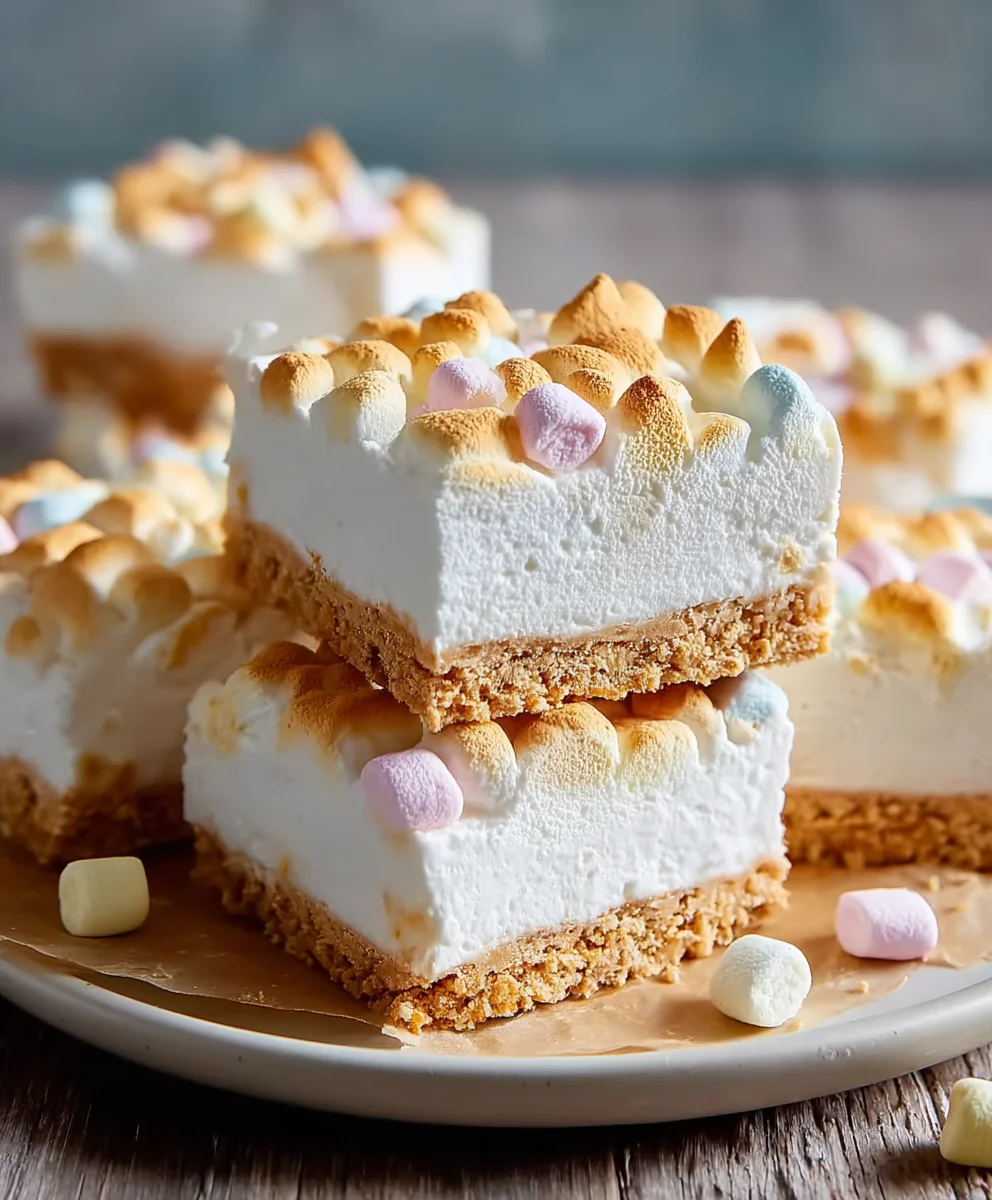
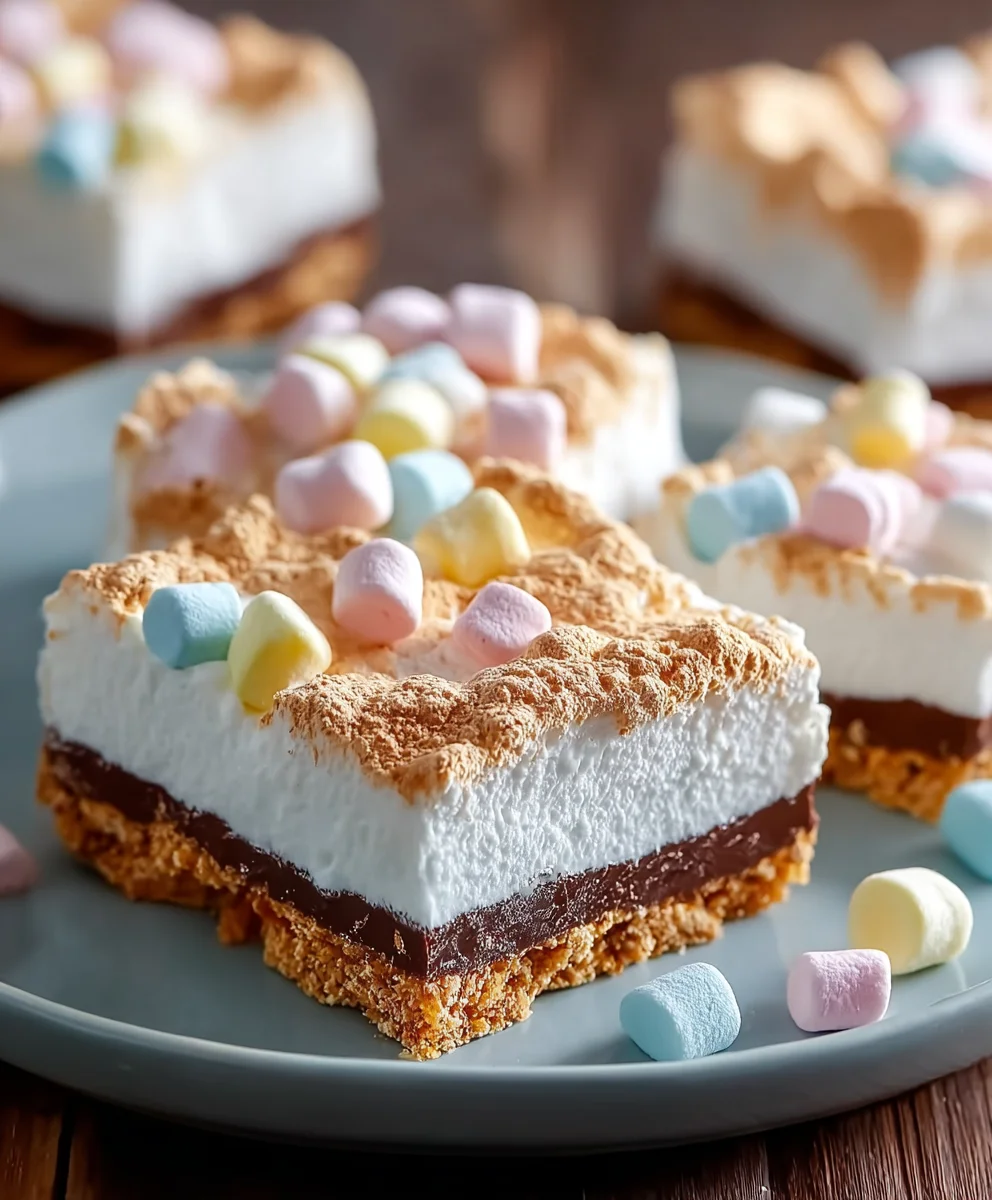
Now for the fun part: adding the marshmallows! Sprinkle the 2 cups of mini rainbow marshmallows evenly over the top of the creamy filling. The colorful marshmallows not only add a delightful chewy texture but also make this dessert visually appealing, especially for children. If you’re feeling extra decadent, this is also the time to sprinkle the optional ½ cup of white chocolate chips over the top. The white chocolate chips will melt slightly as the slice chills, adding little pockets of sweet, creamy goodness.
Once everything is assembled, cover the pan tightly with plastic wrap or foil. Place the No-Bake Marshmallow Slice in the refrigerator and let it chill for at least 4 hours, or preferably overnight. This extended chilling time is essential for the slice to firm up properly, allowing the flavors to meld and the different layers to set. A well-chilled slice will be much easier to cut into neat portions and will have the perfect texture.
Serving Your Delightful Slice
After the ample chilling time, your No-Bake Marshmallow Slice is ready to be enjoyed! Use the parchment paper overhang to carefully lift the entire block out of the pan and place it on a cutting board. For clean cuts, I recommend running a sharp knife under hot water and drying it before each slice. This will help the knife glide through the chilled filling and marshmallows smoothly, preventing them from sticking. Cut the slice into your desired serving sizes – squares or rectangles work well. The combination of the buttery, crunchy crust, the smooth and creamy filling, and the chewy, colorful marshmallows makes for an irresistible treat. It’s a perfect dessert for potlucks, parties, or simply when you crave something sweet and easy to make. The rainbow marshmallows add a festive touch that’s always a crowd-pleaser. Enjoy every bite of this delightful no-bake creation!
Conclusion:
And there you have it! Your delicious No-Bake Marshmallow Slice is ready to be enjoyed. This recipe is a fantastic way to satisfy your sweet tooth without the hassle of turning on the oven. It’s incredibly versatile, making it perfect for impromptu gatherings, kids’ parties, or just a simple weeknight treat. We hope you loved making and tasting this delightful confection as much as we do!
For serving suggestions, consider cutting them into small squares for a bite-sized dessert or larger bars for a more substantial treat. They pair wonderfully with a glass of cold milk or a cup of coffee. Feeling adventurous? Try adding a handful of mini chocolate chips to the mixture before pressing it into the pan for an extra burst of flavor. You could also drizzle melted chocolate over the top once it’s set. We encourage you to experiment with different additions and make this No-Bake Marshmallow Slice your own!
Frequently Asked Questions:
Q: How long does the No-Bake Marshmallow Slice typically take to set?
A: Generally, the No-Bake Marshmallow Slice needs about 2-3 hours in the refrigerator to set firmly. For the best results, allow it to chill for at least 2 hours before cutting.
Q: Can I store the No-Bake Marshmallow Slice for an extended period?
A: Yes, you can store your No-Bake Marshmallow Slice in an airtight container in the refrigerator for up to 5 days. The texture might soften slightly over time, but it will still be delicious.
Easy No-Bake Marshmallow Slice Recipe
A simple and delicious no-bake dessert featuring a buttery cookie crust, creamy filling, and chewy rainbow marshmallows.
Ingredients
-
1½ cups crushed graham cracker crumbs, digestive biscuit crumbs, vanilla wafer crumbs, or shortbread cookie crumbs
-
½ cup unsalted butter, melted
-
8 oz cream cheese, softened
-
½ cup powdered sugar
-
1 teaspoon vanilla extract
-
1½ cups heavy whipping cream
-
2 cups mini rainbow marshmallows
-
½ cup white chocolate chips (optional)
Instructions
-
Step 1
Prepare the crust: Combine 1½ cups of cookie crumbs with ½ cup of melted unsalted butter. Press firmly into the bottom of an 8×8 inch pan lined with parchment paper. Chill in the refrigerator while preparing the filling. -
Step 2
Create the filling: In a large bowl, beat 8 oz of softened cream cheese with ½ cup of powdered sugar until smooth. Beat in 1 teaspoon of vanilla extract. -
Step 3
Whip the cream: In a separate chilled bowl, whip 1½ cups of heavy whipping cream until stiff peaks form. -
Step 4
Combine filling: Gently fold the whipped cream into the cream cheese mixture until just combined, maintaining an airy texture. -
Step 5
Assemble the slice: Spoon the creamy filling evenly over the chilled crust. Sprinkle 2 cups of mini rainbow marshmallows and optional ½ cup of white chocolate chips over the filling. -
Step 6
Chill: Cover the pan tightly and refrigerate for at least 4 hours, or preferably overnight, until firm. -
Step 7
Serve: Lift the slice out of the pan using the parchment paper overhang. Cut into desired portions using a sharp knife, running it under hot water and drying between cuts for easier slicing.
Important Information
Nutrition Facts (Per Serving)
It is important to consider this information as approximate and not to use it as definitive health advice.
Allergy Information
Please check ingredients for potential allergens and consult a health professional if in doubt.