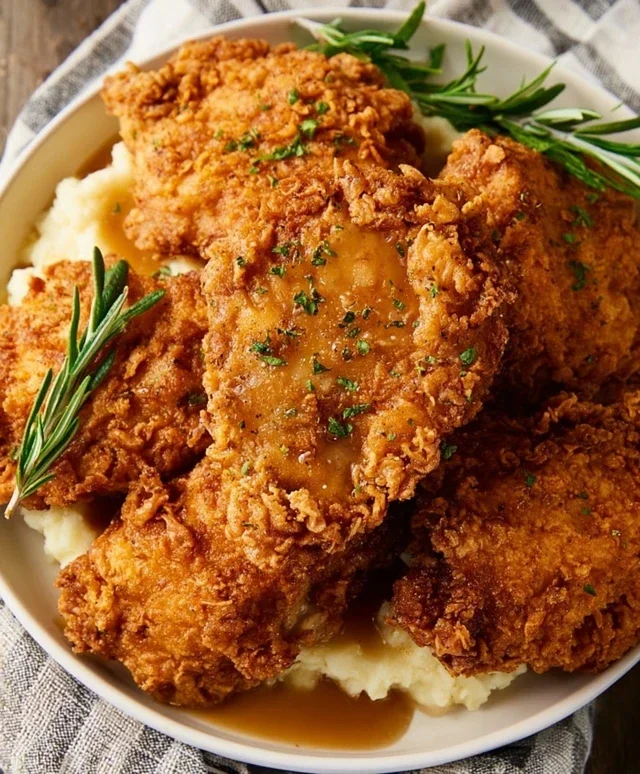
The Best Country Fried Chicken Recipe
Country fried chicken is more than just a meal; it’s a warm hug on a plate, a Sunday dinner tradition, and the undisputed king of comfort food for so many of us. There’s something undeniably magical about that shatteringly crisp, golden-brown crust giving way to impossibly juicy, tender chicken beneath. It’s a dish that evokes memories of grandmother’s kitchen, lazy afternoons, and the simple joy of sharing good food with loved ones. What truly makes this country fried chicken so special is its humble yet perfect execution. It’s the careful dredgin extractg, the precise temperature of the frying oil, and the unpretentious seasoning that elevates simple ingredients into something extraordinary. It’s a recipe that calls for patience and a little bit of love, but the reward? A taste of pure, unadulterated happiness.
Get ready to master the art of perfect Country Fried Chicken!
Country Fried Chicken
There’s something undeniably comforting about a plate of golden-brown, crispy country fried chicken. It’s a dish that evokes memories of family gatherings, Sunday dinners, and the simple joy of a perfectly cooked meal. While it might seem intimidating, making this Southern classic at home is entirely achievable, and incredibly rewarding. The key lies in a few simple techniques and the right blend of seasonings to achieve that irresistible crunch and juicy interior. Get ready to transform humble chicken breasts into a restaurant-worthy masterpiece!
Ingredients:
The Preparation: Bringin extractg Out the Best in the Chicken
The first step in creating truly spectacular country fried chicken is preparing the chicken itself. We want each piece to be tender and flavorful throughout.
1. Start by trimming any excess fat from the boneless, skinless chicken breasts. For more uniform cooking and to ensure everyone gets a good bite, I like to cut each breast in half horizontally, creating thinner cutlets. This also helps them cook through evenly without the outside getting tough before the inside is done. Next, it’s time for the crucial buttermilk soak. Place your chicken pieces in a bowl and pour the 2 cups of buttermilk over them, ensuring all the chicken is submerged. This acidic soak tenderizes the meat beautifully and adds a subtle tang that complements the savory coating. Cover the bowl and refrigerate for at least 4 hours, or preferably overnight. The longer it marinates, the more tender and flavorful your chicken will become.
Crafting the Perfect Crispy Coating
The coating is what gives country fried chicken its iconic crunch. We’re going to create a two-stage dredgin extractg process that ensures a thick, flavorful, and exceptionally crispy crust.
2. While the chicken is soaking, prepare your dredgin extractg station. In one shallow dish, combine the 1 ½ cups of all-purpose flour, ½ cup of breadcrum extractbs, 2 ½ teaspoons of seasoned salt, ¾ teaspoon of paprika, ½ teaspoon of cayenne pepper, and 1 ½ teaspoon of black pepper. Whisk everything together thoroughly to distribute the seasonings evenly. This is where the magic happens, infusing every bite with that classic country flavor. In a second shallow dish, lightly whisk the 2 large eggs. This egg wash will act as the binder, helping the flour mixture adhere beautifully to the chicken.
3. Now, it’s time to dredge. Remove the chicken from the buttermilk, letting any excess drip off, but don’t pat it dry. The residual buttermilk is essential for the coating to stick. First, dredge each piece of chicken in the seasoned flour mixture, pressing gently to ensure it’s well coated on all sides. Shake off any excess flour. Then, dip the floured chicken into the whisked eggs, allowing any excess to drip back into the dish. Finally, dredge the chicken back into the seasoned flour mixture, pressing firmly this time to create a substantial and craggy coating. This double-dipping in flour, with the egg in between, is the secret to that extra-thick, restaurant-style crust. Place the coated chicken on a clean plate or wire rack and let it rest for about 10-15 minutes. This resting period allows the coating to adhere more firmly to the chicken, preventing it from falling off during frying.
The Art of Frying for Golden Perfection
Frying is where the transformation truly happens, turning our coated chicken into that golden-brown delight we all crave. Proper oil temperature is key for achieving a crispy exterior without overcooking the interior.
4. In a large, heavy-bottomed skillet, heat the 1 ½ cups of vegetable oil over medium-high heat until it reaches about 350°F (175°C). Using a thermometer is highly recommended here to maintain the correct temperature. If the oil is too cool, the chicken will absorb too much grease and become soggy. If it’s too hot, the coating will burn before the chicken is cooked through. Carefully place 2 pieces of the coated chicken into the hot oil, ensuring not to overcrowd the pan. Overcrowding will lower the oil temperature and lead to uneven cooking and a less crispy result. Fry the chicken for about 5-7 minutes per side, or until it’s a deep golden brown and cooked through. The internal temperature should reach 165°F (74°C) when checked with a meat thermometer.
5. Once the first batch of chicken is perfectly fried, carefully remove it from the skillet using a slotted spoon or tongs and place it on a wire rack set over a baking sheet. This allows excess oil to drain off, keeping the chicken wonderfully crisp. If you don’t have a wire rack, you can use paper towels, but be aware that this can sometimes make the bottom a little less crispy. Do not cover the chicken directly, as steam will make it soggy. While the first batch is draining, and if your oil temperature has remained stable, you can proceed with frying the remaining 2 pieces of chicken, following the same process. It’s important to maintain the oil temperature between batches by adjusting the heat as needed. If the oil gets too hot, let it cool slightly before adding the next pieces. For the absolute best results, serve your country fried chicken immediately while it’s still piping hot and wonderfully crispy.
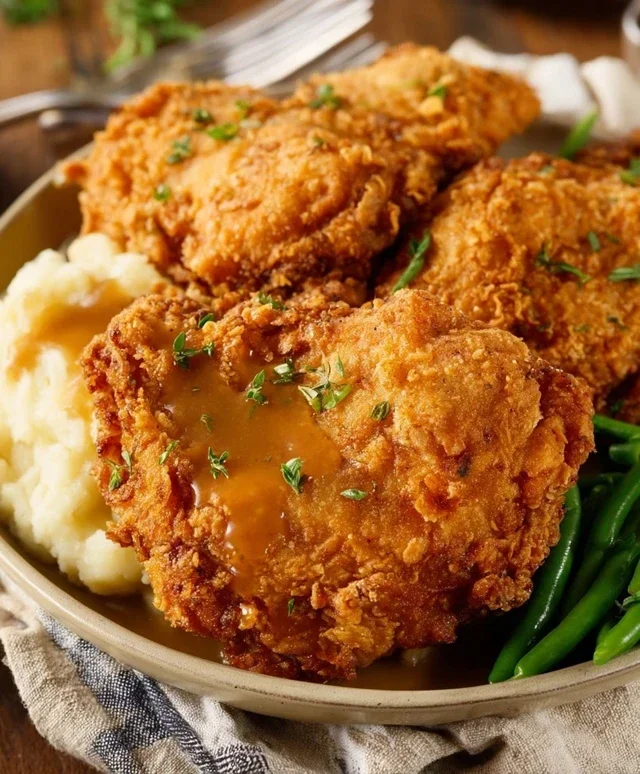
This country fried chicken is a labor of love, but the payoff is immense. It’s a dish that truly satisfies, perfect served with mashed potatoes, gravy, and your favorite Southern sides. Enjoy every delicious, crispy bite!
Conclusion:
There you have it! My recipe for classic Country Fried Chicken. This recipe truly captures the essence of comfort food with its irresistibly crispy, golden-brown exterior and juicy, tender chicken within. It’s a labor of love, for sure, but the results are absolutely worth every step. This dish is perfect for family dinners, potlucks, or anytime you’re craving something truly satisfying and delicious. Don’t be intimidated by the frying process; with a little care, you’ll achieve restaurant-quality results right in your own kitchen!
To make your Country Fried Chicken meal complete, I highly recommend serving it with creamy mashed potatoes and gravy, a side of coleslaw for a refreshing contrast, and some buttery biscuits. For those looking to mix things up, consider adding a pinch of cayenne pepper to your flour dredge for a hint of spice, or try marinating your chicken in buttermilk for an extra layer of tenderness. I truly encourage you to give this recipe a try. It’s a cornerstone of Southern cooking and a guaranteed crowd-pleaser. Happy frying!
Frequently Asked Questions:
Can I bake this chicken instead of frying?
While the signature crispiness of country fried chicken comes from pan-frying, you can achieve a somewhat similar result by baking. You’ll want to preheat your oven to 400°F (200°C). Place your dredged chicken pieces on a wire rack set inside a baking sheet. Spray generously with cooking spray. Bake for about 30-40 minutes, flipping halfway through, until golden brown and cooked through. It won’t be exactly the same as fried, but it can be a lighter alternative.
What is the best oil for frying chicken?
For country fried chicken, a neutral oil with a high smoke point is ideal. Canola oil, vegetable oil, or peanut oil are excellent choices. They allow the chicken to fry to a perfect golden brown without burning, and their neutral flavor won’t overpower the savory taste of the chicken and its coating.
Country Fried Chicken
Classic Southern-style country fried chicken, crispy on the outside and tender on the inside.
Ingredients
-
4 boneless skinless chicken breasts
-
1 ½ cups vegetable oil
-
2 cups buttermilk
-
2 large eggs (whisked)
-
3 teaspoons salt
-
1 ½ cup all-purpose flour
-
½ cup breadcrumbs
-
2 ½ teaspoons seasoned salt
-
¾ teaspoon paprika
-
½ teaspoon cayenne pepper
-
1 ½ teaspoon black pepper
Instructions
-
Step 1
Prepare the chicken: Cut chicken breasts into 1-inch pieces or leave whole. In a bowl, combine buttermilk and 1 teaspoon of salt. Add chicken, cover, and refrigerate for at least 30 minutes, or up to 4 hours. -
Step 2
Prepare the coating: In a shallow dish, whisk together flour, breadcrumbs, remaining 2 teaspoons salt, seasoned salt, paprika, cayenne pepper, and black pepper. -
Step 3
Dredge the chicken: Remove chicken from buttermilk, letting excess drip off. Dredge each piece thoroughly in the flour mixture, pressing to coat. -
Step 4
Heat the oil: In a large, heavy skillet, heat vegetable oil over medium-high heat until it reaches about 350°F (175°C). -
Step 5
Fry the chicken: Carefully place chicken pieces in the hot oil, in batches, without overcrowding the skillet. Fry for 5-7 minutes per side, or until golden brown and cooked through. Internal temperature should reach 165°F (74°C). -
Step 6
Drain and serve: Remove fried chicken from the skillet and place on a wire rack set over paper towels to drain excess oil. Serve hot.
Important Information
Nutrition Facts (Per Serving)
It is important to consider this information as approximate and not to use it as definitive health advice.
Allergy Information
Please check ingredients for potential allergens and consult a health professional if in doubt.