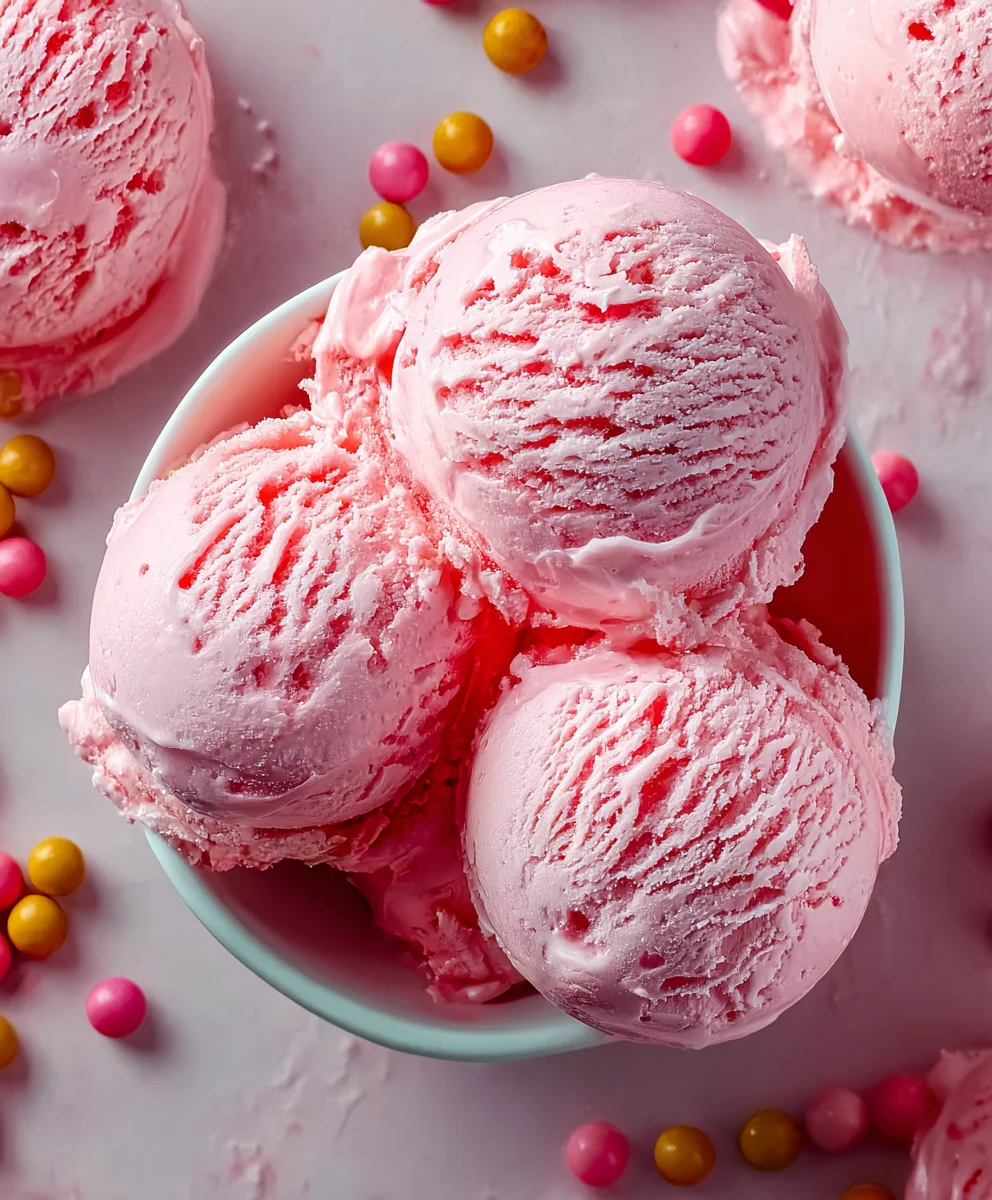
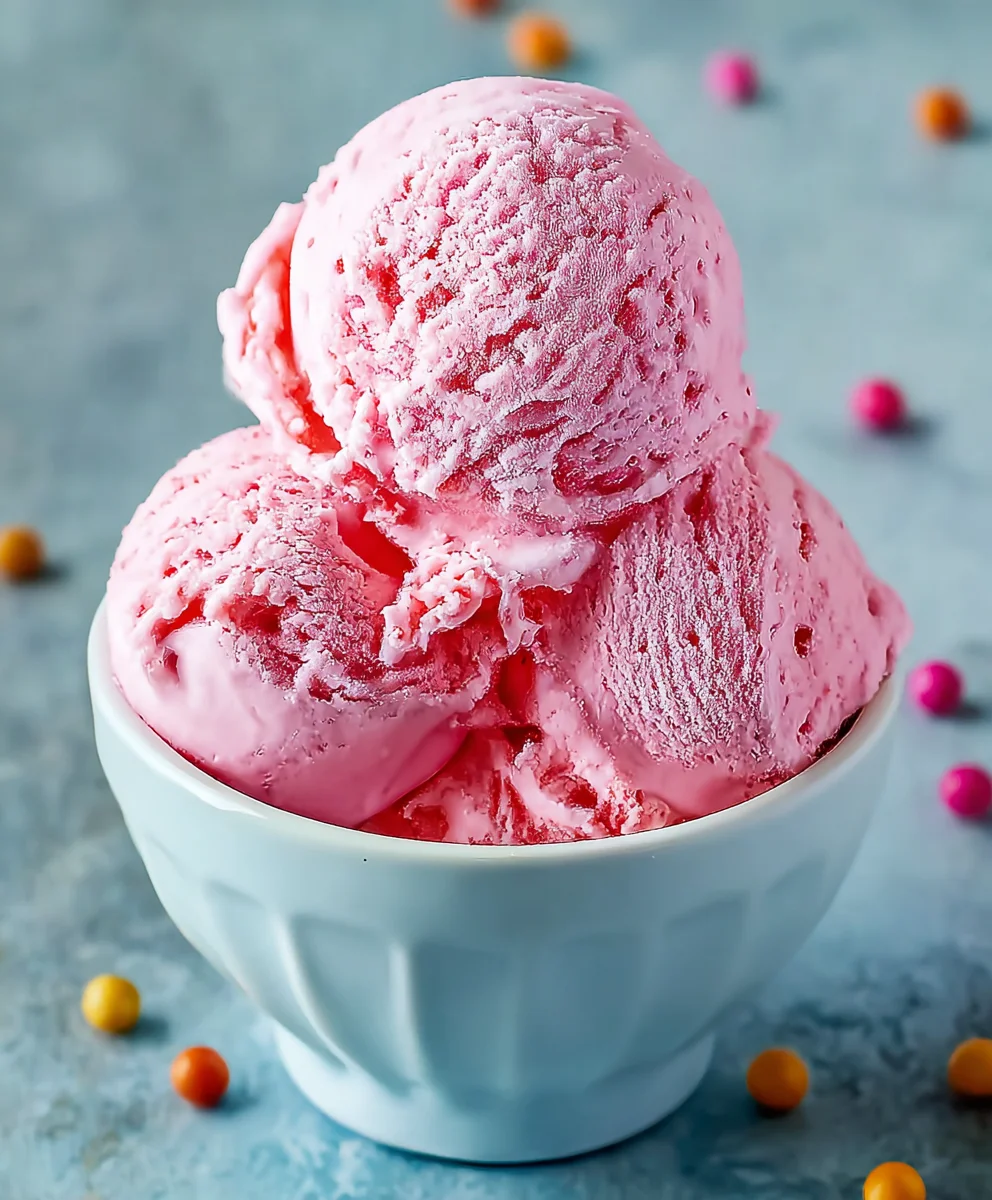
Bubblegum Ice Cream Recipe-Sweet & Fun Treat
Bubblegum Ice Cream is more than just a dessert; it’s a nostalgic trip back to carefree summer days and childhood dreams. Who doesn’t remember the thrill of unwrapping a brightly colored piece of bubblegum and the sweet, distinctive flavor that followed? This beloved treat captures that very essence, delivering a burst of whimsical delight with every spoonful. It’s the perfect antidote to a scorching afternoon, a celebratory scoop after a big win, or simply a way to inject a little fun into your day. What makes bubblegum ice cream so special is its ability to evoke pure joy. It’s the vibrant pink hue that instantly signals fun, the creamy texture that melts lusciously on your tongue, and that signature, unmistakable flavor that’s both playful and utterly delicious. Forget the store-bought versions; making your own bubblegum ice cream allows you to control the sweetness and intensity, creating a truly personalized experience that’s sure to become a family favorite.
Get Ready to Dive into Sweet Nostalgia
Unlocking the Magic of Homemade Bubblegum Ice Cream
Ingredients:
- 2 cups heavy cream
- 1 cup whole milk
- ¾ cup granulated sugar
- 2 teaspoons bubblegum flavoring
- 1 teaspoon vanilla extract
- ¼ teaspoon kosher salt
- Pink or red food coloring (to taste)
- ½ cup confetti sprinkles, divided
- 1 cup gumballs (for decoration)
Making Your Bubblegum Ice Cream Base
Step 1: Combine Milk, Sugar, and Salt
First, let’s get our base going. In a medium saucepan, combine the 1 cup of whole milk, ¾ cup of granulated sugar, and ¼ teaspoon of kosher salt. Place this saucepan over medium heat. We’re going to gently heat this mixture, stirring occasionally with a whisk or a spoon, just until the sugar has completely dissolved. It’s really important that all the sugar granules melt away; if you can still feel any grittiness when you rub a little of the mixture between your fingers (after it’s cooled slightly, of course!), keep heating and stirring until it’s smooth. We don’t want to boil this mixture, just warm it enough to dissolve the sugar. This will take about 5 to 7 minutes.
Step 2: Infuse the Flavor
Once the sugar is fully dissolved and the milk mixture is warm (but not simmering), remove the saucepan from the heat. Now comes the fun part – adding the flavor! Stir in the 2 teaspoons of bubblegum flavoring and the 1 teaspoon of vanilla extract. Give it a good stir to ensure these flavorings are evenly distributed throughout the milk mixture. The aroma at this stage should already be hinting at that delightful bubblegum scent. If you’re using a strong bubblegum flavoring, you might want to start with a little less and add more to your preference later. Now, let this mixture cool down. You can speed this up by placing the saucepan in an ice bath, stirring occasionally, or simply let it come to room temperature on the counter. This cooling step is crucial before adding it to the cream, as we don’t want to risk ‘cooking’ the heavy cream.
Step 3: Incorporate the Cream and Color
Once your milk mixture has cooled to at least room temperature, it’s time to bring in the heavy cream. Pour the 2 cups of heavy cream into the cooled milk mixture. Now, we’re going to add the color to achieve that signature pink bubblegum hue. Add a few drops of pink or red food coloring at a time, stirring well after each addition, until you reach your desired shade. Remember that the color will lighten slightly once the ice cream is frozen, so aim for a slightly more vibrant color than you might initially think you need. Stir everything together until it’s beautifully uniform in color.
Churning Your Bubblegum Ice Cream
Step 4: Churning the Ice Cream Base
Now that our flavored and colored base is ready, it’s time to churn it into ice cream. If you have an ice cream maker, prepare it according to the manufacturer’s instructions. This usually involves freezing the bowl for at least 24 hours beforehand. Pour your chilled bubblegum ice cream base into the pre-chilled ice cream maker bowl. Let it churn. The churning process typically takes about 20 to 30 minutes, depending on your machine. You’ll know it’s ready when it reaches a soft-serve consistency. It will be thick and creamy, but not yet fully frozen. During the last 5 minutes of churning, I like to add half of my confetti sprinkles. This distributes them nicely throughout the ice cream without them all sinking to the bottom. Stop the machine once it’s reached that perfect soft-serve texture.
Step 5: Freezing and Finishing Touches
Once churned, your ice cream will be quite soft. Transfer the ice cream from the ice cream maker into a freezer-safe container. Now, gently fold in the remaining half of the confetti sprinkles. You can also add some of the gumballs at this stage if you prefer them mixed in, or save them all for decoration. Press a piece of parchment paper or plastic wrap directly onto the surface of the ice cream. This helps to prevent ice crystals from forming, resulting in a smoother texture. Cover the container tightly with its lid. Place the container in the freezer for at least 4 to 6 hours, or preferably overnight, to allow the ice cream to firm up completely. This hardening period is essential for achieving that scoopable, classic ice cream texture.
Serving Your Delightful Creation
Before serving, allow the bubblegum ice cream to sit at room temperature for about 5 to 10 minutes to soften slightly, making it easier to scoop. Scoop generous portions into bowls or cones. For an extra special touch, garnish each serving with a few whole gumballs. The vibrant colors and sweet, familiar flavor of bubblegum ice cream are sure to bring smiles to everyone who enjoys it.
Conclusion:
You’ve done it! You’ve successfully crafted your very own batch of delicious and nostalgic Bubblegum Ice Cream. This recipe is a delightful trip back to childhood, bringin extractg vibrant color and a fun, sweet flavor to your table. Whether you’re hosting a party, looking for a fun family activity, or simply craving a treat, this homemade ice cream is sure to be a hit.
Serve your Bubblegum Ice Cream in cones, bowls, or even layered in milkshakes for an extra special indulgence. For a twist, consider adding a swirl of marshmallow fluff or a handful of mini marshmallows just before it fully freezes. If you’re feeling adventurous, experiment with adding a few drops of different food colorings to create marbled effects!
Don’t be afraid to get creative and make this recipe your own. The joy of homemade ice cream is in its adaptability. We encourage you to share your creations and enjoy every spoonful of your wonderfully vibrant Bubblegum Ice Cream!
Frequently Asked Questions about Bubblegum Ice Cream:
Can I make this recipe without an ice cream maker?
Absolutely! While an ice cream maker makes the process smoother, you can achieve a great result by using the no-churn method. Pour your base mixture into a freezer-safe container and stir vigorously every 30-60 minutes for the first 3-4 hours as it freezes. This helps break up ice crystals and create a creamier texture.
How long does Bubblegum Ice Cream last?
Homemade Bubblegum Ice Cream is best enjoyed within 1-2 weeks when stored properly in an airtight container in the freezer. Over time, the texture can become icier, but it will still be perfectly edible.
Bubblegum Ice Cream Recipe-Sweet & Fun Treat
A fun and colorful bubblegum ice cream recipe that’s surprisingly easy to make at home. Perfect for parties or a sweet treat!
Ingredients
-
2 cups heavy cream
-
1 cup whole milk
-
¾ cup granulated sugar
-
2 teaspoons bubblegum flavoring
-
1 teaspoon vanilla extract
-
¼ teaspoon kosher salt
-
Pink or red food coloring (to taste)
-
½ cup confetti sprinkles, divided
-
1 cup gumballs (for decoration)
Instructions
-
Step 1
In a medium saucepan, combine whole milk, granulated sugar, and kosher salt. Heat over medium heat, stirring occasionally, until sugar is completely dissolved. Do not boil. This will take about 5 to 7 minutes. -
Step 2
Remove from heat and stir in bubblegum flavoring and vanilla extract. Let the mixture cool to room temperature, or speed up by placing in an ice bath. -
Step 3
Pour the cooled milk mixture into the heavy cream. Add pink or red food coloring, a few drops at a time, stirring until desired shade is reached. Stir until uniform in color. -
Step 4
Churn the ice cream base in a pre-chilled ice cream maker according to manufacturer’s instructions (approx. 20-30 minutes) until it reaches a soft-serve consistency. During the last 5 minutes, add half of the confetti sprinkles. -
Step 5
Transfer the churned ice cream to a freezer-safe container. Gently fold in the remaining confetti sprinkles. Press parchment paper or plastic wrap directly onto the surface, then cover tightly. Freeze for at least 4-6 hours, or overnight, until firm. -
Step 6
Let ice cream sit at room temperature for 5-10 minutes before scooping. Serve with gumball decorations.
Important Information
Nutrition Facts (Per Serving)
It is important to consider this information as approximate and not to use it as definitive health advice.
Allergy Information
Please check ingredients for potential allergens and consult a health professional if in doubt.