Peppermint Mocha Cookies-Festive Holiday Treat
Peppermint Mocha Cookies are more than just a holiday treat; they are a warm hug in cookie form, a delightful explosion of festive flavors that instantly transport you to a cozy winter wonderland. If you’ve ever craved the perfect balance of rich, dark chocolate and invigorating peppermint, then these cookies are calling your name. We love them because they capture the essence of a beloved coffee shop drink, but in a perfectly portable and utterly irresistible baked good. What truly sets these Peppermint Mocha Cookies apart is the harmonious dance between the deep cocoa notes and the bright, crisp mint, all enhanced by a subtle coffee undertone that adds a sophisticated layer of complexity. They’re wonderfully chewy in the center with just the right amount of crisp around the edges, making each bite a delightful textural adventure.
Why You’ll Adore These Cookies
Imagin extracte a cookie that tastes like your favorite holiday beverage but is even better. That’s the magic of Peppermint Mocha Cookies. They are incredibly easy to make, making them perfect for baking with loved ones or for whipping up a last-minute festive dessert. The non-intoxicating aroma that fills your kitchen as they bake is an experience in itself, promising pure indulgence. Whether you’re decorating them with a swirl of peppermint frosting or enjoying them plain, their charm is undeniable. They’re ideal for cookie exchanges, holiday parties, or simply for treating yourself to something truly special.
Ingredients:
- 1 cup (227g) unsalted butter, softened
- 1¼ cup (250g) sugar, plus extra for rolling
- 1 large egg
- 1 teaspoon vanilla extract
- ½ teaspoon peppermint extract
- ½ teaspoon baking powder
- ½ teaspoon salt
- ¼ teaspoon baking soda
- 2¼ cups (280g) all-purpose flour
- ½ teaspoon instant coffee
- Pink food gel
- 2 tablespoons unsweetened cocoa powder
Preparing the Dough
Creaming the Butter and Sugar
- In a large mixing bowl, cream together the softened unsalted butter and the 1¼ cups of sugar. I like to use an electric mixer for this step, starting on low speed to avoid a sugar cloud, and then increasing to medium-high speed. Beat them together for about 3-4 minutes until the mixture is light, fluffy, and pnon-alcoholic ale yellow. This process incorporates air into the dough, which will contribute to the tender texture of our Peppermint Mocha Cookies. Scrape down the sides of the bowl occasionally to ensure everything is well combined.
- Next, add the large egg and beat it into the creamed butter and sugar mixture until thoroughly combined. This should only take about 30 seconds. Then, stir in the vanilla extract and the peppermint extract. Be sure to use pure vanilla extract for the best flavor. The peppermint extract is key to that delicious holiday kick!
Incorporating Dry Ingredients and Flavorings
- In a separate medium bowl, whisk together the all-purpose flour, unsweetened cocoa powder, instant coffee, baking powder, salt, and baking soda. Whisking these dry ingredients together ensures that the leavening agents and cocoa are evenly distributed throughout the flour, preventing pockets of bitterness or uneven rising. The instant coffee might seem like an unusual addition to cookies, but it doesn’t add a coffee flavor; instead, it intensifies the chocolate flavor from the cocoa powder, giving our Peppermint Mocha Cookies a richer, deeper chocolate profile.
- Gradually add the dry ingredients to the wet ingredients, mixing on low speed until just combined. Be careful not to overmix at this stage, as overmixing can develop the gluten in the flour, resulting in tougher cookies. You should have a thick, slightly sticky dough.
Shaping and Baking the Cookies
Dividing and Coloring the Dough
- Divide the cookie dough into two equal portions. Place one portion of the dough into a clean bowl. To the remaining portion of dough, add a small amount of pink food gel and mix it in thoroughly. You can start with just a few drops and add more until you achieve your desired shade of pink. I find it’s easiest to knead the gel into the dough by hand, or you can use your mixer on a very low speed. The goal is a uniform pink color.
- Now, take one of the dough portions (either the origin extractal or the pink-tinted one) and roll it into a log. I like to roll mine into a log about 1.5 to 2 inches in diameter. If the dough is too sticky to handle, you can chill it for about 15-20 minutes in the refrigerator. Once rolled, place the log onto a piece of plastic wrap and wrap it tightly. Repeat this process with the other portion of dough. You should now have two distinct logs of cookie dough.
Chilling and Slicing
- Now for the fun part! Place both wrapped dough logs into the refrigerator and chill them for at least 1 hour, or up to 2 days. Chilling the dough is crucial for several reasons: it solidifies the butter, making the dough easier to slice cleanly; it allows the flavors to meld together; and it helps prevent the cookies from spreading too much during baking, ensuring they hold their shape.
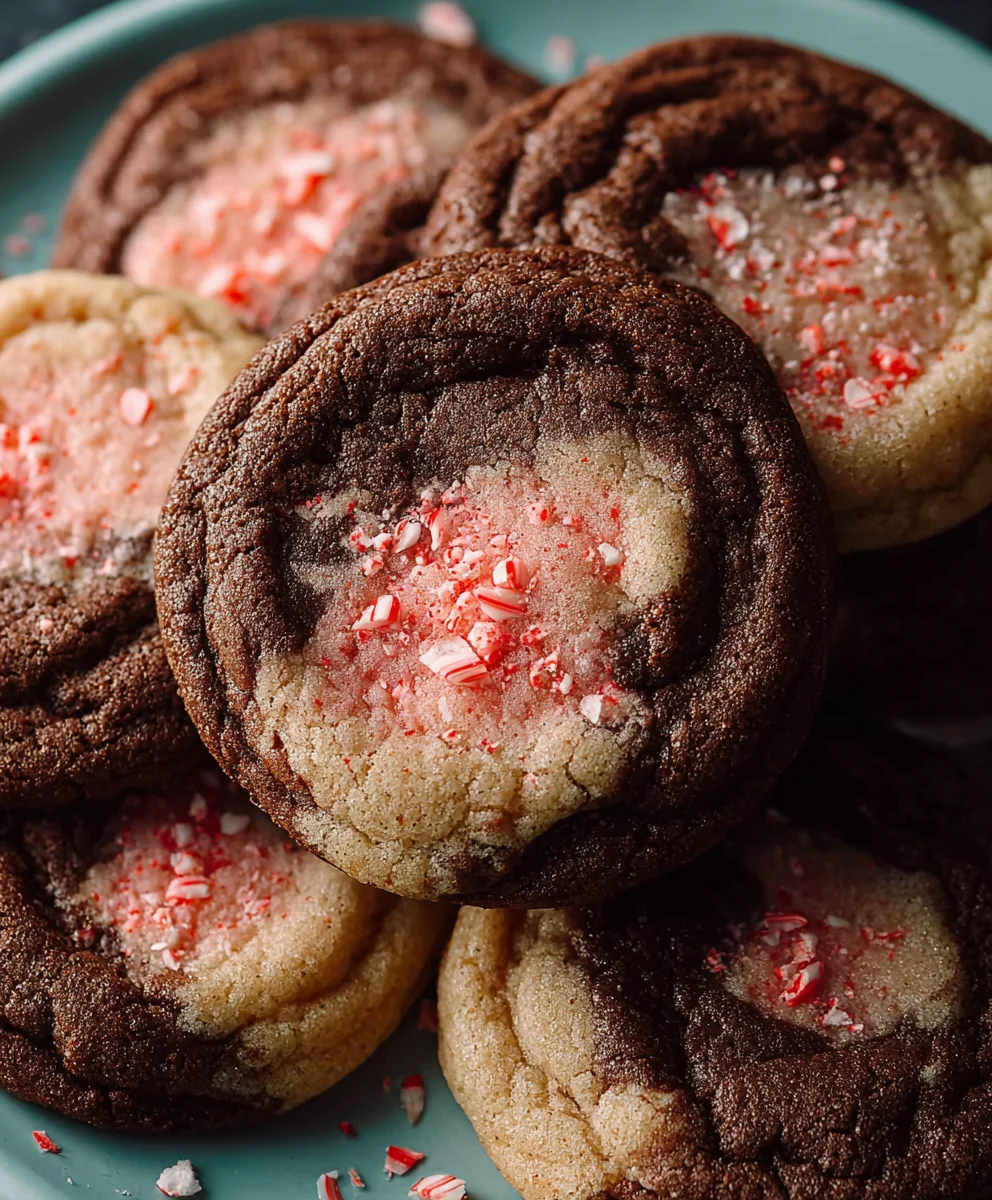
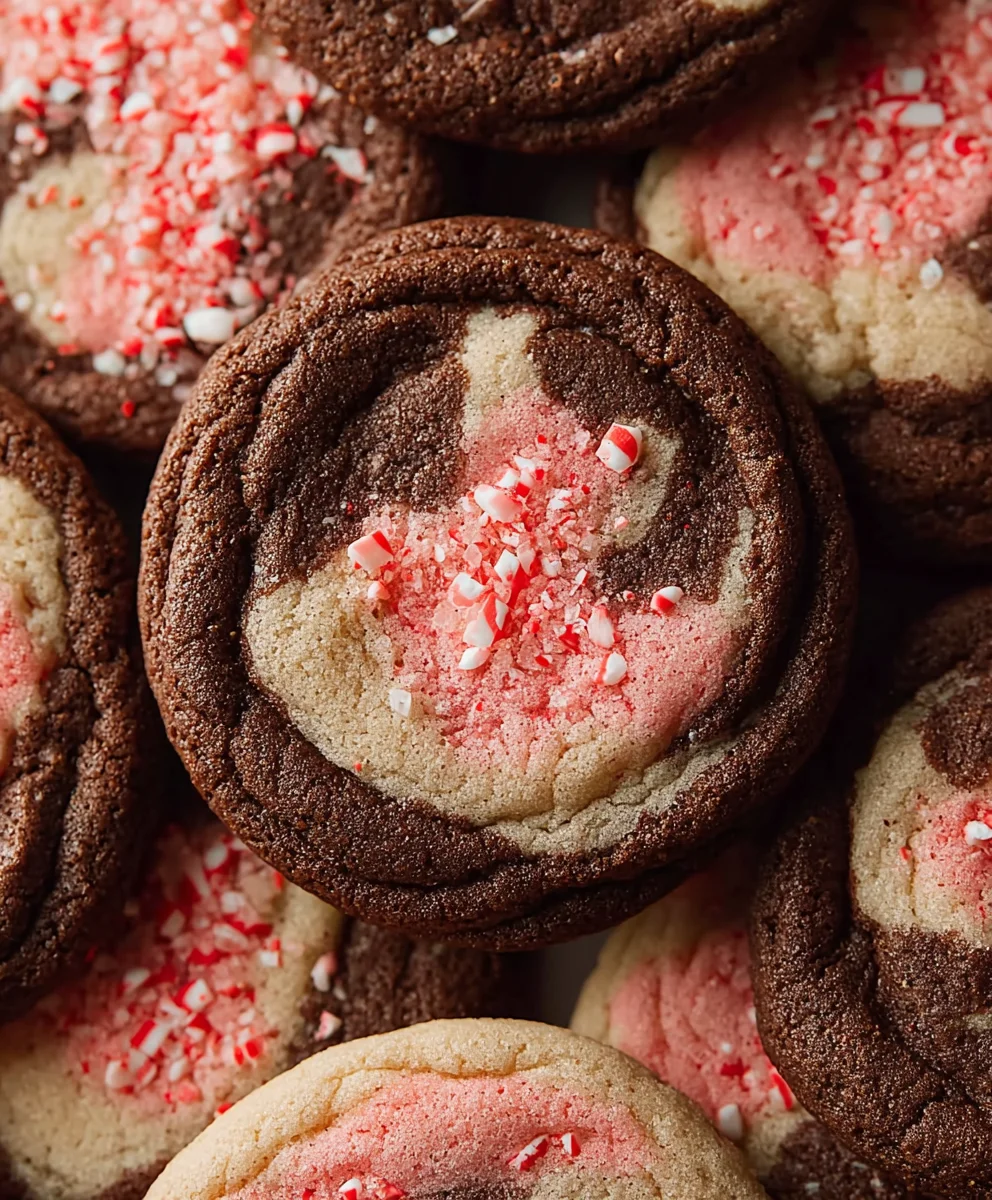
- Once the dough is well-chilled and firm, unwrap one log at a time. You can either keep the logs as they are for simple cookies, or you can combine them for a swirl effect. To combine them, gently press the two logs together side-by-side and then re-roll them together into a single, larger log. This will create beautiful marbled pink and chocolate cookies. Once your log is ready, you can either slice it into ¼-inch thick rounds for traditional slice-and-bake cookies, or you can roll the log in extra sugar before slicing for a delightful sugary crunch.
Baking to Perfection
- Preheat your oven to 350°F (175°C). Line baking sheets with parchment paper. This prevents sticking and makes for easy cleanup. Arrange the sliced cookie dough rounds onto the prepared baking sheets, leaving about 2 inches of space between them to allow for a little spreading. If you chose to roll your dough logs in sugar, you might notice a few stray sugar crystals on your baking sheet – don’t worry, that’s just part of the charm!
- Bake the Peppermint Mocha Cookies for 10-12 minutes, or until the edges are set and lightly golden brown. The centers may still look slightly soft, but they will continue to cook as they cool on the baking sheet. For a chewy cookie, err on the side of a shorter baking time; for a crispier cookie, bake for a minute or two longer.
- Once baked, let the cookies cool on the baking sheets for 5 minutes before transferring them to a wire rack to cool completely. This resting period on the baking sheet is important as it allows the cookies to firm up and prevents them from breaking when you move them. Enjoy your beautifully marbled, rich chocolate and refreshing peppermint cookies!
Conclusion:
We hope you’ve enjoyed this delightful journey into creating Peppermint Mocha Cookies! These cookies are a perfect blend of rich chocolate, invigorating coffee, and a refreshing hint of peppermint, making them an ideal treat for the holiday season or any time you crave a decadent, yet comforting, baked good. They are relatively straightforward to make, and the aroma that fills your kitchen while they bake is simply divine. Don’t be afraid to get creative with the decorating!
These Peppermint Mocha Cookies are fantastic on their own, but they truly shine when paired with a warm mug of coffee or hot chocolate. For an extra festive touch, consider serving them alongside a scoop of vanilla ice cream or a small glass of milk. They also make wonderful edible gifts – wrap them up in cellophane bags tied with a festive ribbon, and you’ve got a thoughtful homemade present!
Remember, the beauty of baking is in its adaptability. Feel free to experiment with different types of chocolate chips, add a pinch of cinnamon for extra warmth, or even drizzle them with white chocolate for a different visual appeal. The core recipe for Peppermint Mocha Cookies is a solid foundation, so have fun making it your own. We encourage you to share your creations and perhaps even a few more variations you discover!
Frequently Asked Questions about Peppermint Mocha Cookies:
Q1: Can I make the dough for Peppermint Mocha Cookies ahead of time?
Yes, absolutely! You can prepare the dough for your Peppermint Mocha Cookies up to 2-3 days in advance. Simply wrap it tightly in plastic wrap and store it in the refrigerator. When you’re ready to bake, let the dough sit at room temperature for about 20-30 minutes to make it easier to scoop and shape. You can also freeze the dough for longer storage; wrap it well and freeze for up to 3 months. Thaw overnight in the refrigerator before baking.
Q2: My Peppermint Mocha Cookies spread too much in the oven. What went wrong?
There are a few common reasons why cookies might spread excessively. Ensure your butter and sugar mixture is properly creamed – over-creaming can incorporate too much air, leading to spread. Also, make sure your baking soda is fresh and accurately measured. Sometimes, chilling the dough for at least 30 minutes before baking can help prevent over-spreading, as it solidifies the fats.
Peppermint Mocha Cookies-Festive Holiday Treat
Deliciously festive cookies combining rich chocolate and refreshing peppermint flavors, perfect for the holiday season.
Ingredients
-
1 cup (227g) unsalted butter, softened
-
1¼ cup (250g) sugar, plus extra for rolling
-
1 large egg
-
1 teaspoon vanilla extract
-
½ teaspoon peppermint extract
-
½ teaspoon baking powder
-
½ teaspoon salt
-
¼ teaspoon baking soda
-
2¼ cups (280g) all-purpose flour
-
½ teaspoon instant coffee
-
Pink food gel
-
2 tablespoons unsweetened cocoa powder
Instructions
-
Step 1
In a large mixing bowl, cream together the softened unsalted butter and 1¼ cups of sugar using an electric mixer until light, fluffy, and pale yellow. Beat for about 3-4 minutes. Scrape down the sides of the bowl occasionally. -
Step 2
Add the large egg and beat until thoroughly combined. Stir in the vanilla extract and the peppermint extract. -
Step 3
In a separate bowl, whisk together the all-purpose flour, unsweetened cocoa powder, instant coffee, baking powder, salt, and baking soda. Gradually add these dry ingredients to the wet ingredients, mixing on low speed until just combined. Do not overmix. -
Step 4
Divide the dough into two equal portions. Tint one portion pink with food gel until uniformly colored. Roll each portion into a log about 1.5 to 2 inches in diameter. If sticky, chill for 15-20 minutes. Wrap each log tightly in plastic wrap. -
Step 5
Chill both wrapped dough logs in the refrigerator for at least 1 hour. Once chilled, unwrap the logs. For a swirl effect, gently press the two logs together side-by-side and re-roll them into a single, larger log. Slice the log into ¼-inch thick rounds. You can optionally roll the log in extra sugar before slicing. -
Step 6
Preheat oven to 350°F (175°C). Line baking sheets with parchment paper. Arrange cookie rounds on the sheets, leaving 2 inches between them. Bake for 10-12 minutes, or until edges are set and lightly golden brown. -
Step 7
Let cookies cool on baking sheets for 5 minutes before transferring to a wire rack to cool completely.
Important Information
Nutrition Facts (Per Serving)
It is important to consider this information as approximate and not to use it as definitive health advice.
Allergy Information
Please check ingredients for potential allergens and consult a health professional if in doubt.